
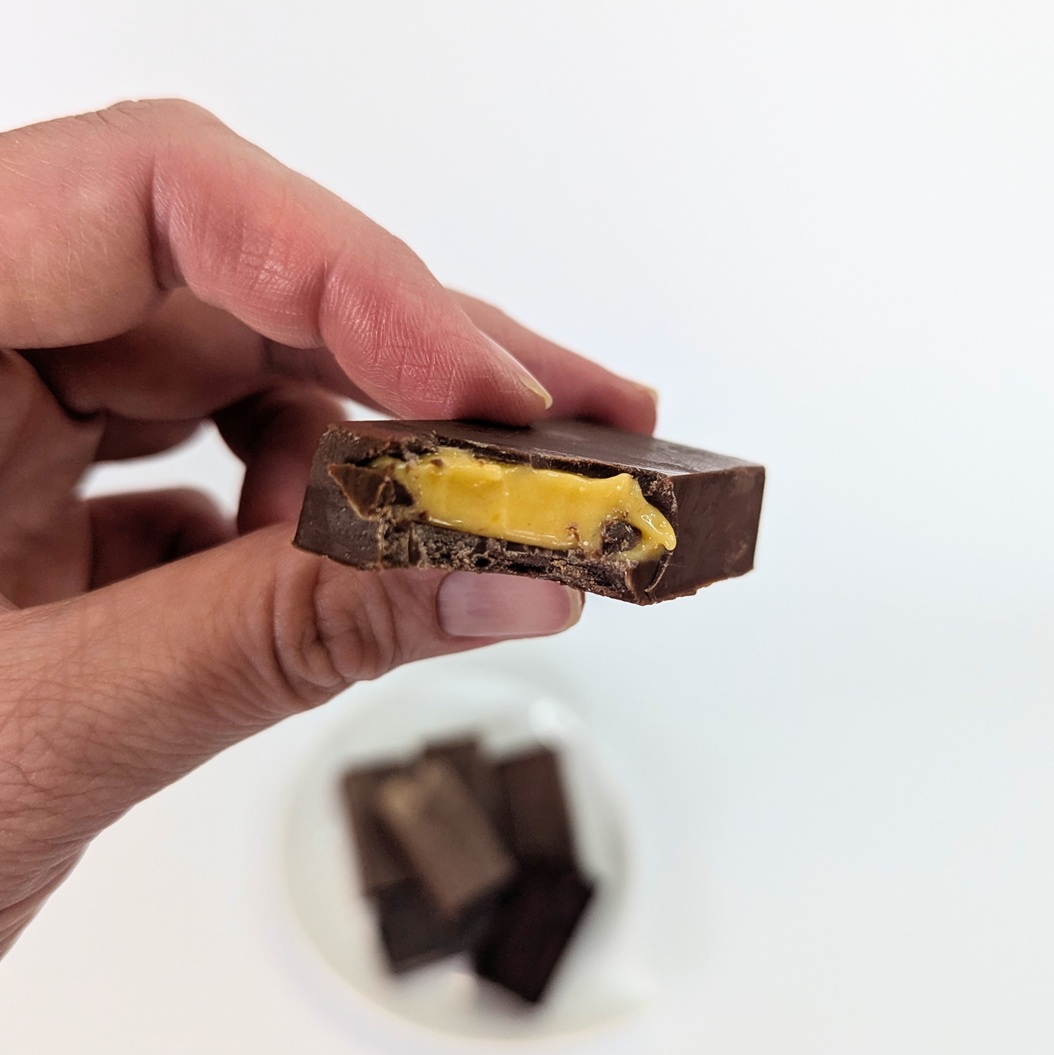
One of my favorite Passover treats (well, anytime of the year, but especially at Passover) was the Elite chocolate bars filled with orange cream. Strawberry and pineapple flavours were good too, but for me, orange was the best. It’s been many years since I’ve had one – eventually the only flavour we were able to get where I live was strawberry, and even those haven’t been around in a long time.
Every year I bemoan the loss of the orange filled chocolates. This year I decided I’d try making them myself. I started reading recipes for filled chocolate bars but nothing I read worked for Passover, so I started experimenting. I think it was the third batch that made me stop in my tracks. It’s been many years since I tasted one, but mine tasted so familiar and so good.
I’ve now made batches with milk chocolate and parve chocolate. While both were good, the milk chocolate ones are closer to the originals. But if you want to keep them non-dairy and vegan, you can definitely use parve chocolate for this recipe.
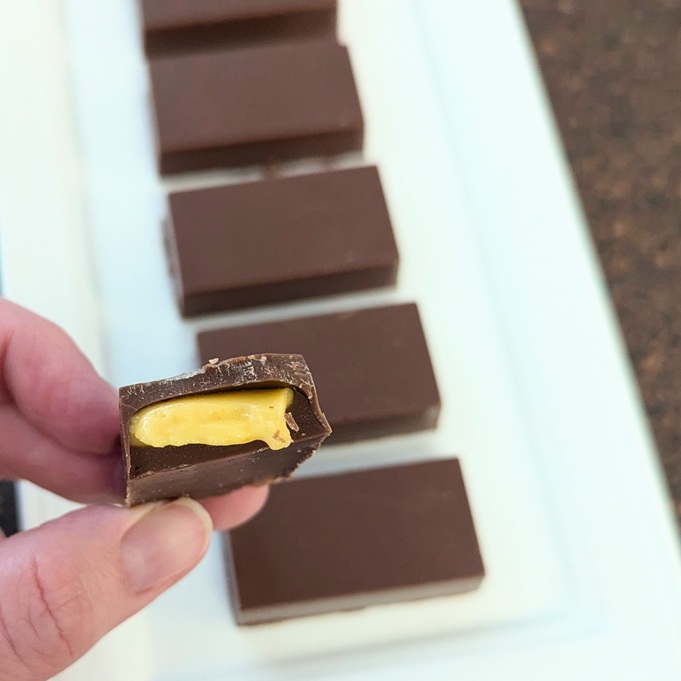
I used these molds to make smaller, individual chocolates, but you can use different shapes or make a couple of larger chocolate bars if you like. The amount of chocolate you’ll need will depend on the molds you use, but start with the amount in the recipe and have more on hand to melt if needed.
I think, after a big holiday dinner, having plates of these on the table with fresh fruit would make a great dessert!
I should add that I’ve also tried batches using different juices. While good, the filling didn’t have the intense flavour that the orange filling had – they just tasted like a sweet filling with a slight fruit flavour. I’d sill like to experiment on more flavours using fresh fruits, but the orange filling? That’s the one I really wanted.
Orange Filled Chocolates
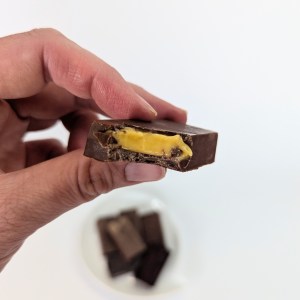
Milk or dark chocolate filled with a creamy orange filling. Delicious!
Ingredients
-
Filling:
- zest from two oranges, finely grated, orange part only – no white pith
- 1 1/2 cups fresh squeezed orange juice
- 6 oz / 170 grams granulated sugar (3/4 cup)
- 1/2 tsp. vanilla extract
- 2 oz / 56 grams confectioner’s sugar (1/2 cup)
- 10 ounces / 280 grams milk or dark chocolate, divided (plus more as needed)
Chocolate shell:
Directions
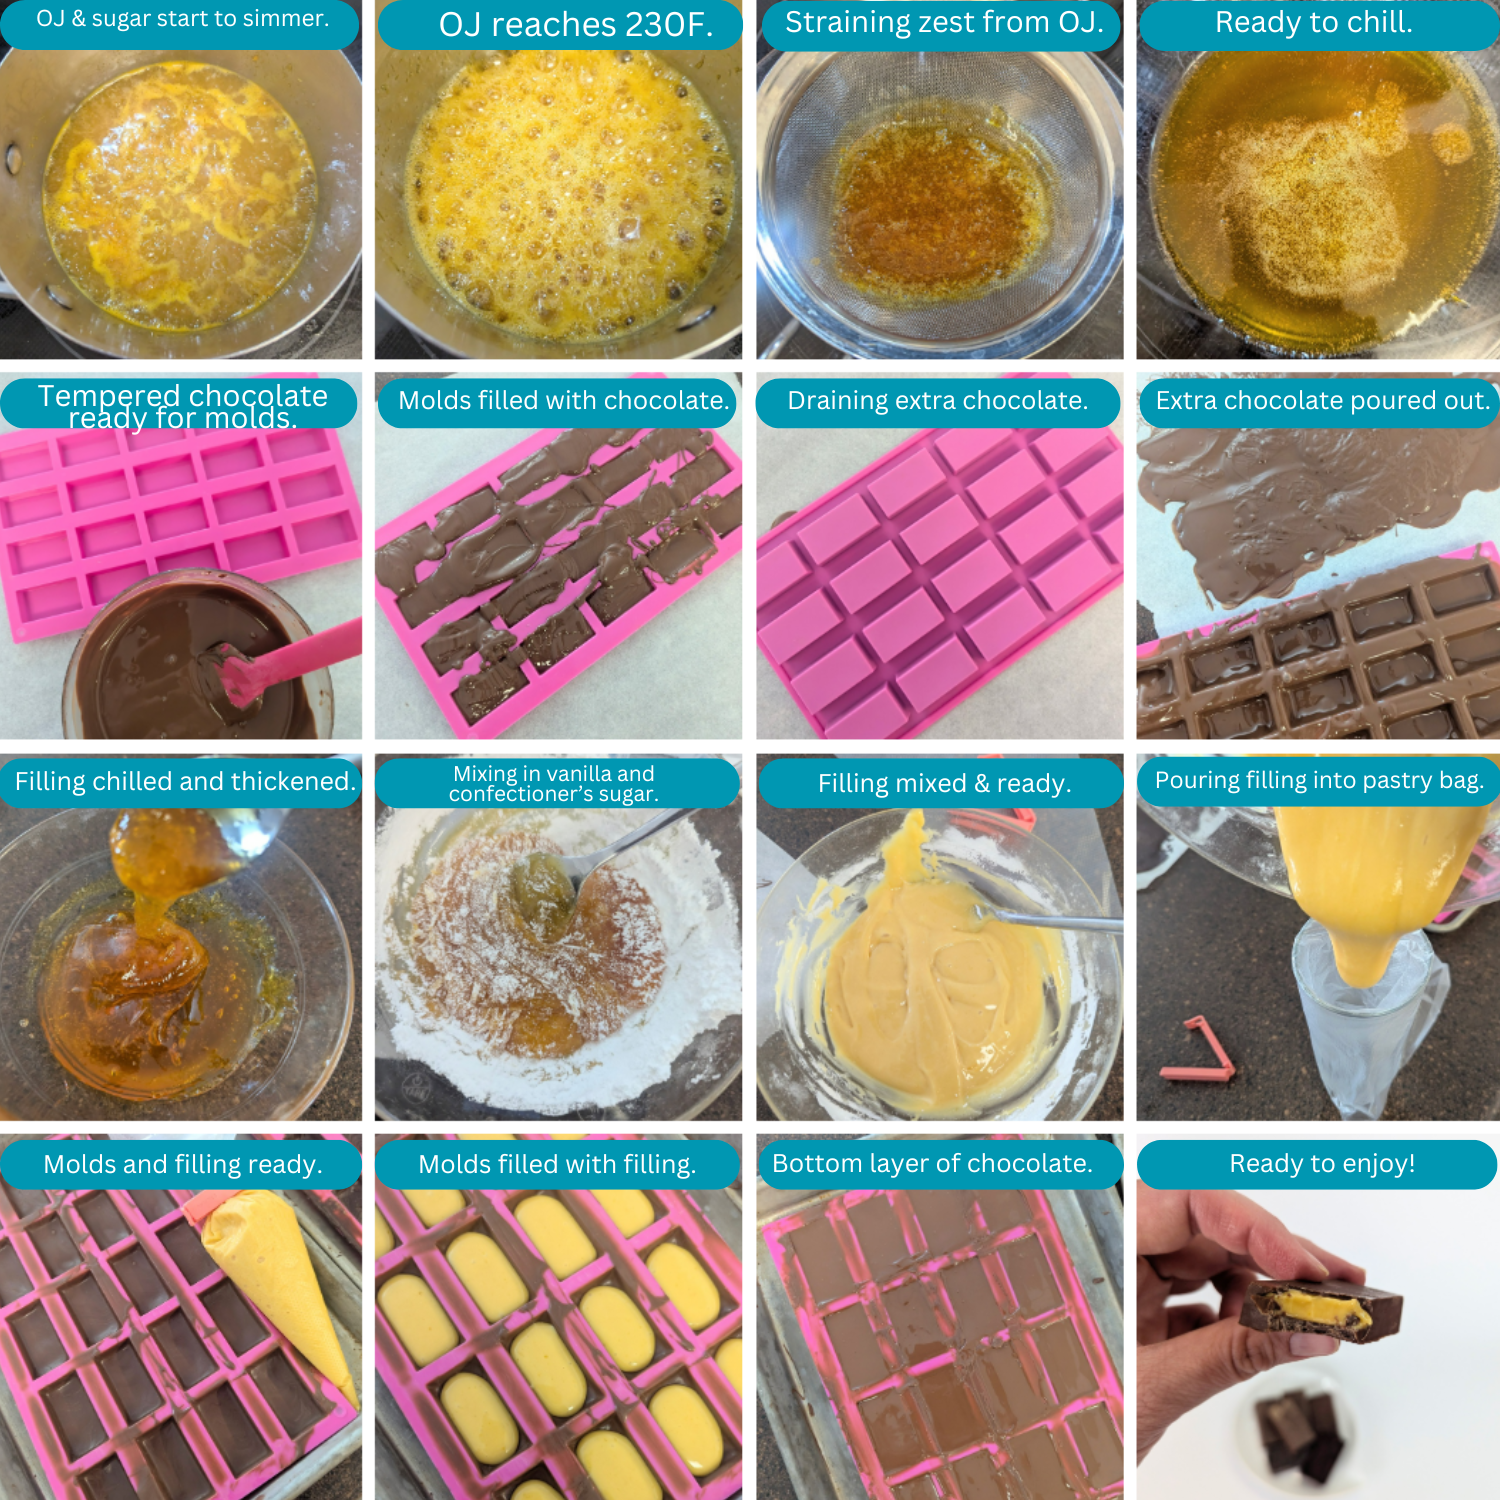
- Start with the orange filling. Combine the zest, orange juice and granulated sugar in a medium pot and place over high heat. Bring to a simmer, reduce heat to medium-high and simmer until the mixture reaches 230ºF / 110°C, stirring occasionally. This will take approximately 40 minutes.
- Carefully pour the mixture through a fine-mesh strainer into a clean bowl. Let it cool for about 20 minutes, then transfer to the fridge to chill until cold.
- While the filling is simmering, start working on the chocolate tempering and making the shells.
- Chop the chocolate into small pieces and place two-thirds of it into a glass or metal bowl that sits well on a saucepan filled with 1-inch of water. Over low heat, let the chocolate melt, stirring as it does, until it is completely smooth and reaches 112ºF / 45°C for milk chocolate or 115ºF / 46°C for dark chocolate.
- Remove the bowl from the pot and transfer to a towel on your counter. Gradually add the last third of chocolate, while stirring until it’s all melted and incorporated and the chocolate has come down to 84ºF / 29°C. This can take a while and it will take longer to come down to temperature if you used a glass bowl vs. a metal bowl. But keep stirring until it does.
- Return the bowl of chocolate to the double boiler, and let it come back to 86ºF / 30°C for milk chocolate or 89ºF / 32°C for dark. It’s now ready to fill the molds.
- Pour or spoon the chocolate into the molds, making sure all of the corners are filled. When all of the wells are full. Carefully turn the mold upside down over a piece of parchment paper and tap out all of the excess chocolate.
- Scrape any excess chocolate off of the mold, then scrape all of the excess chocolate off of the parchment and back into the bowl you used to melt it. Let the mold sit until set, about one hour.
- When the filling is chilled and the chocolate is set, it’s time to fill the chocolate.
- Add the vanilla extract to the orange filling and use a spoon to mix together. Add the confectioner’s sugar and mix together until smooth. Place a plastic pastry bag into a glass, then pour/spoon the filling into the bag. Use a clip if you have one to close the pastry bag. Cut a small hole off the tip of the bag, then pipe filling into each of the chocolate wells, leaving enough room at the top for the bottom layer of chocolate.
- While the filling sits in the shells for a few minutes and spreads out, place the bowl of chocolate back on the pot of gently simmering water. Bring the chocolate back to 86ºF / 30°C for milk chocolate or 89ºF / 32°C for dark.
- Pour or spoon the chocolate over the fillings, then scrape any excess off the top.
- Place in the fridge for 1-2 hours, until the chocolate are completely set up. Carefully remove from the molds and trim off any extra chocolate from the edges if necessary.
- These should stay nice and snappy and shiny at room temperature, but I like to place them in an air-tight container and keep in the fridge for a week or longer (if they last!).


[…] Orange Filled Chocolates […]
I’ve always been skeptical about making angel food cake. So glad I finally did! 2 things I could have done better was pulse the crap out of the sugar. I did about 15 pulses and could “feel” (if that’s the right word) the sugar and I forgot to pulse the salt. Oops… other than that it is awesome!