Rosh Hashana, the Jewish New Year, has always meant it was time for sweet challah. Traditionally we eat sweet foods to usher in a sweet new year. When I was growing up that meant one thing: raisins added to regular challah dough. I’m not saying that raisins in challah are a bad thing, but I think there are so many other ways we can sweeten challah. One of my favorite flavour combinations is chocolate and orange (have you tried my Orange Chocolate Rugelach yet?) and it works beautifully in challah. The dough is lightly flavoured with orange zest and juice and then it’s layered with a rich chocolate filling. This recipe is parve, using no dairy products, so it can be eaten with both dairy or meat meals.
Another Jewish New Year tradition calls for us to eat round challah vs. the typically braided loaves. There are various reasons behind this tradition — the round loaf represents the cycle of life or the cyclical nature of the year, or a round loaf has no beginning or end and symbolizes our wish that the blessings of the new year have no end. There are other ideas out there as well and it’s interesting to look into the reasons, but for most of us, the tradition of eating round challah (or foigel) is something we did in our grandparents’ house or our family home and it’s part of the ritual of bringing in the new year.
The directions for forming this challah are a little difficult, so please look at the pictures below the recipe for help. If it seems too daunting, roll the dough into squares, spread with chocolate filling, roll up into ropes and then do a simple coil (making one challah from each half of the dough).
Have a happy, healthy and sweet new year!
Chocolate Orange Challah

Challah dough lightly flavoured with orange and filled with chocolate -- the perfect sweet challah to bring in the new year!
Ingredients
-
Dough:
- 4 1/2 cups all-purpose flour (1 lb 6.5 oz / 630 grams)
- 2 tsp. quick rise/instant yeast (8 grams)
- 1 tsp. salt
- 3 Tbsp. sugar
- zest of 2 oranges, finely grated
- 2 large eggs
- 1 large egg yolk
- 1/4 cup oil (I use canola)
- 1/2 cup orange juice
- 1/2 cup warm water
- 4 oz / 112 grams bittersweet chocolate, chopped small
- 2 tsp. oil (canola)
- 6 Tbsp. sugar
- 2 Tbsp. cocoa powder
- 1 large egg
- 1 Tbsp. water
Chocolate Filling:
Egg Wash:
Directions
- Add all of the dry ingredients to the bowl of a stand-mixer fitted with a dough hook and mix briefly on low to mix together. Add the orange zest, eggs, oil, orange juice, and water and mix on low until all of the ingredients are combined. Turn the machine up to medium and knead for 6-8 minutes or until the dough has formed a ball that’s slightly tacky.
- Scrape the dough out onto a lightly floured counter and knead for just 1-2 minutes, forming a smooth dough ball. Place the dough into a lightly greased bowl, cover with plastic wrap or a damp towel and set aside for 30 minutes to relax.
- While the dough relaxes, make the chocolate filling. Place the chocolate and oil in a heat-proof bowl and melt in the microwave. Heat in 30 second increments, stirring after each one, until melted (you can also melt the chocolate over a double boiler). Once melted and smooth, add the sugar and cocoa powder and stir well, until combined. Let cool on the counter until ready to use.
- After the 30 minutes, check your dough to see if it’s relaxed enough. Press one finger into the middle of the dough and when you pull your finger out, if the indentation remains in the dough without springing back, you’re good to go.
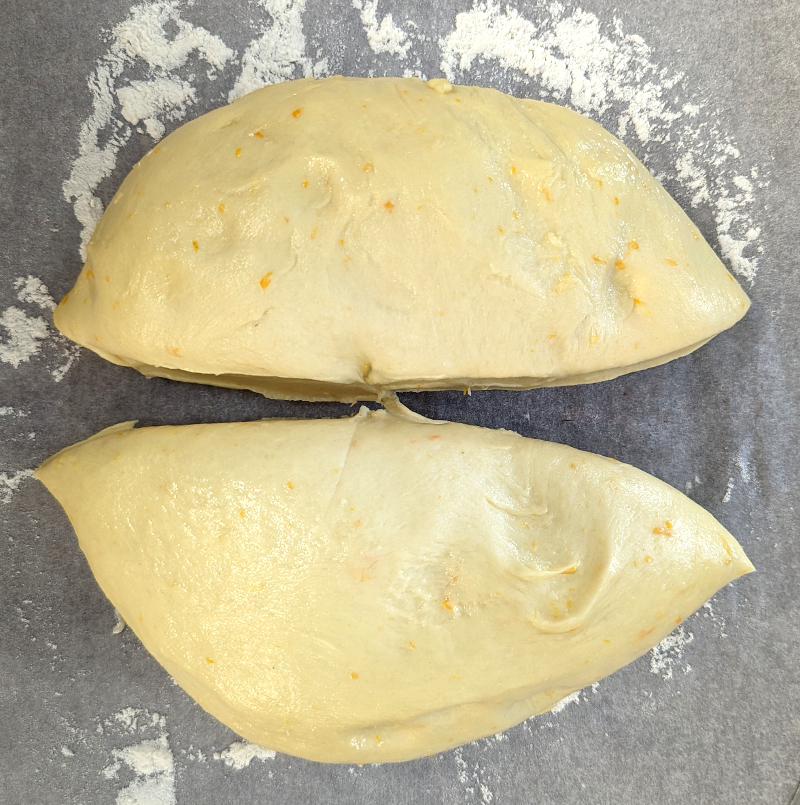
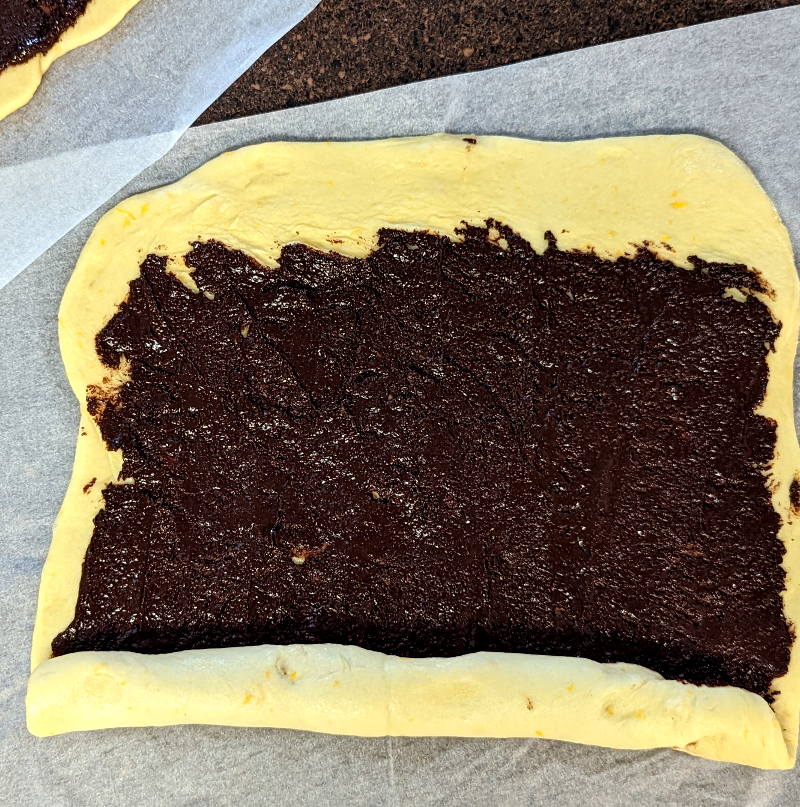
- Cut the dough ball in half and roll out each half on a lightly floured worksurface. Dust the top of the dough lightly with flour, then roll out into a large square, approximately 12″ x 12″. Use a spoon or spatula to spread half of the the chocolate mixture evenly over each dough, leaving approximately 1/2″ of the top edges naked. Brush the naked dough with water.
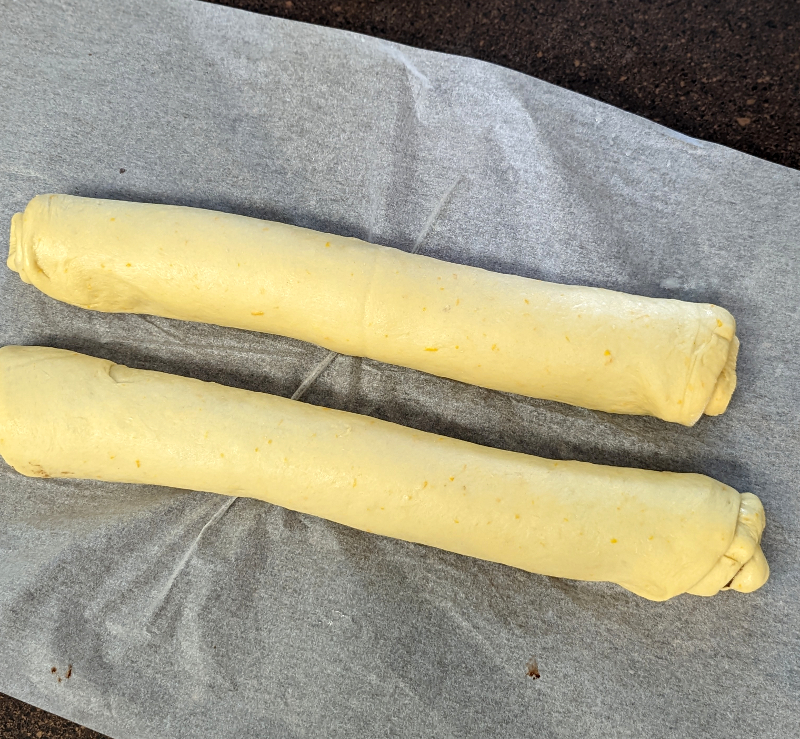
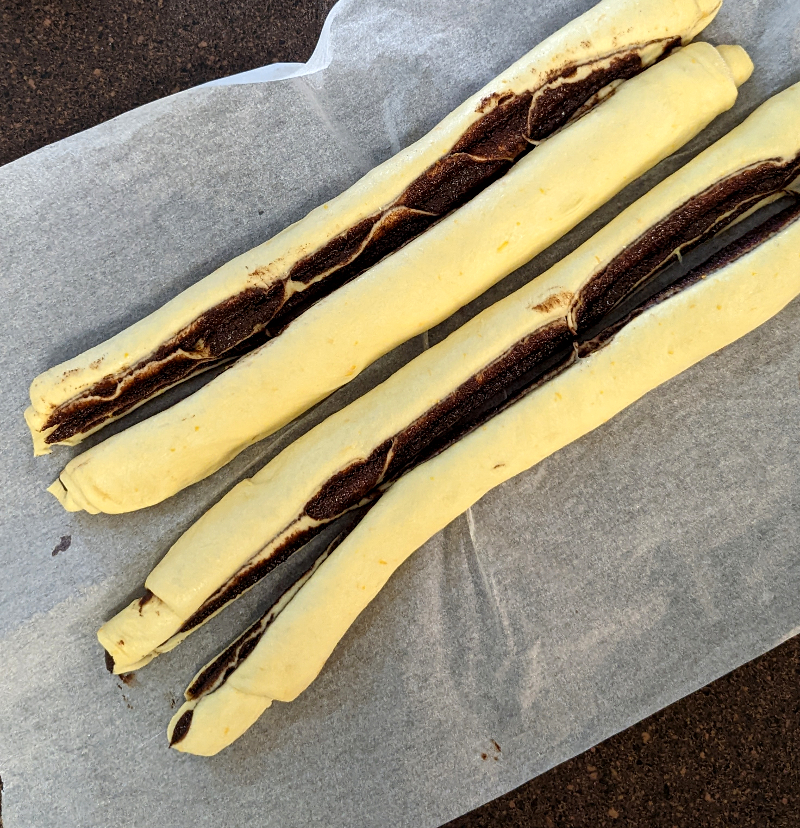
- Roll each dough into a log, then use a sharp knife to carefully cut the rolls in half, lengthwise. Next we’ll form the challah. I like to do this right on a baking sheet lined with parchment paper.
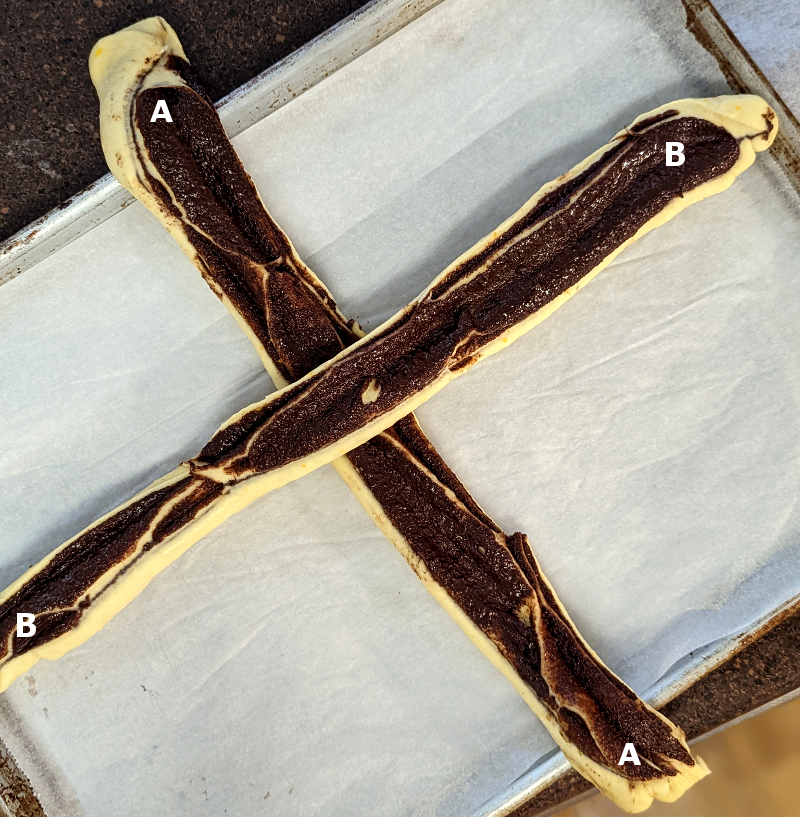
- (This is where you may want to look at the pictures below.) Place two strips of dough on the baking sheet cut side up, with one strip, piece B over the other, piece A, forming a plus sign. Place a third rope of dough, piece C, across the piece B and lined up next to the piece A. Fold piece A up and over piece B, then place piece D across piece C and lined up with piece B. Unfold piece A so it’s now lying across C.
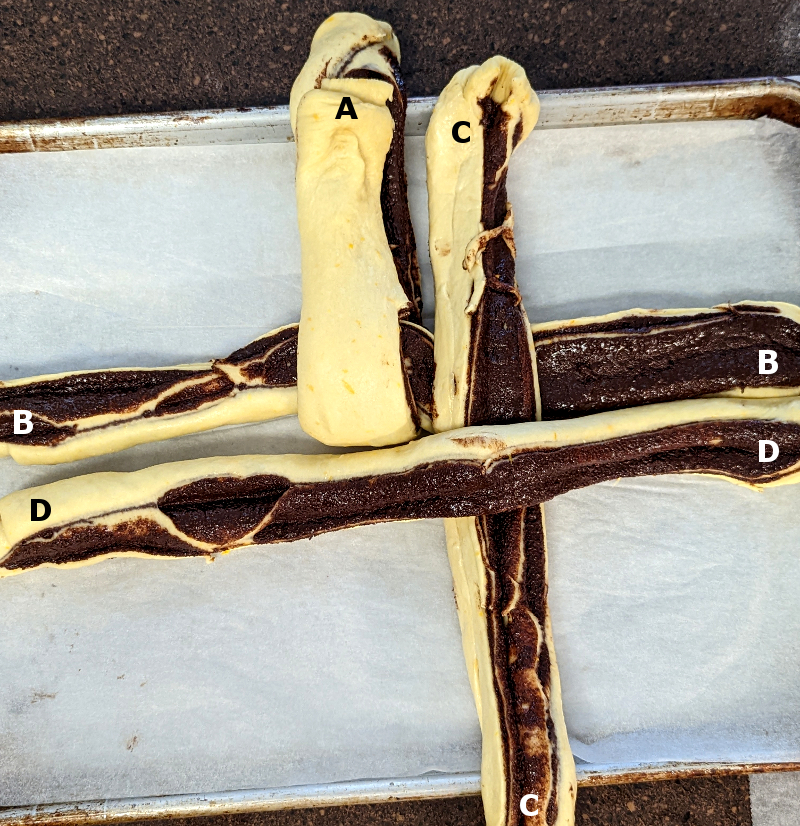
- Working clockwise from the top, pull piece A over piece C, piece B over D, piece A over C and piece B over D.
- Now working counter-clockwise from the top, pull piece C over B, D over C, A over D and B over A.
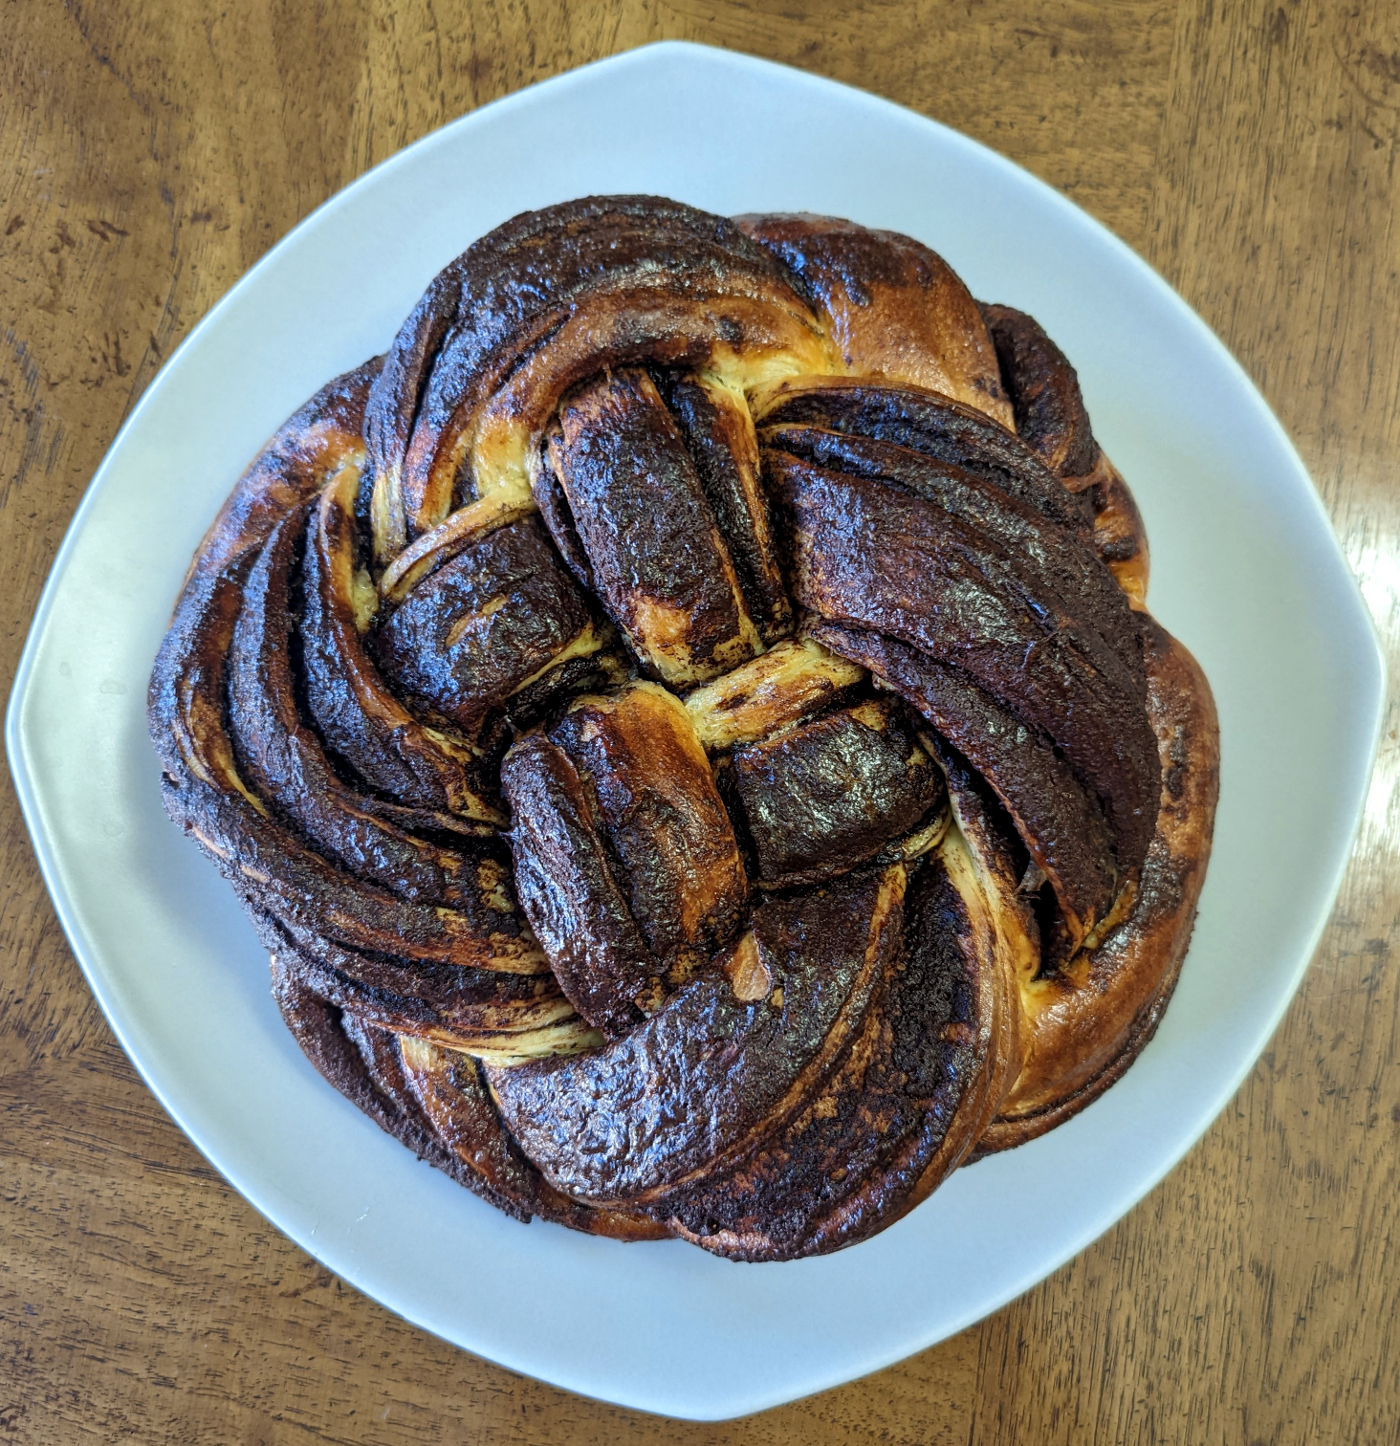
- Finally, connect A with A, B with B, C with C and D with D. Tuck all of the ends underneath the challah and push the challah in a little on all sides, plumping it up.
- Spray the challah with oil and cover loosely with plastic. Let rise for 30 minutes.
- While the challah rises, preheat the oven to 375°F / 190°C.
- When the challah has puffed up and the oven is ready, whisk the egg and water together and brush the challah with egg wash. Bake the challah on the middle rack of your oven for 15 minutes, remove from oven and brush with the egg wash again. Return to oven and bake another 20-25 minutes, or until the challah is golden brown and baked through.
- Cool and serve. This is best eaten the day it’s baked, but you can wrap well and keep on the counter for up to two days or freeze.