

Knishes have always been a part of my life. My grandmother made them for Friday night dinners. My great-aunt taught my mother how to make them, stretching the dough out on a clean tablecloth (we stopped using the tablecloth early on). My mother taught her catering company employees how to make them and I learned by helping out in the kitchen at work when I was growing up.
Like many Jewish foods popular in North America, knishes are a humble food created by eastern European Jews. By wrapping dough around kasha (buckwheat), potatoes, or a simple cheese filling they made something new and interesting out of rather inexpensive ingredients. Because they were inexpensive items, they were staples of peasant diets and they became the traditional foods full of wonderful memories for future generations.
There are different types of knishes. Some are fried (not in my kitchen!), some use puff pastry, some use phyllo, and some use a dough made of flour, water, and egg that is rolled out with a rolling pin. In my opinion, the best knishes are made with a stretch dough – similar to a strudel dough – that is stretched out across large tables as thinly as humanly possible. When you roll the stretch dough around the fillings, you create thin, flaky layers.
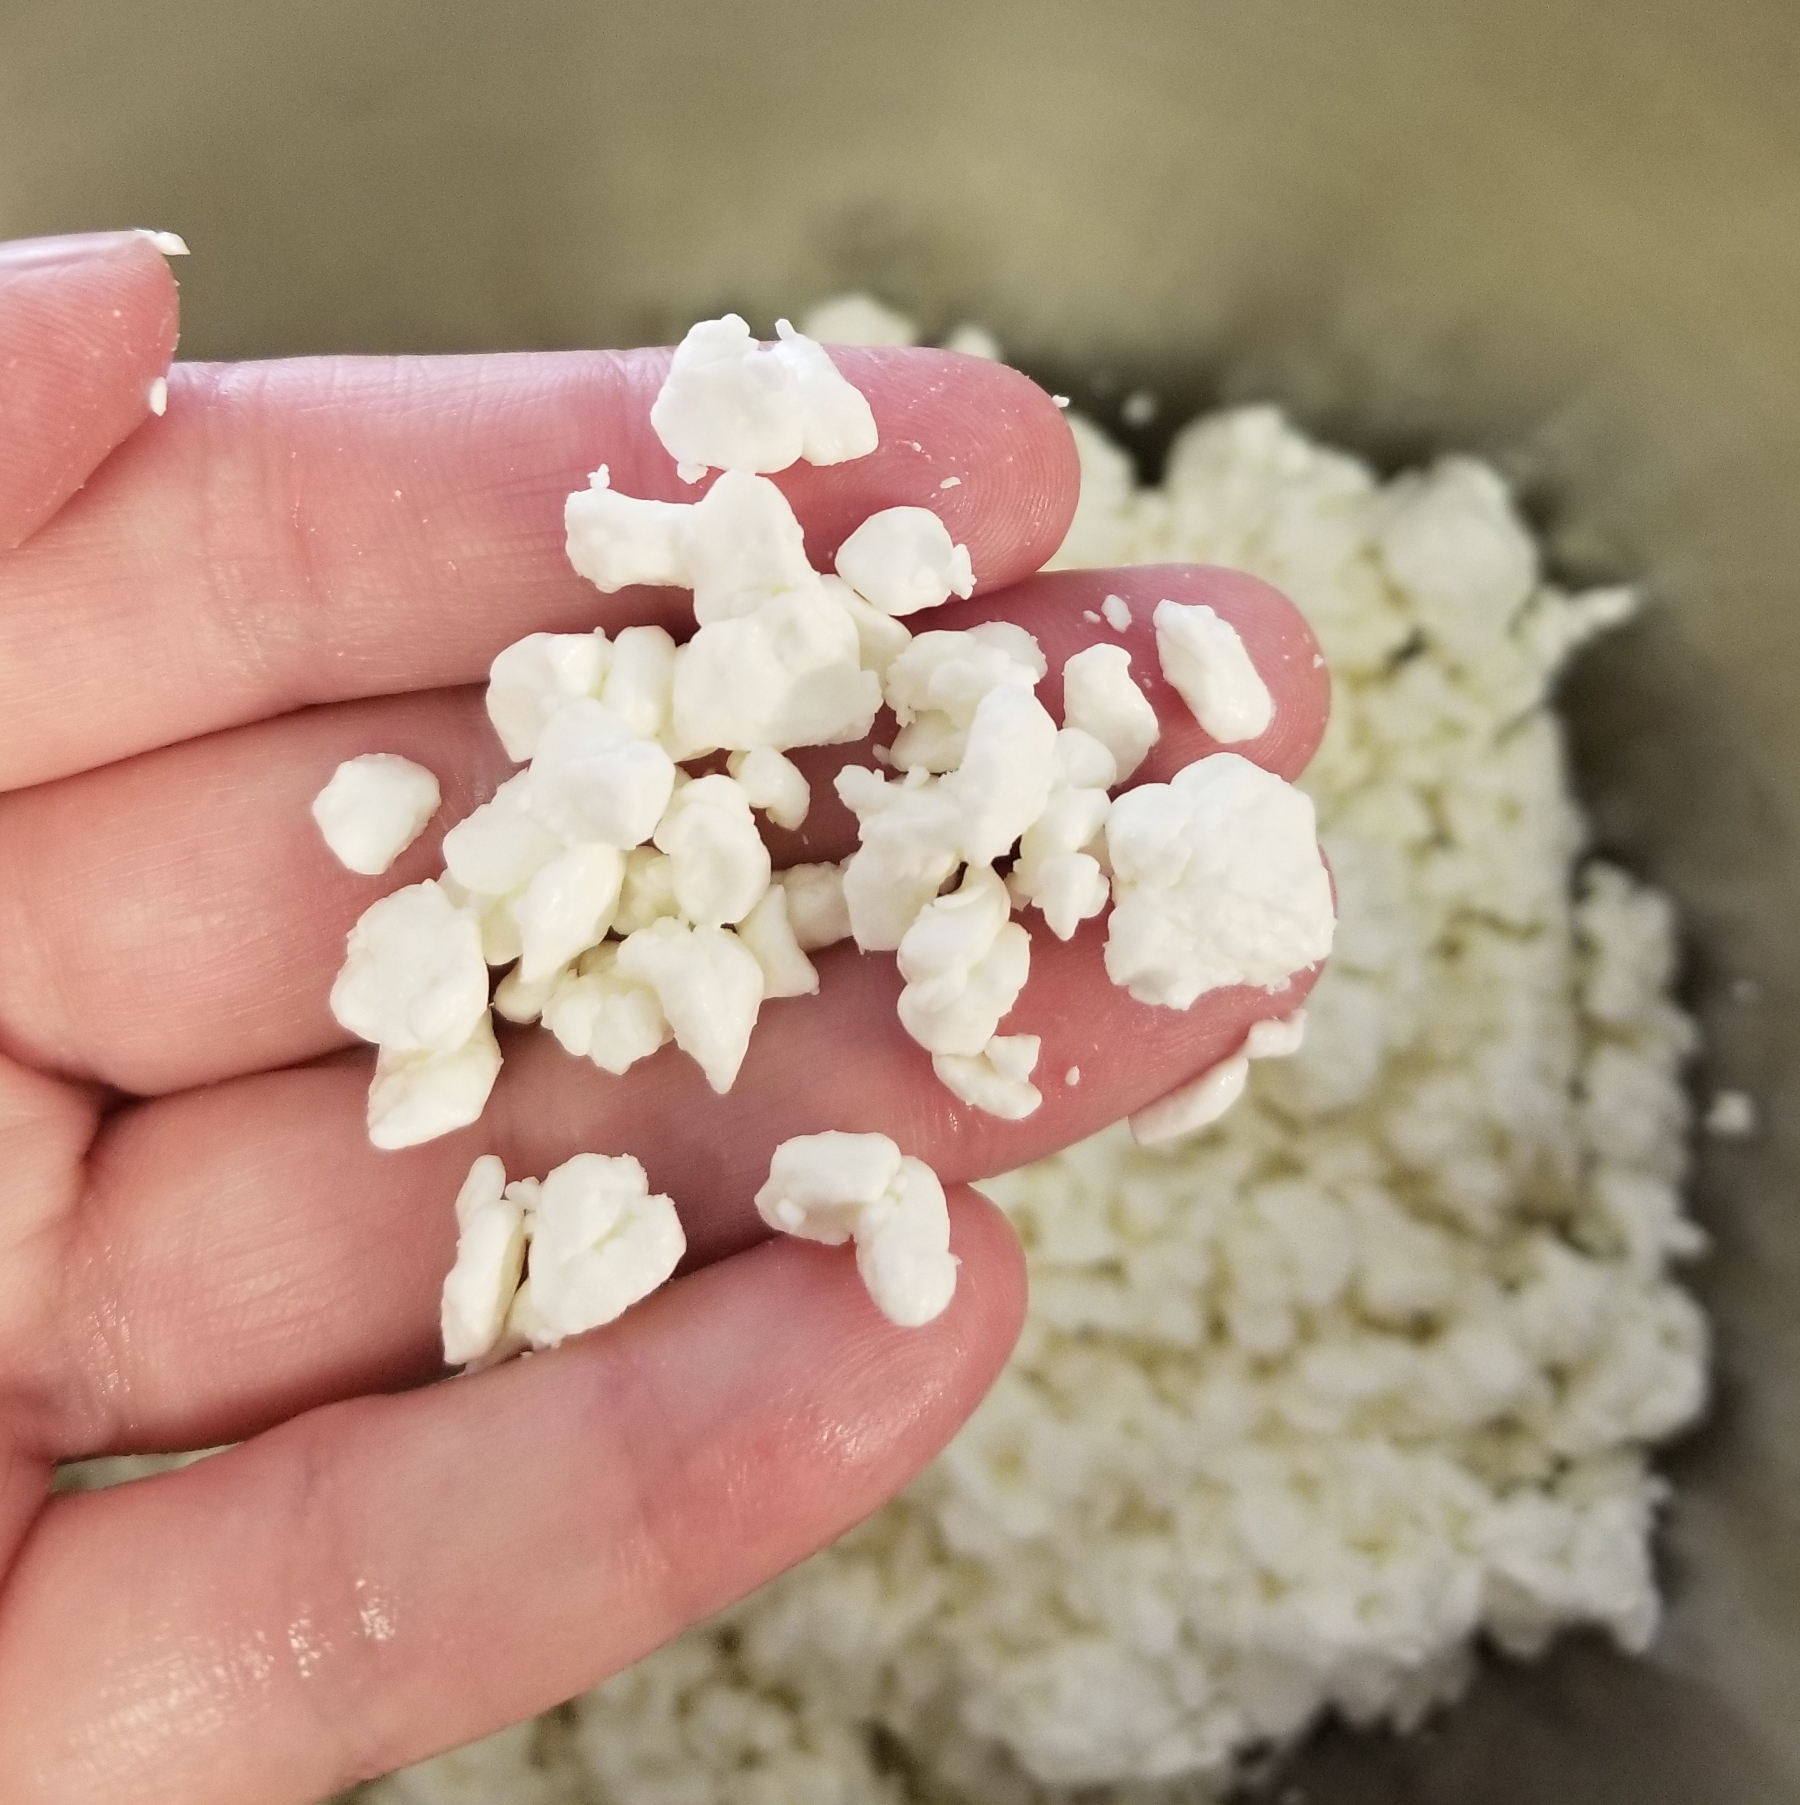
For the filling, I use dry curd cottage cheese, which is literally the curds of cottage cheese without any added milk or cream. I’ve never had trouble finding dry curd, but I live in the land of perogies where it’s a staple used for fillings for many different cultural groups. If you can’t find it where you live, you can try finding farmer’s cheese or baker’s cheese, which are similar. If you can’t find any of those, you can drain 1% cottage cheese in a colander lined with cheesecloth for a few hours, until all of the liquid has drained off. Any extra moisture in knish filling makes the knishes more likely to split while baking (you will almost always have some splitting when baking, but more moisture means more splitting), so it’s important to remove any extra moisture.
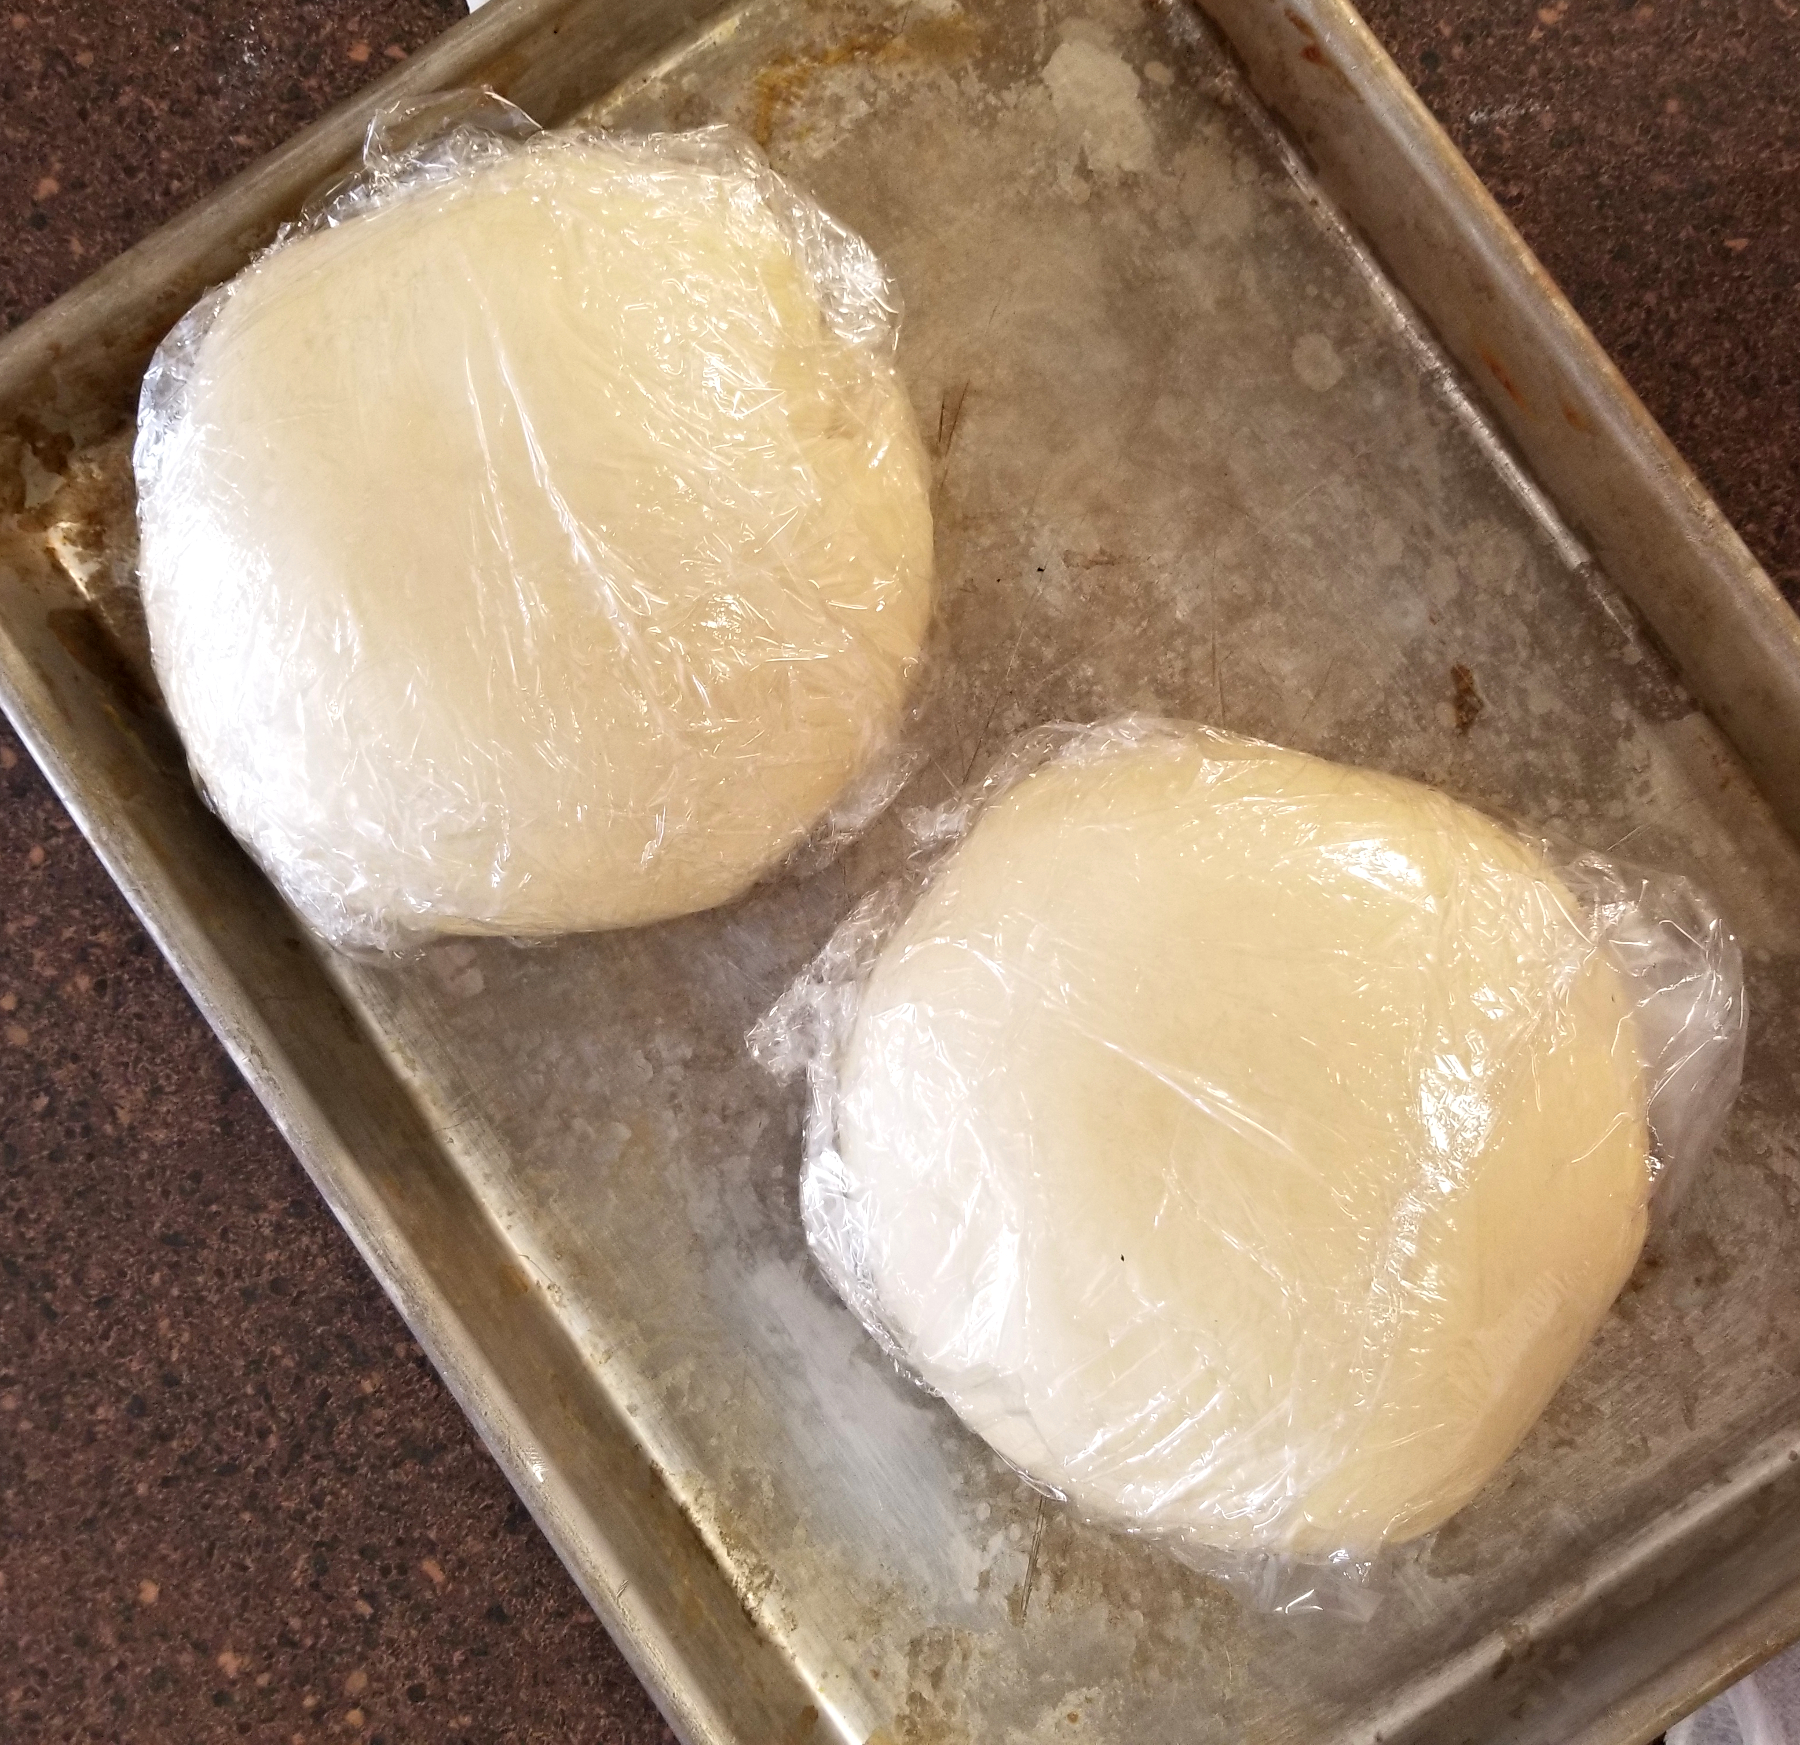
Helpful Hints: Once all of the dough kneading is done, the dough can be saved for later use. Place the dough on a baking sheet lined with parchment, freeze, then wrap well with plastic or place in a freezer bag. Pull them out of the freezer the night before you want to use and thaw them in the fridge, on a baking sheet covered in plastic wrap. A couple of hours before you need it, pull the dough out of the fridge and let it come up to room temperature – then stretch away.
You can also freeze the knishes before you bake them. Freeze in a single layer on a baking sheet lined with parchment – when they’re frozen, transfer them to a freezer bag or container. Pull them out as you want them and bake them without thawing. You will need to bake them approximately 5 minutes longer if baked from frozen.
Cheese Knishes

Traditional knishes made with a stretch-dough and filled with a simple cheese filling. Serve with sour cream and sweetened strawberries.
Ingredients
-
Dough
- 595 grams / 1 lb. 5 1/4 oz. all-purpose flour (4 1/4 cups)
- 1 tsp. salt
- 2 tsp. baking powder
- 2 large eggs
- 1 cup oil (canola, safflower, or other vegetable oil)
- 2 tsp. white vinegar
- 1 cup warm water
- Ingredient
- 1200 grams / 2 lbs. 11 oz. dry curd cottage cheese
- 2 large eggs
- 1 Tbsp. granulated sugar
- 1 1/2 tsp. salt
- 55 grams / 2 oz. all-purpose flour (6 Tbsp.)
Cheese Filling
Directions
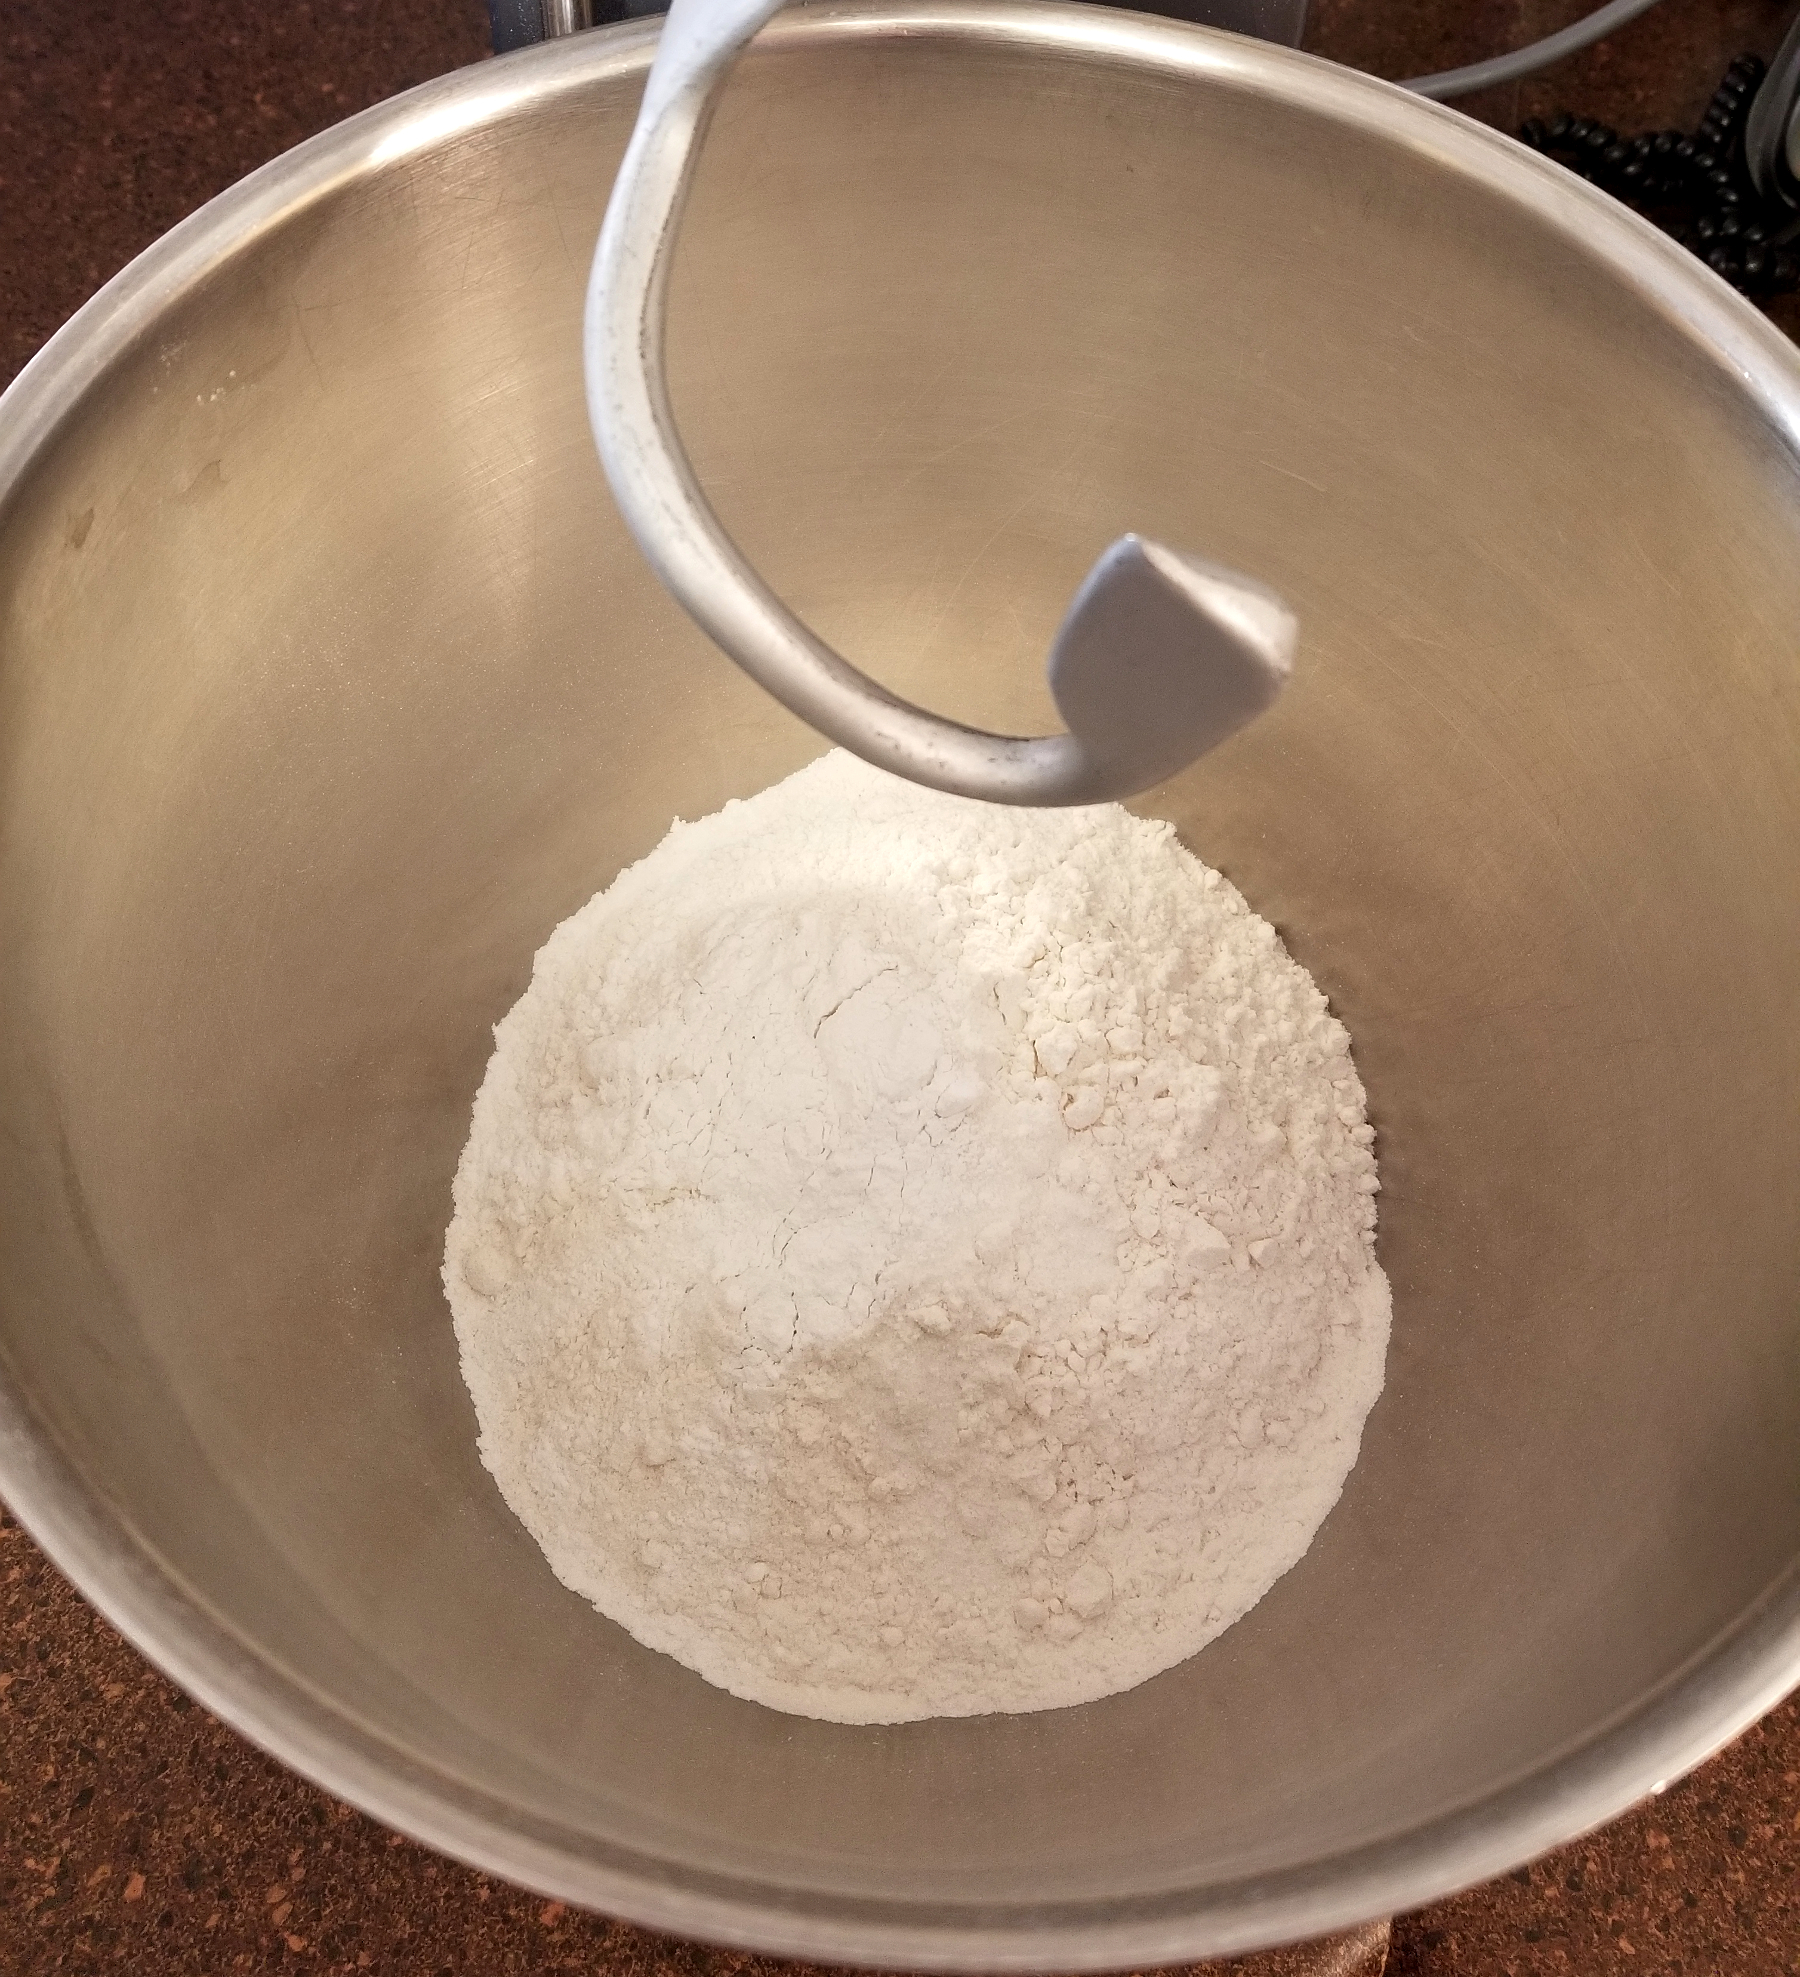
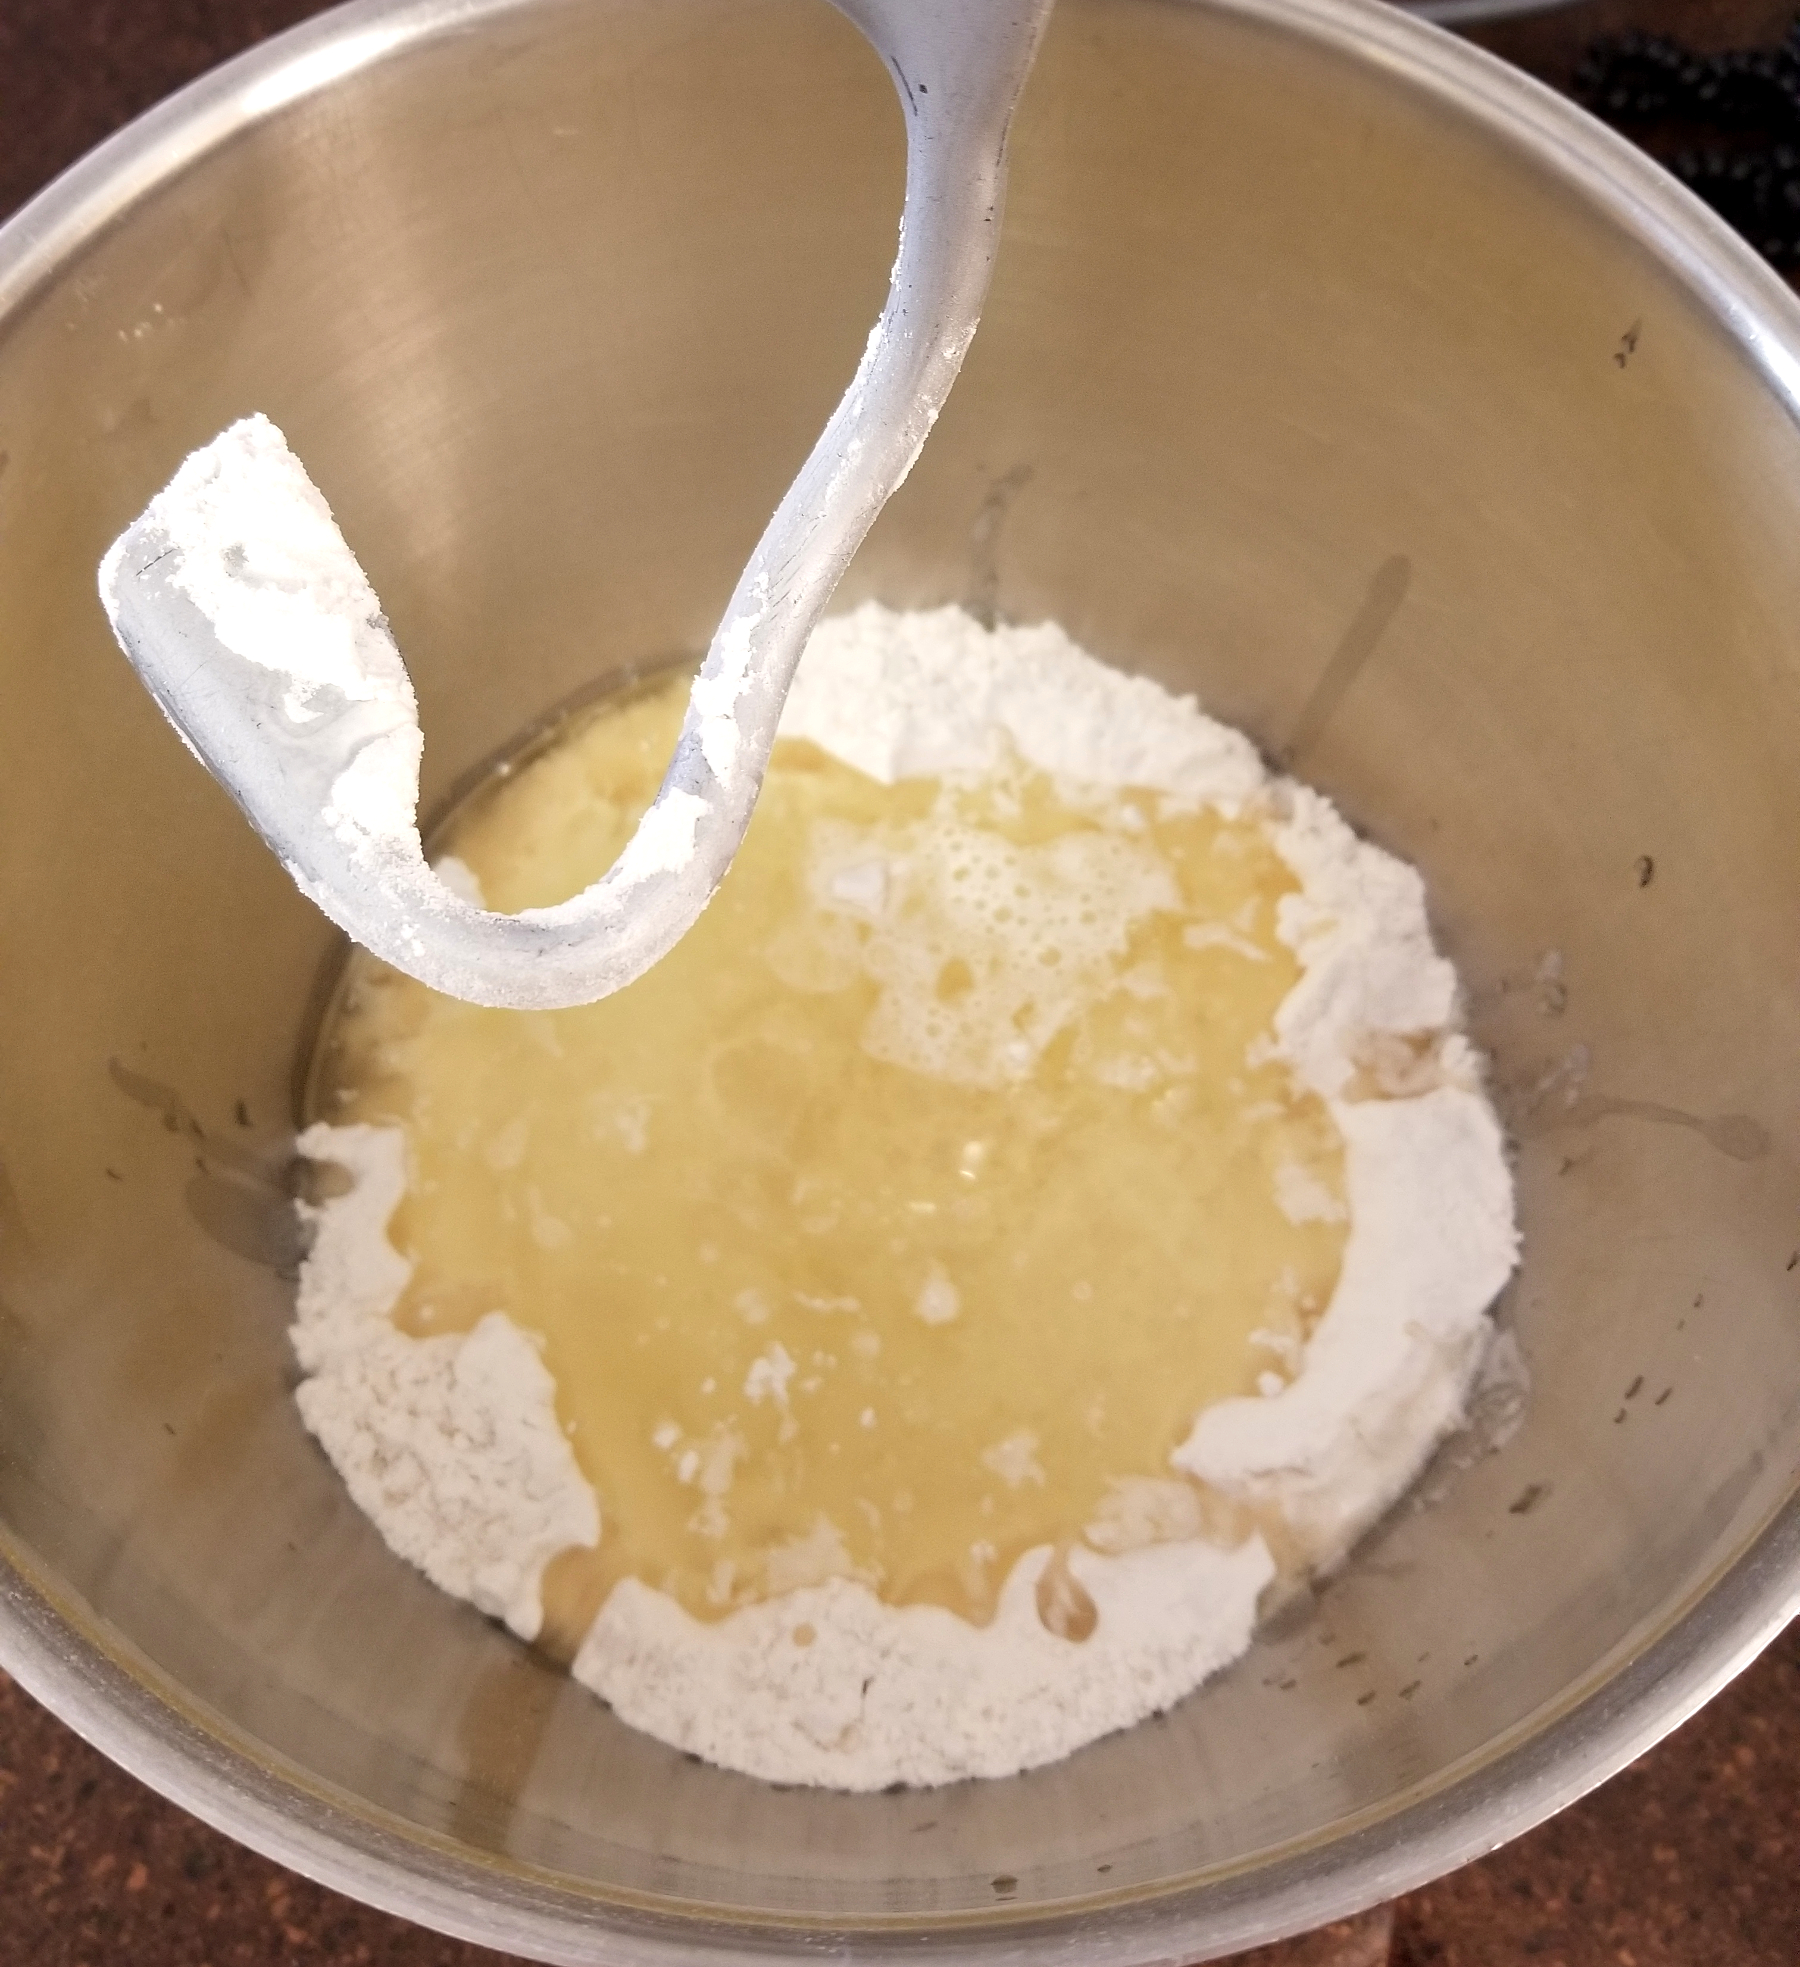
- Place all of the dough dry ingredients into the bowl of a stand mixer fit with a dough hook and mix briefly. This can be done by hand, but using a machine makes it so much easier. I’ve also tried this recipe using a food-processor with a regular blade and it will do if you don’t have a mixer. Form a well in the middle of the dry ingredients and add all of the wet ingredients
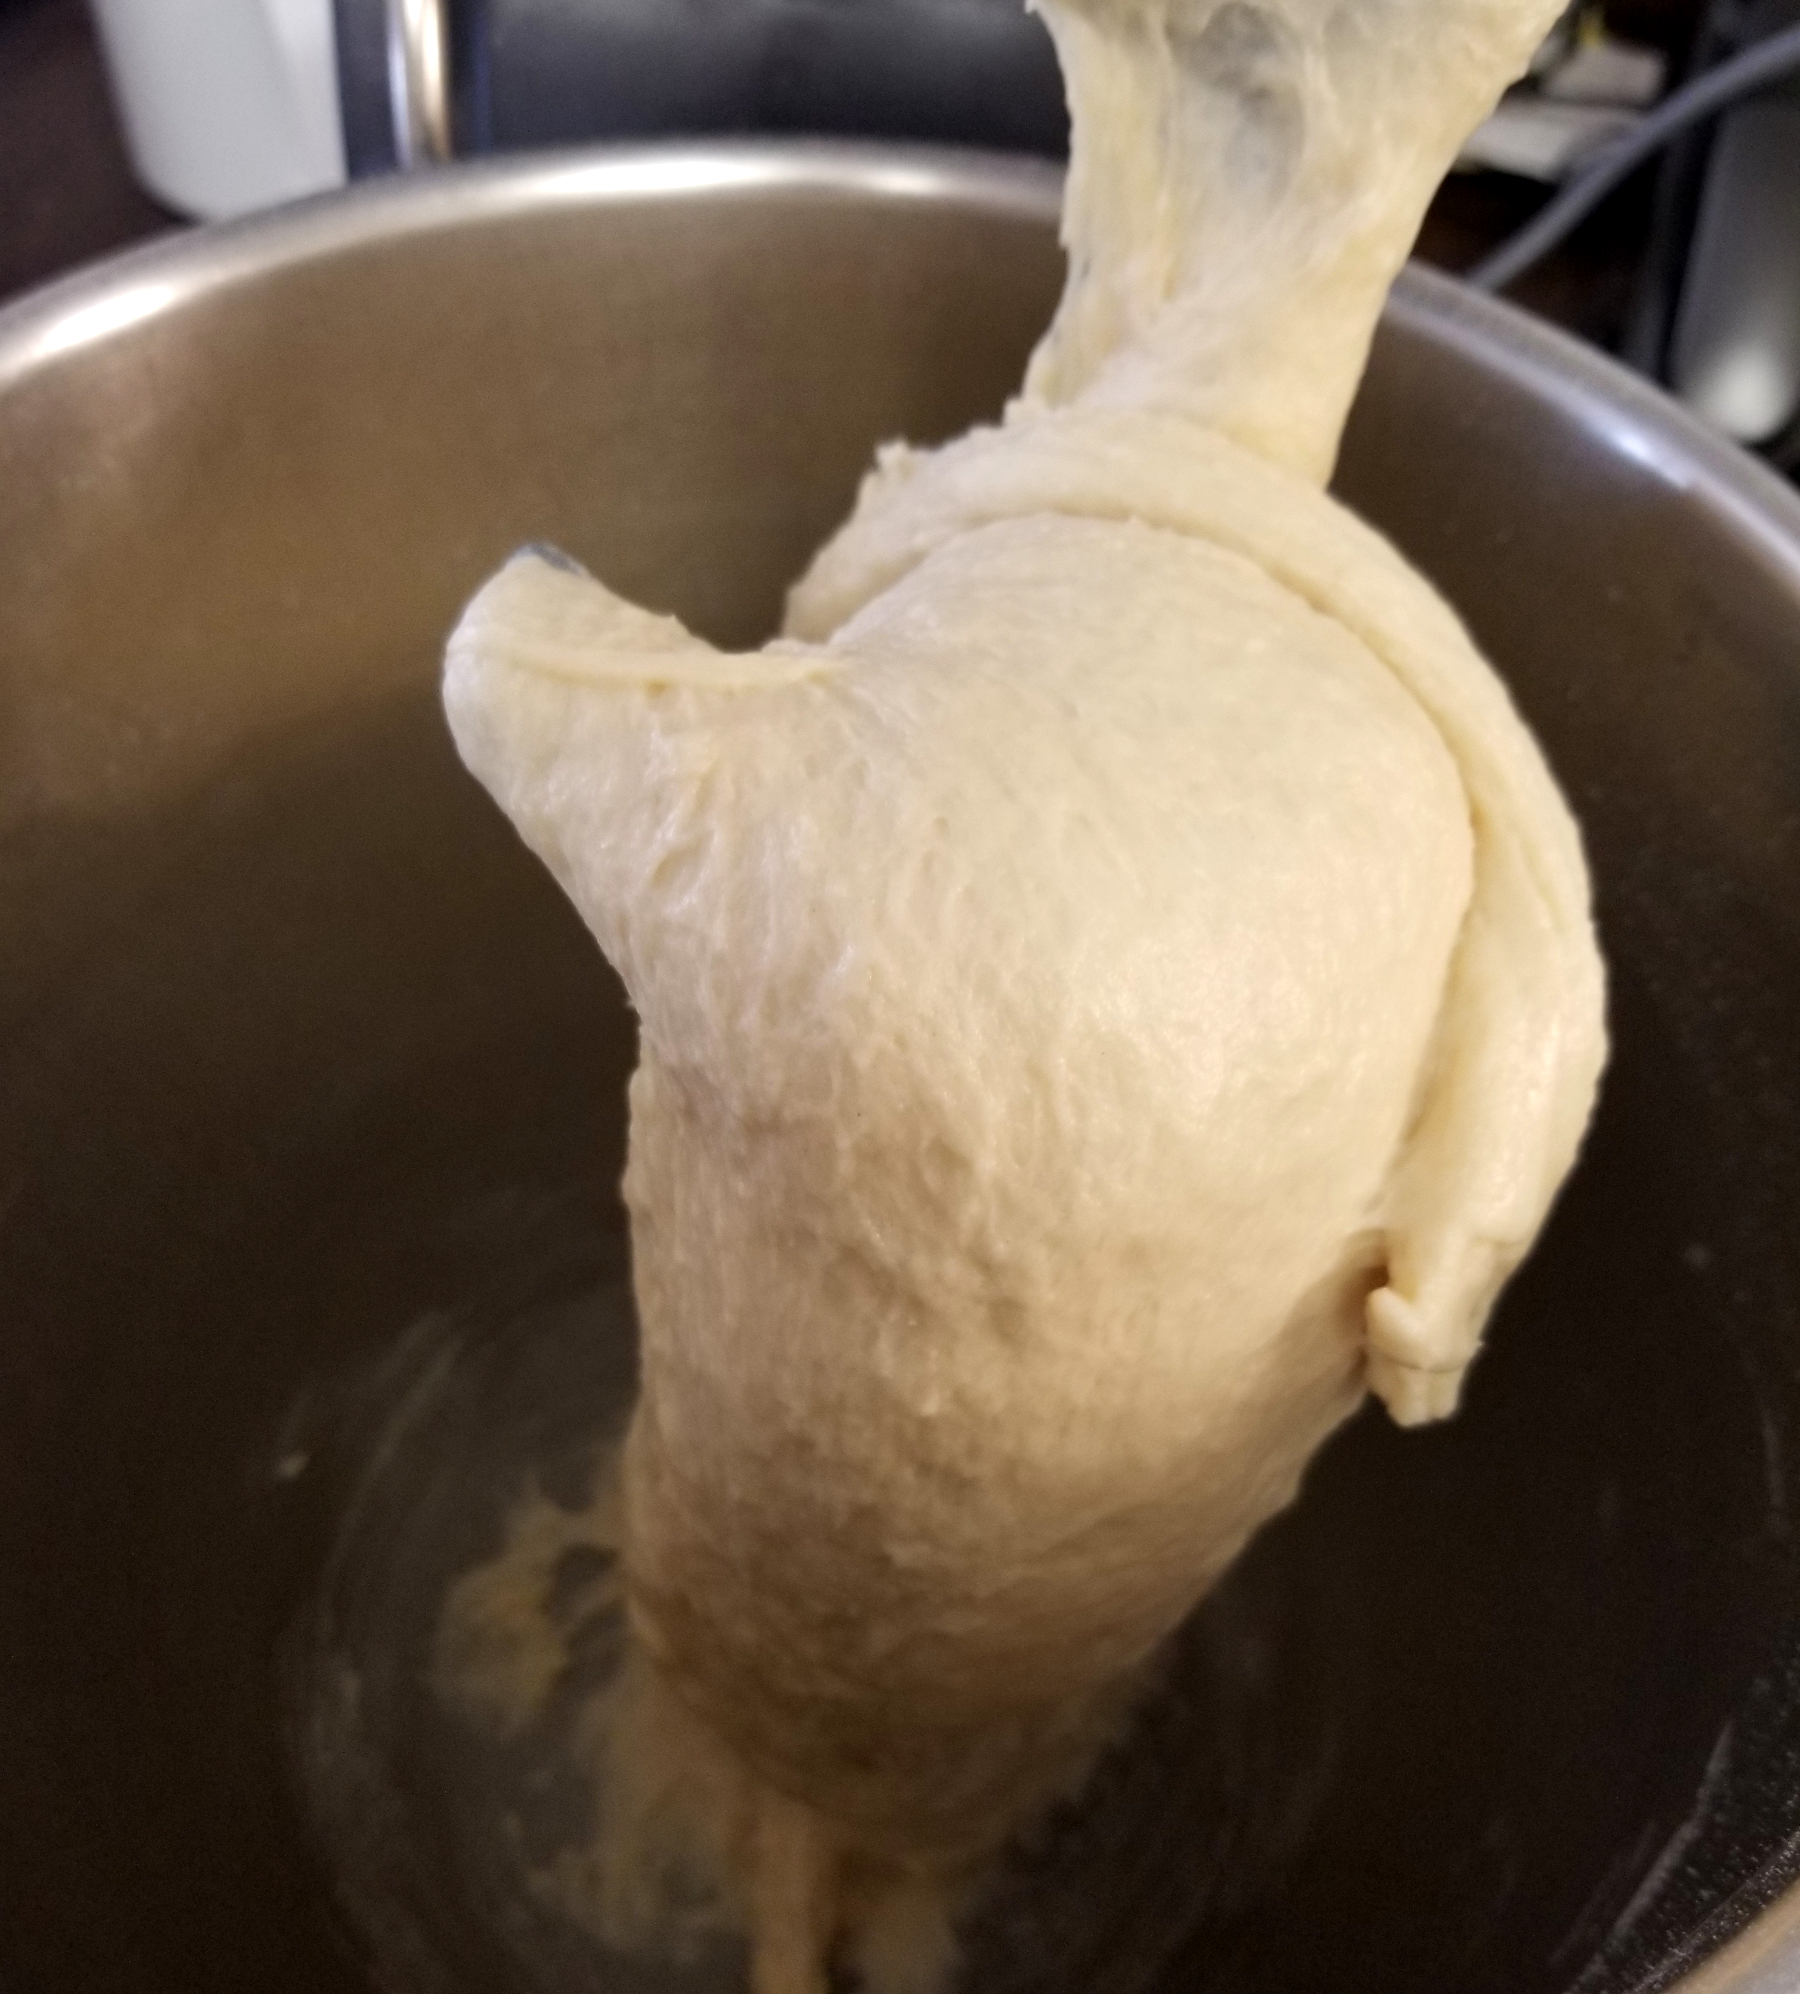
- Mix on low until most of the ingredients are combined, then turn the mixer to high and knead for 5-6 minutes. When the dough has been kneaded enough, you should be able to see little bubbles beneath the surface of the dough and it will be very soft and still tacky.
- (If you are not using a stand mixer, use a spoon or your hands to get everything mixed together. Next, I was taught, you must slap the dough onto a counter 100 times, giving it the occasional kneading. (I told you the mixer was an easier method).)
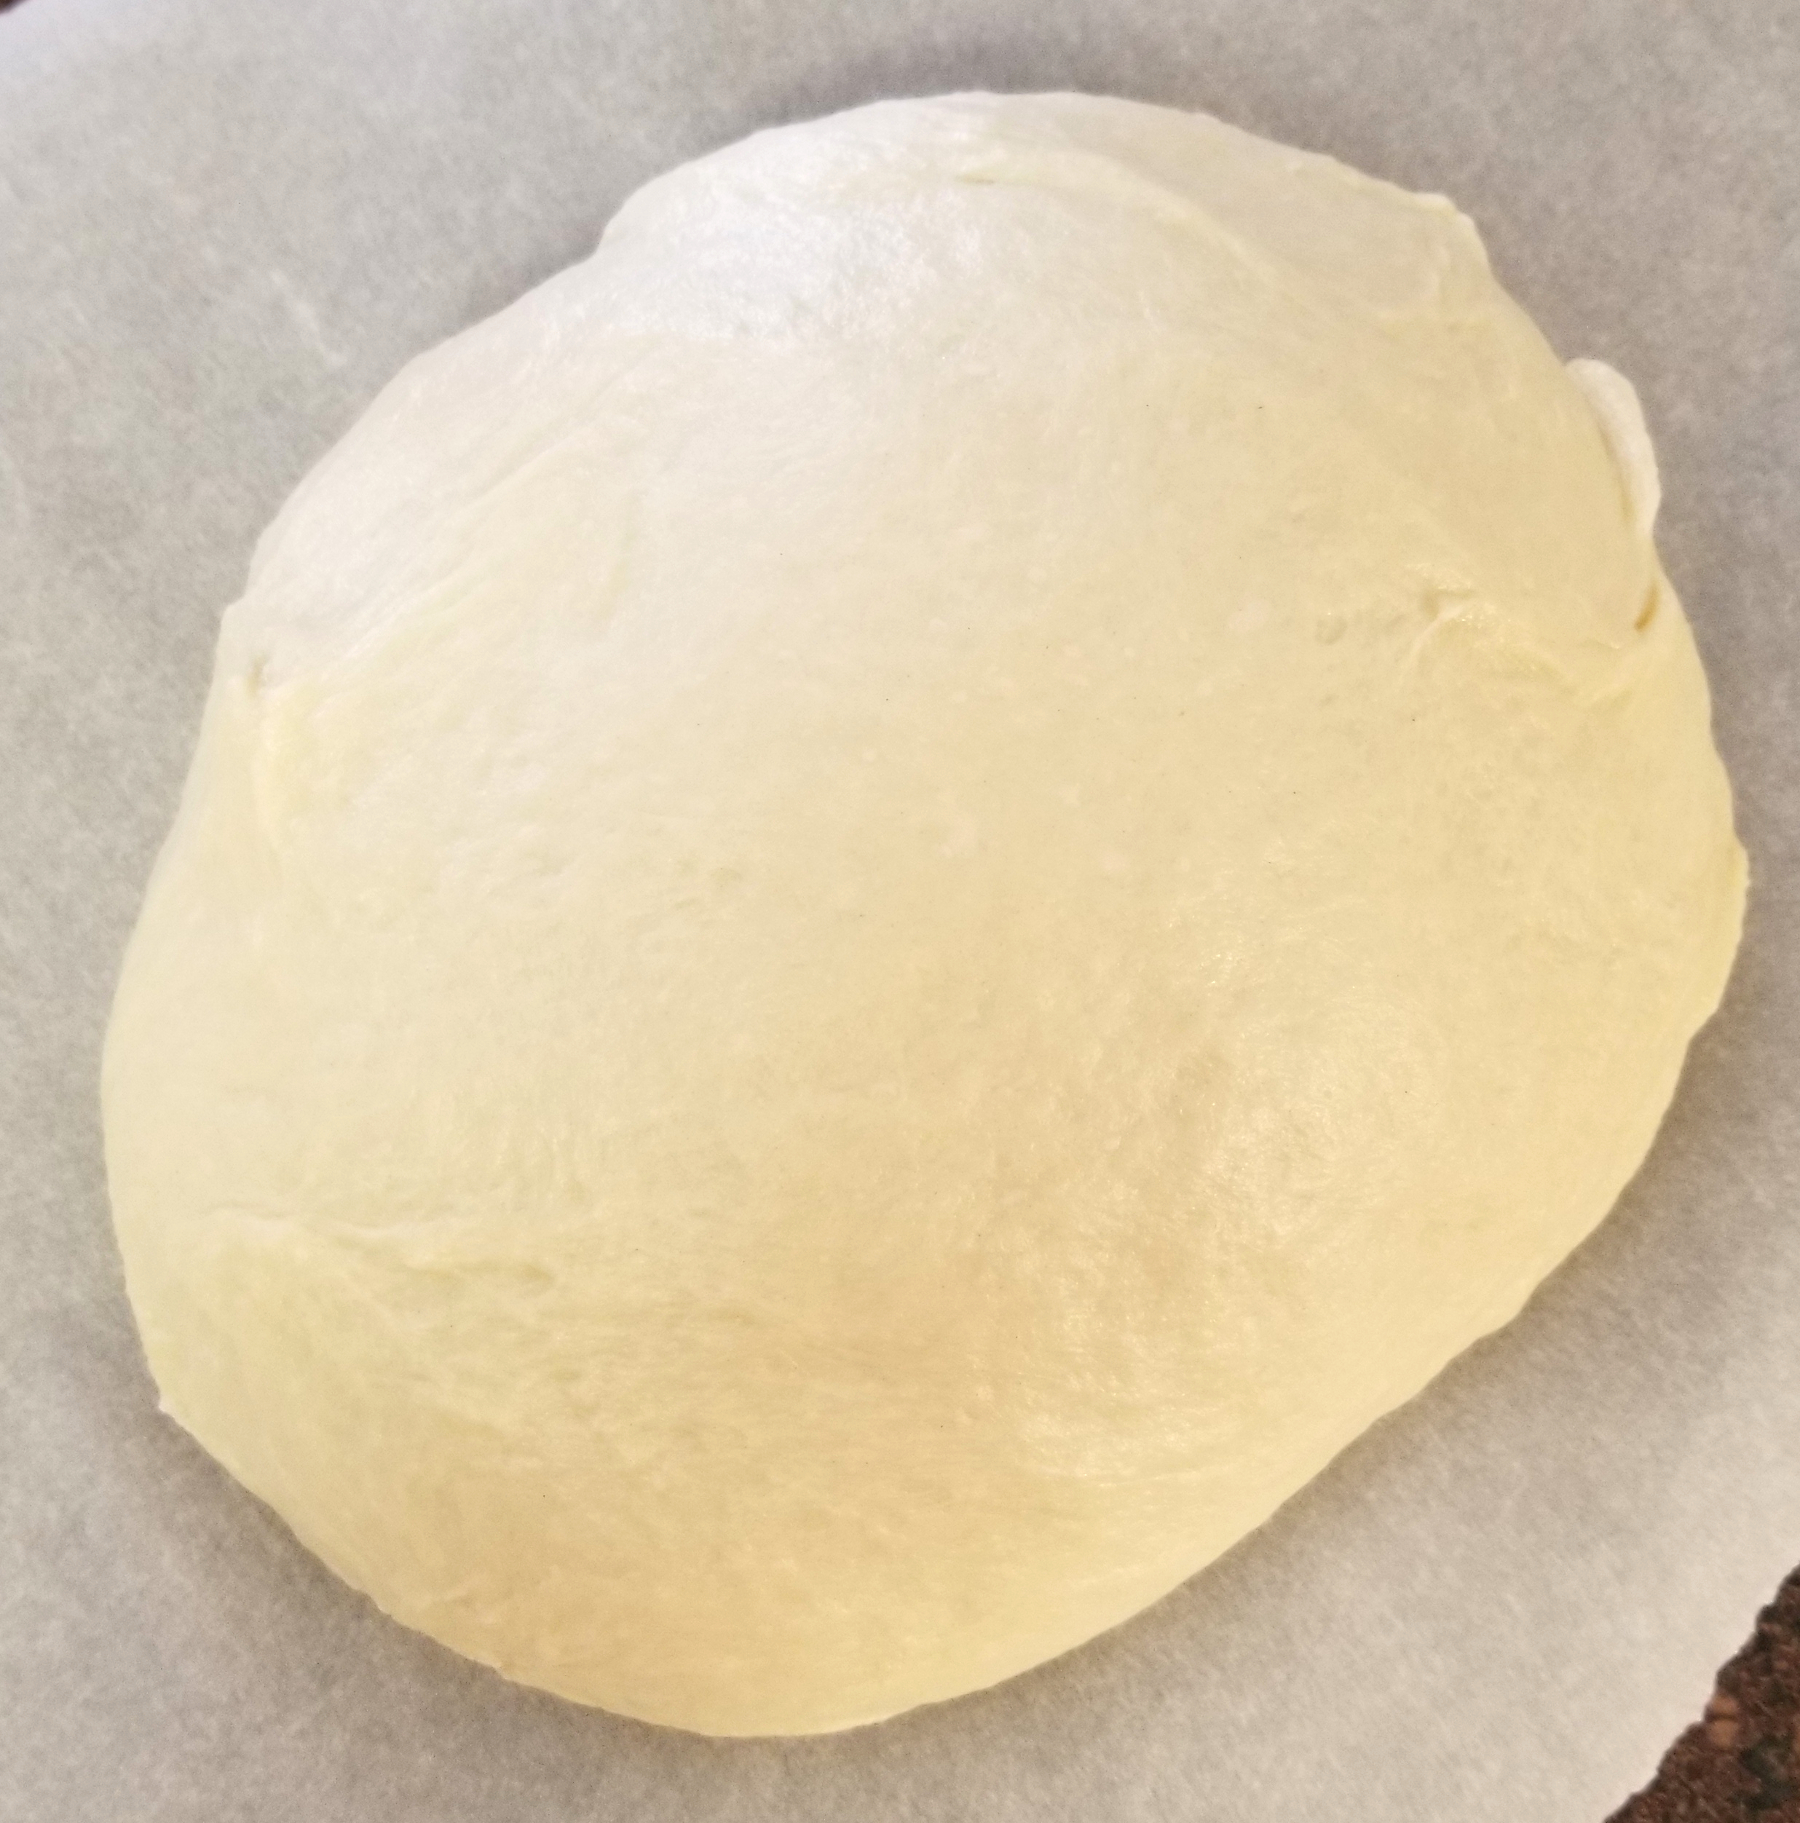
- Divide the dough in half, and form into two balls. Wrap each one with plastic wrap and let it hang out for at least an hour, relaxing at room temperature. While the dough is resting, prepare the filling.
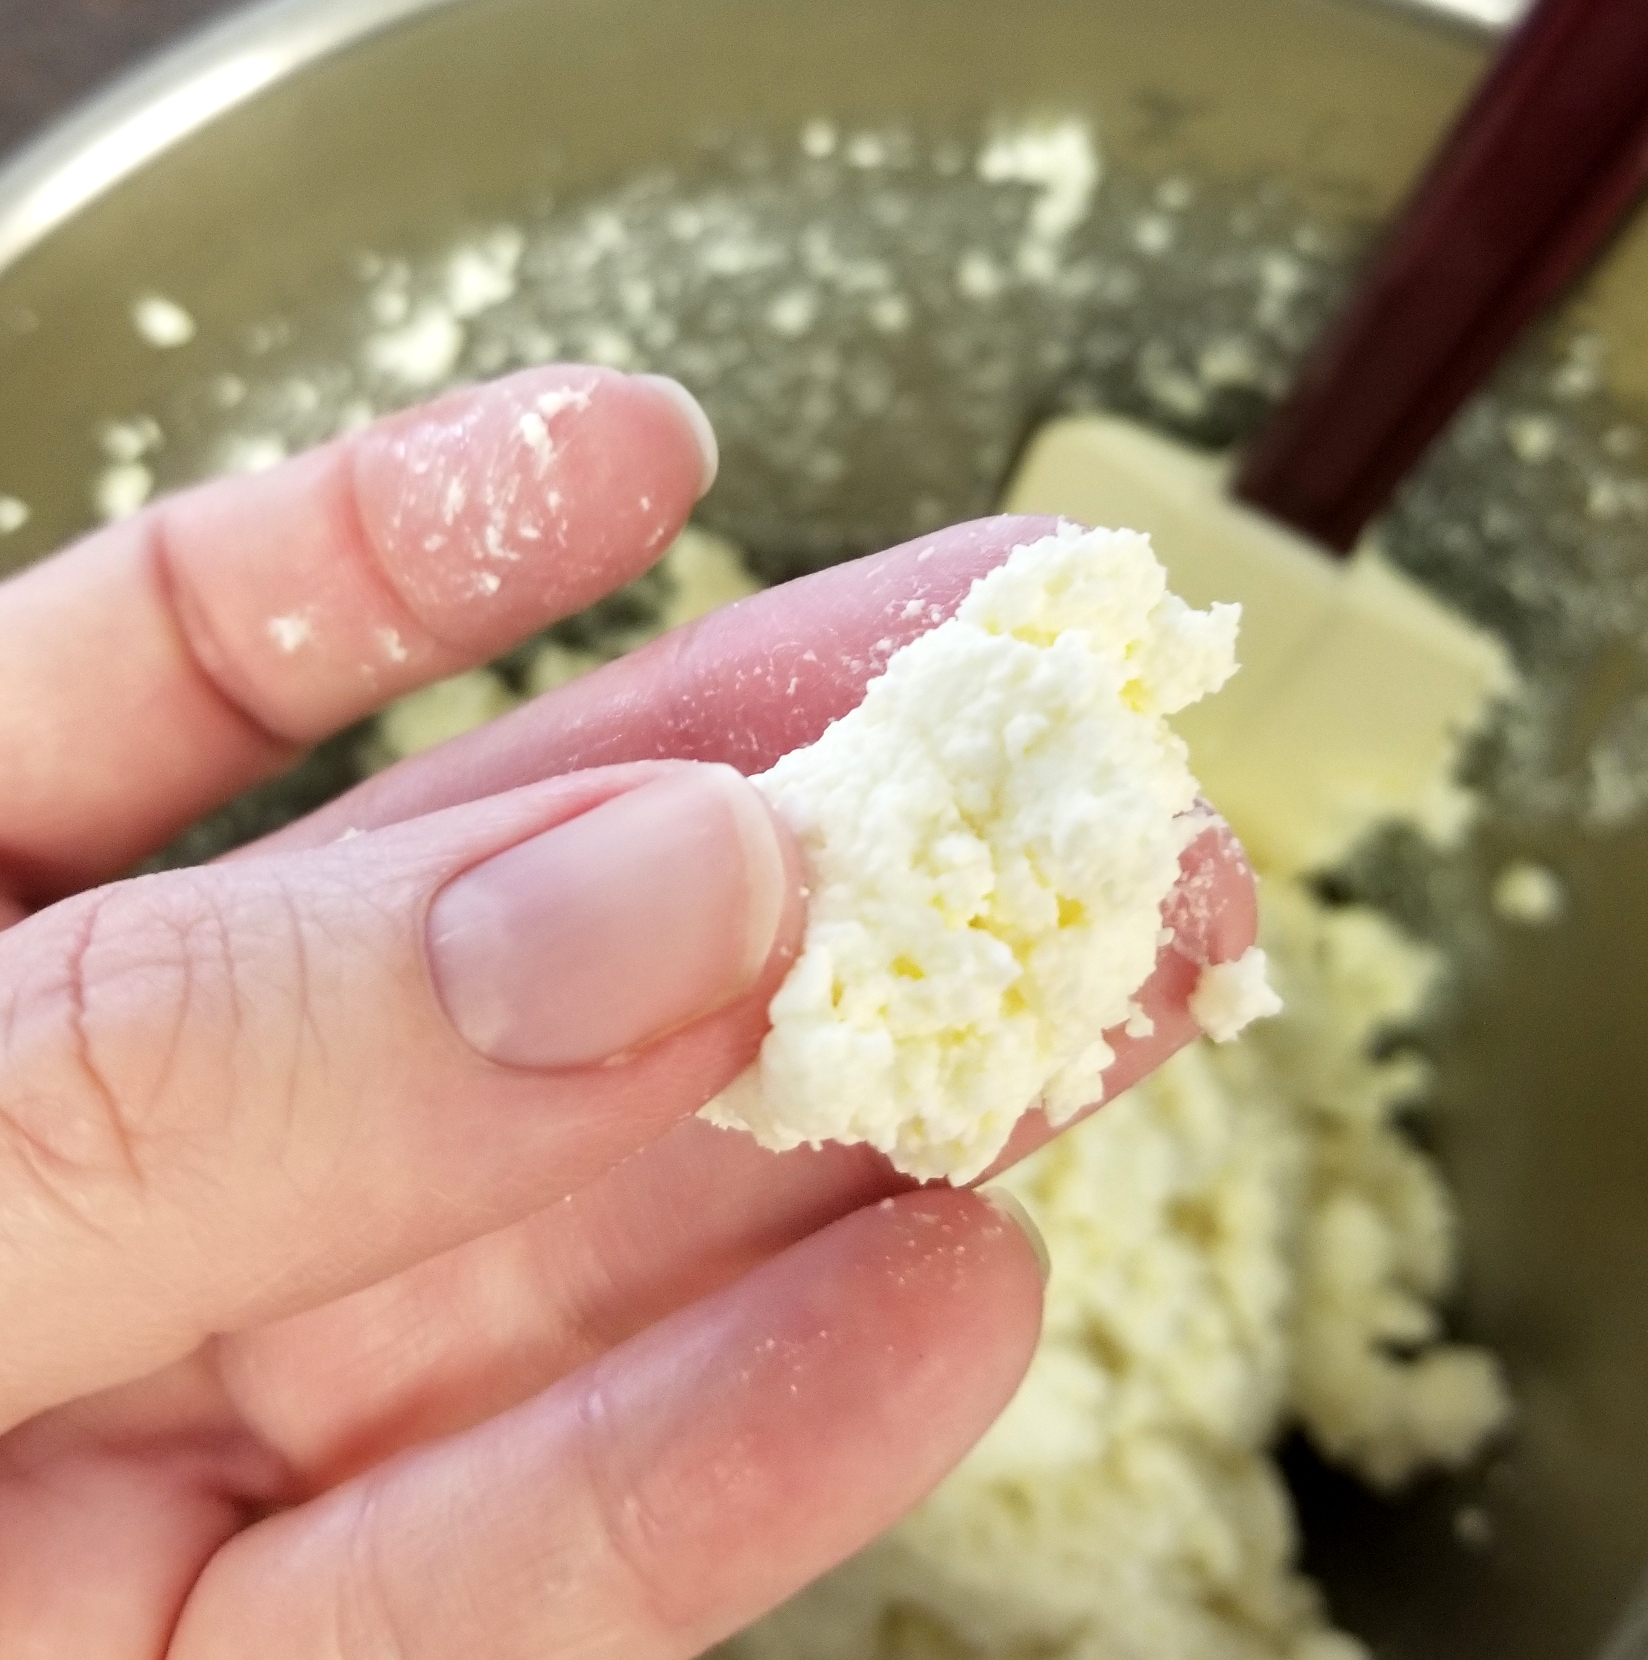
- Place all of the filling ingredients into the bowl of a stand mixer. Use the paddle attachment to mix the filling on medium-high for 2-3 minutes, or until the cheese curds have broken down and the filling holds together when you pinch some (see image below).
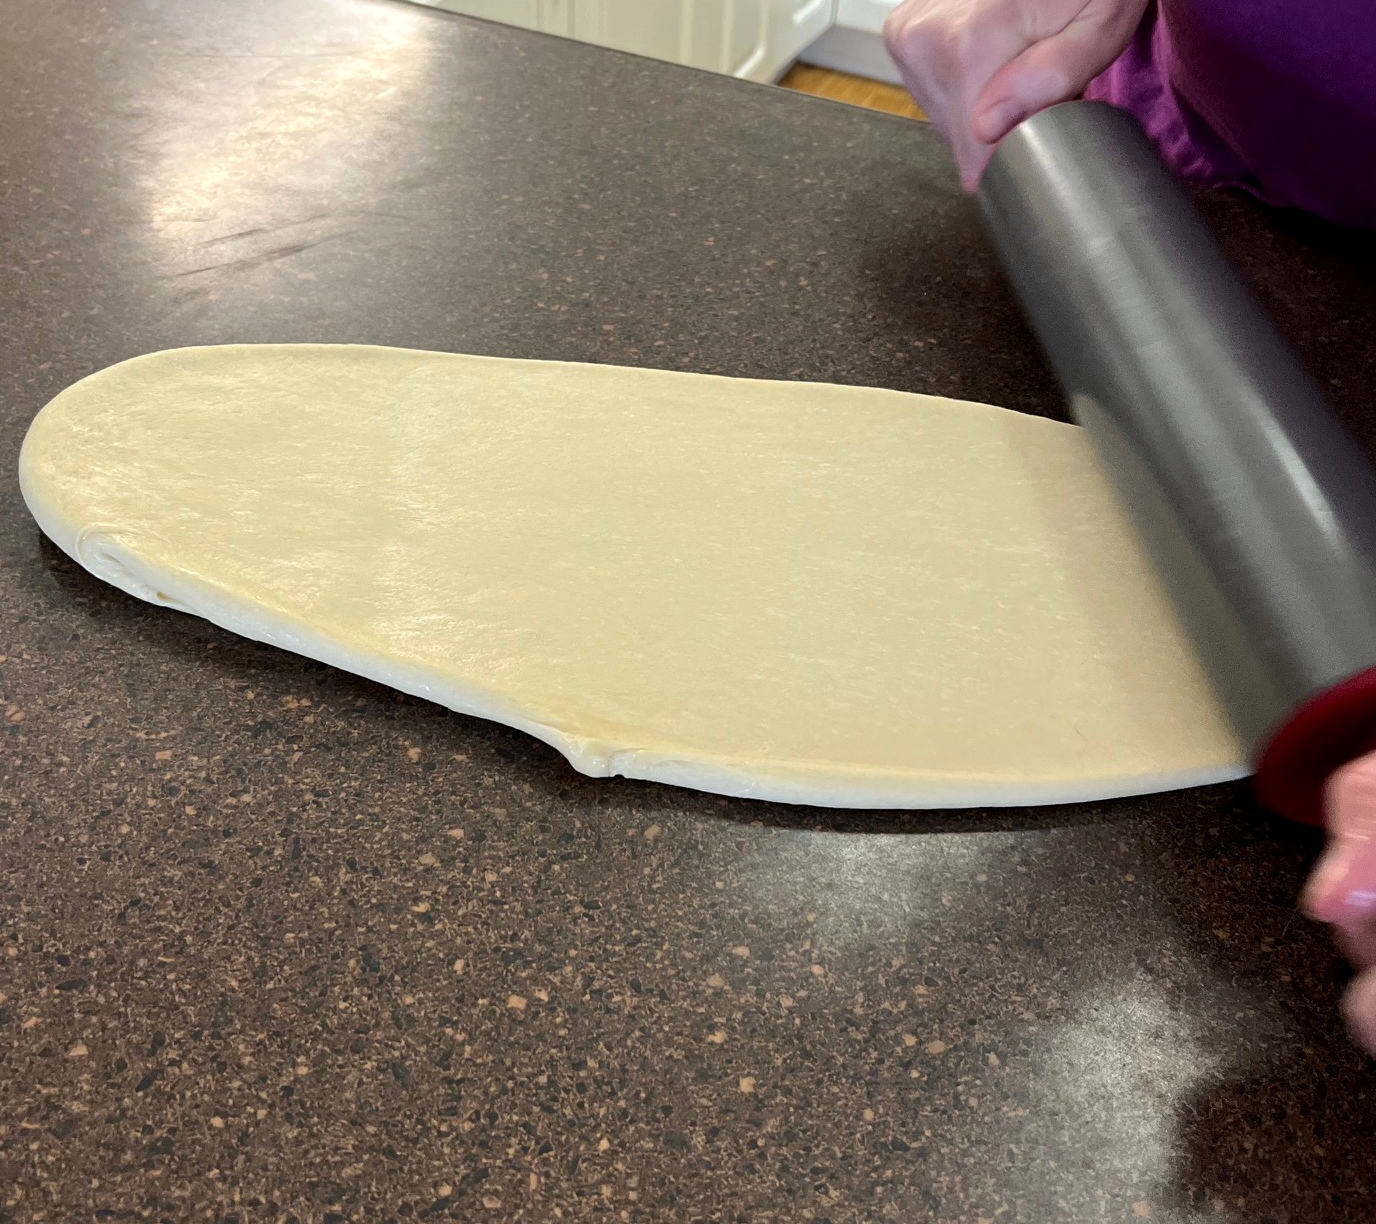
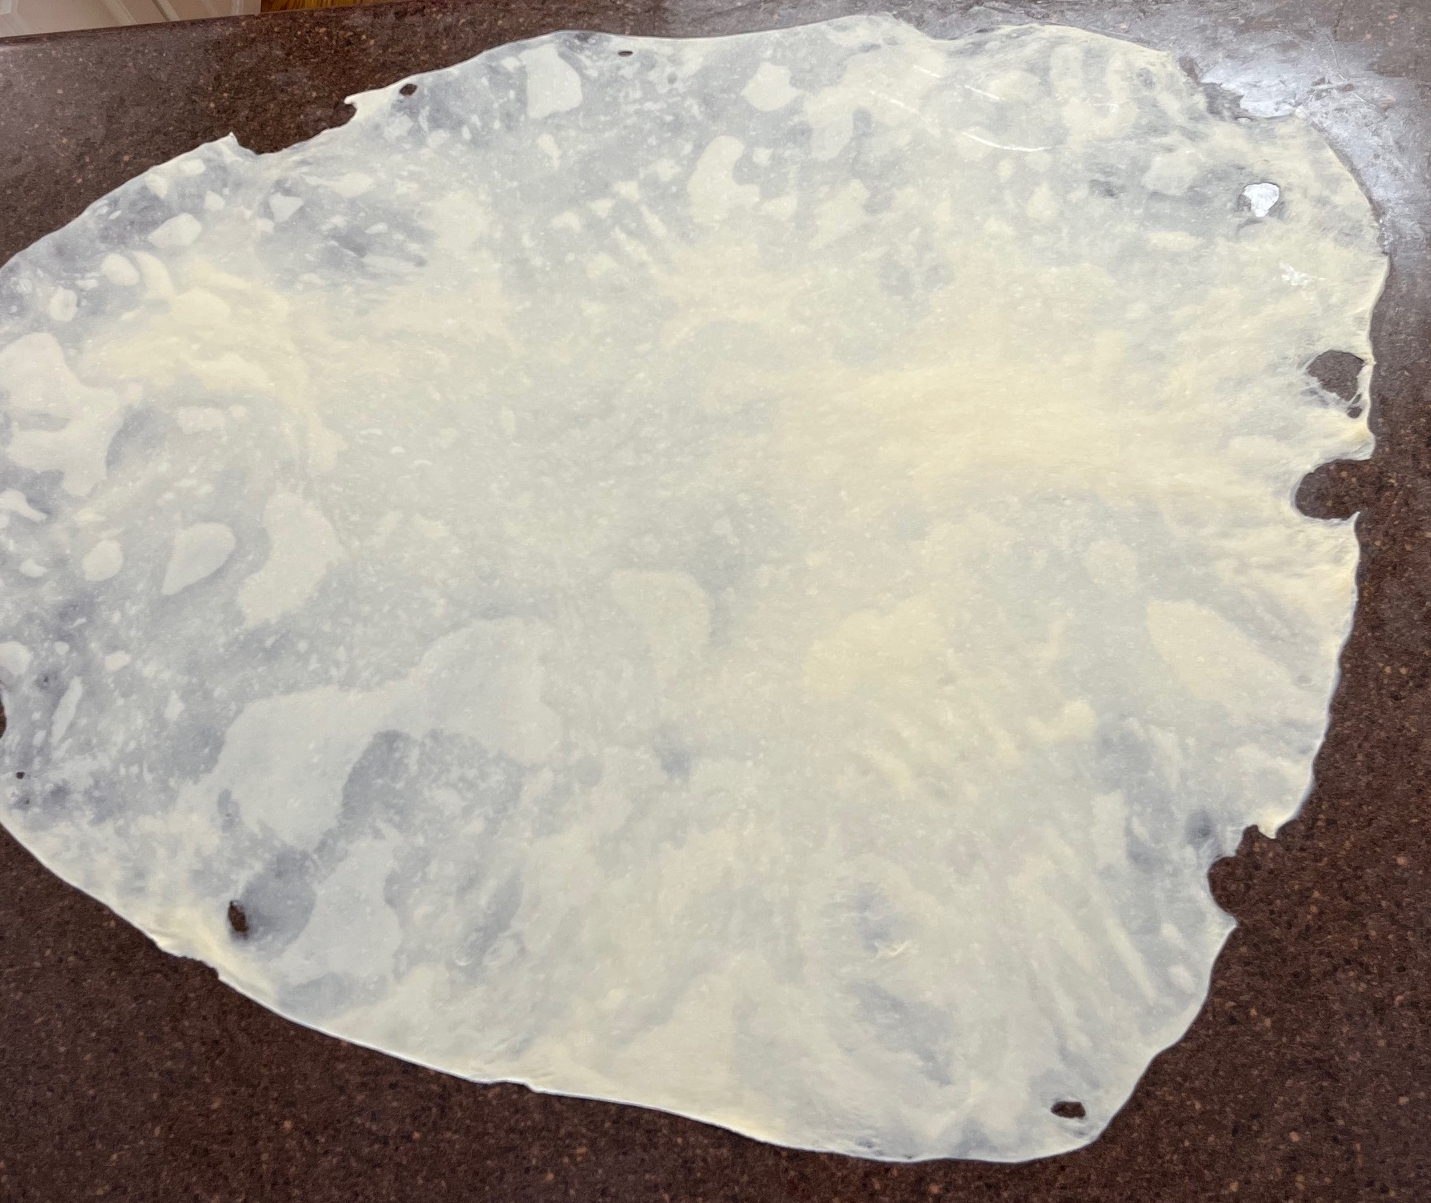
- Once the filling is ready and the dough has relaxed for at least one hour, place the dough on a clean, dry work-surface and roll it into a long rectangle.
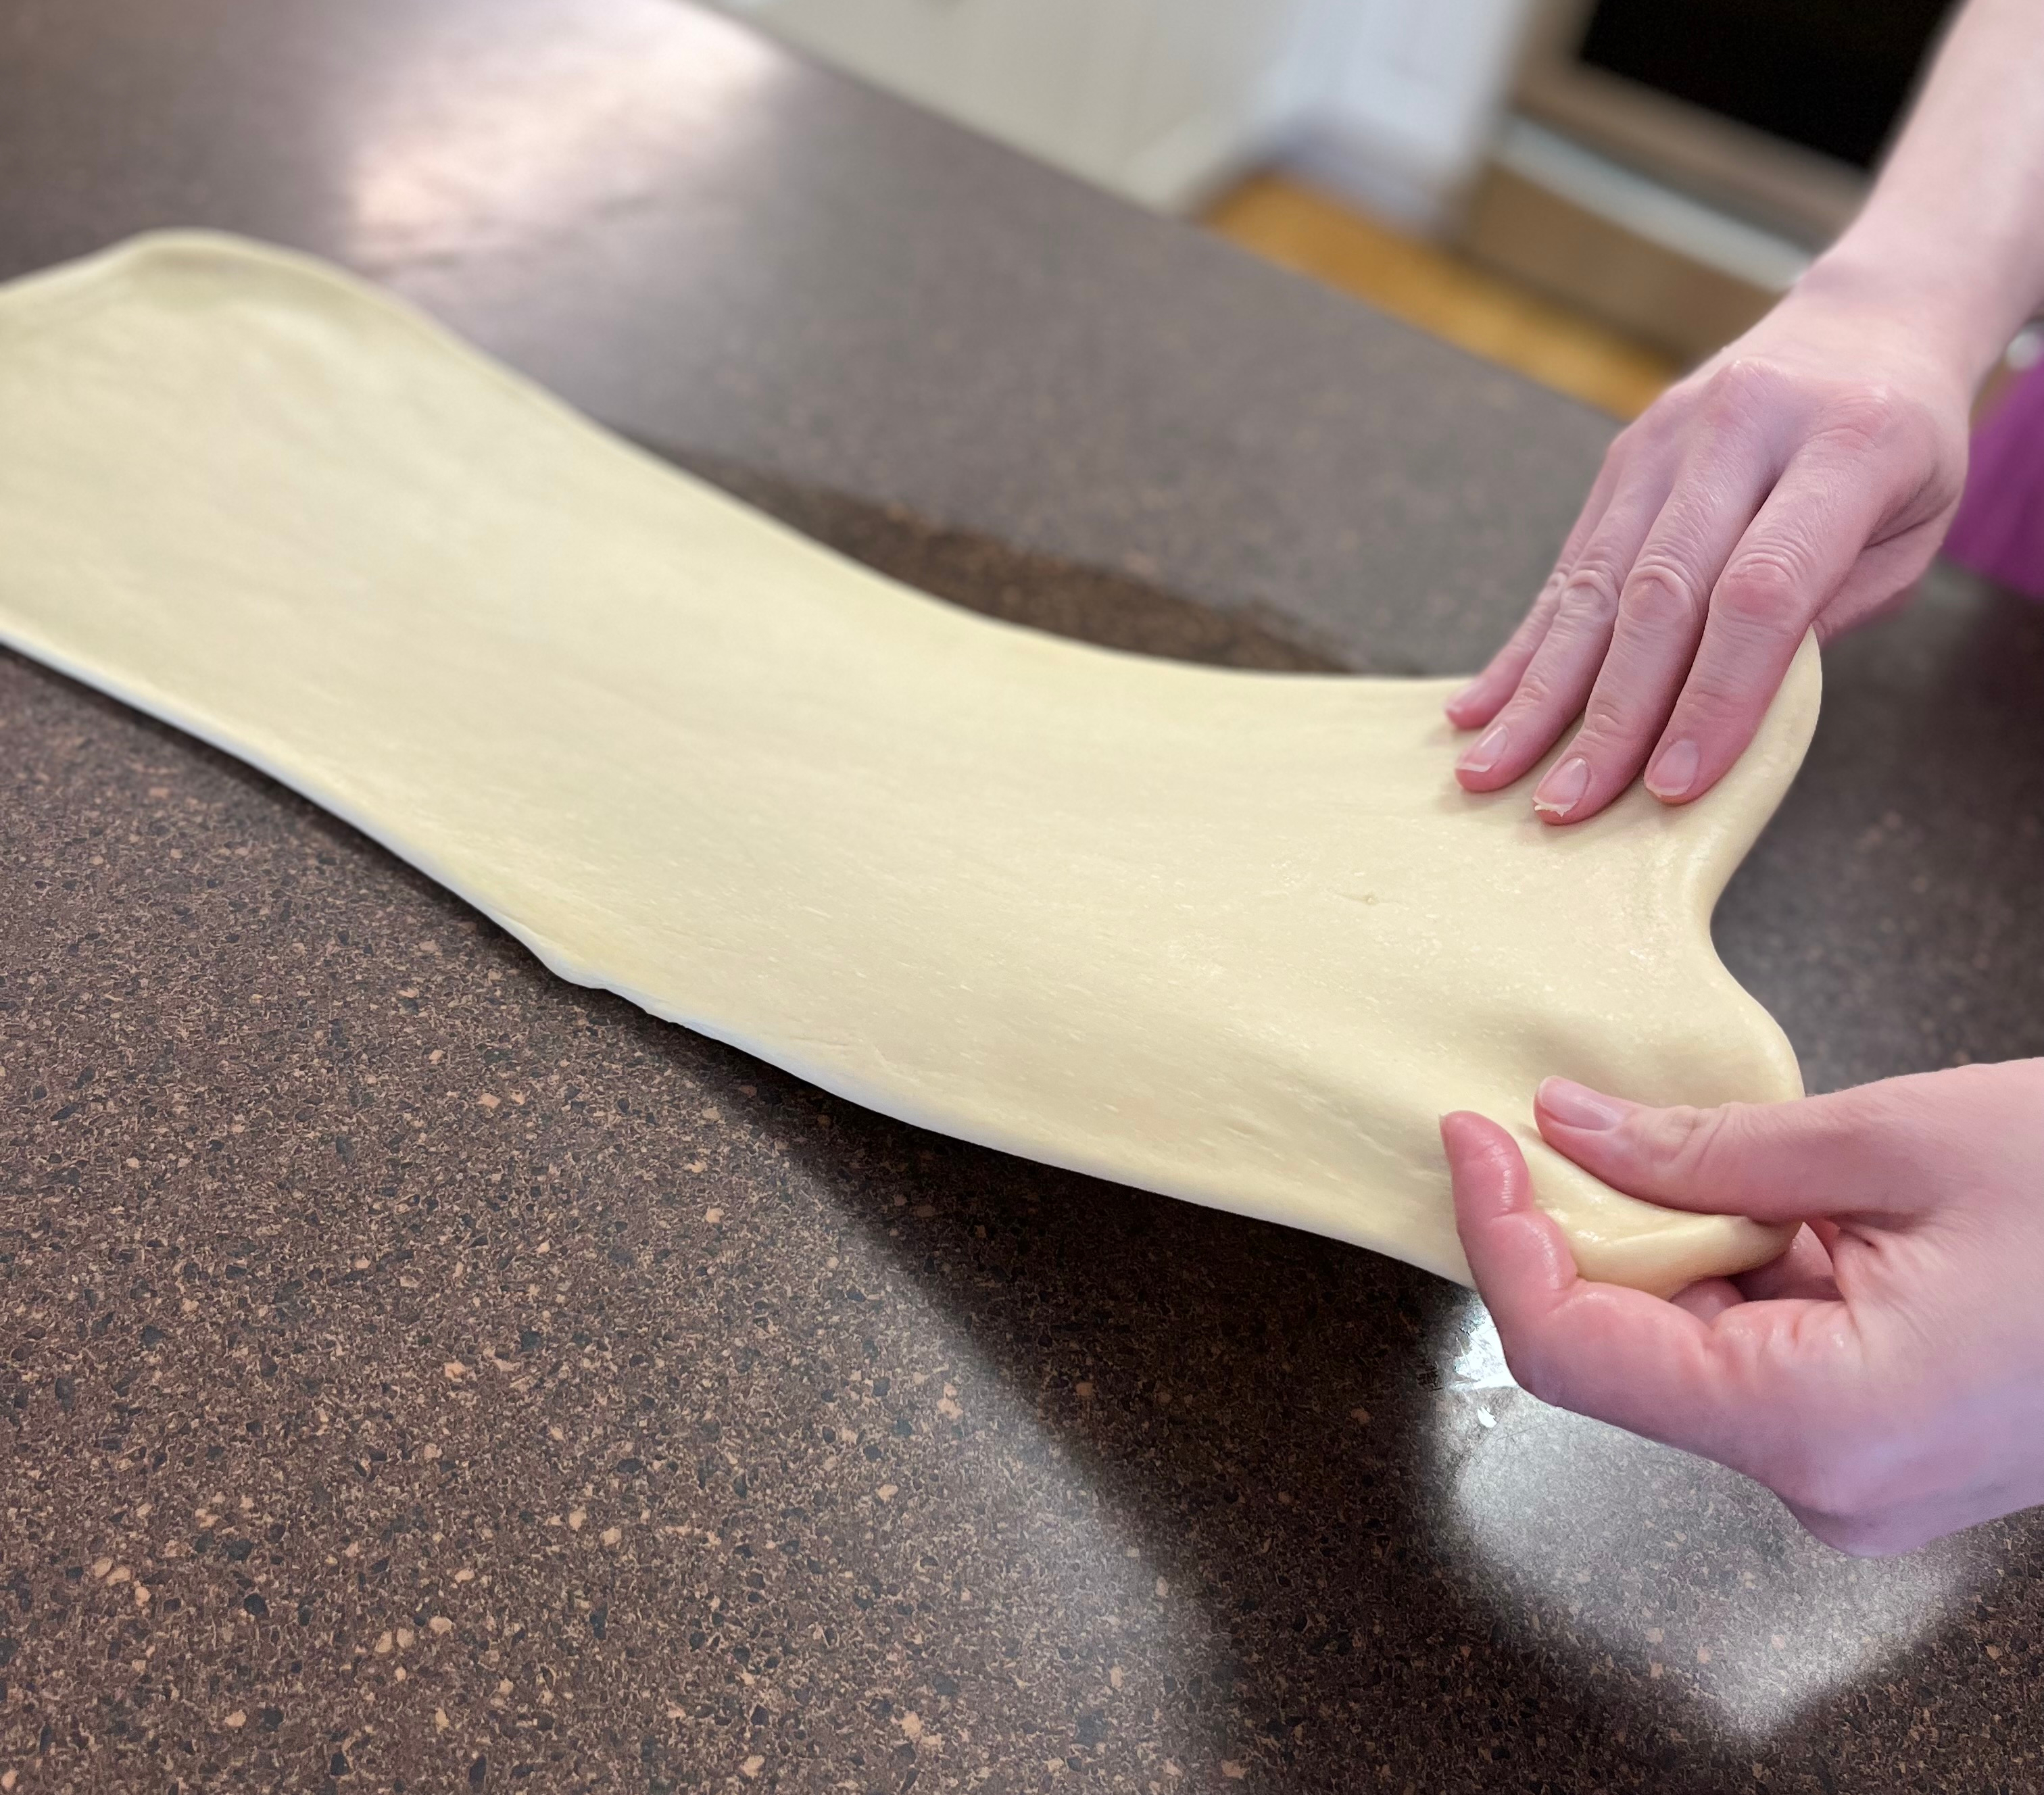
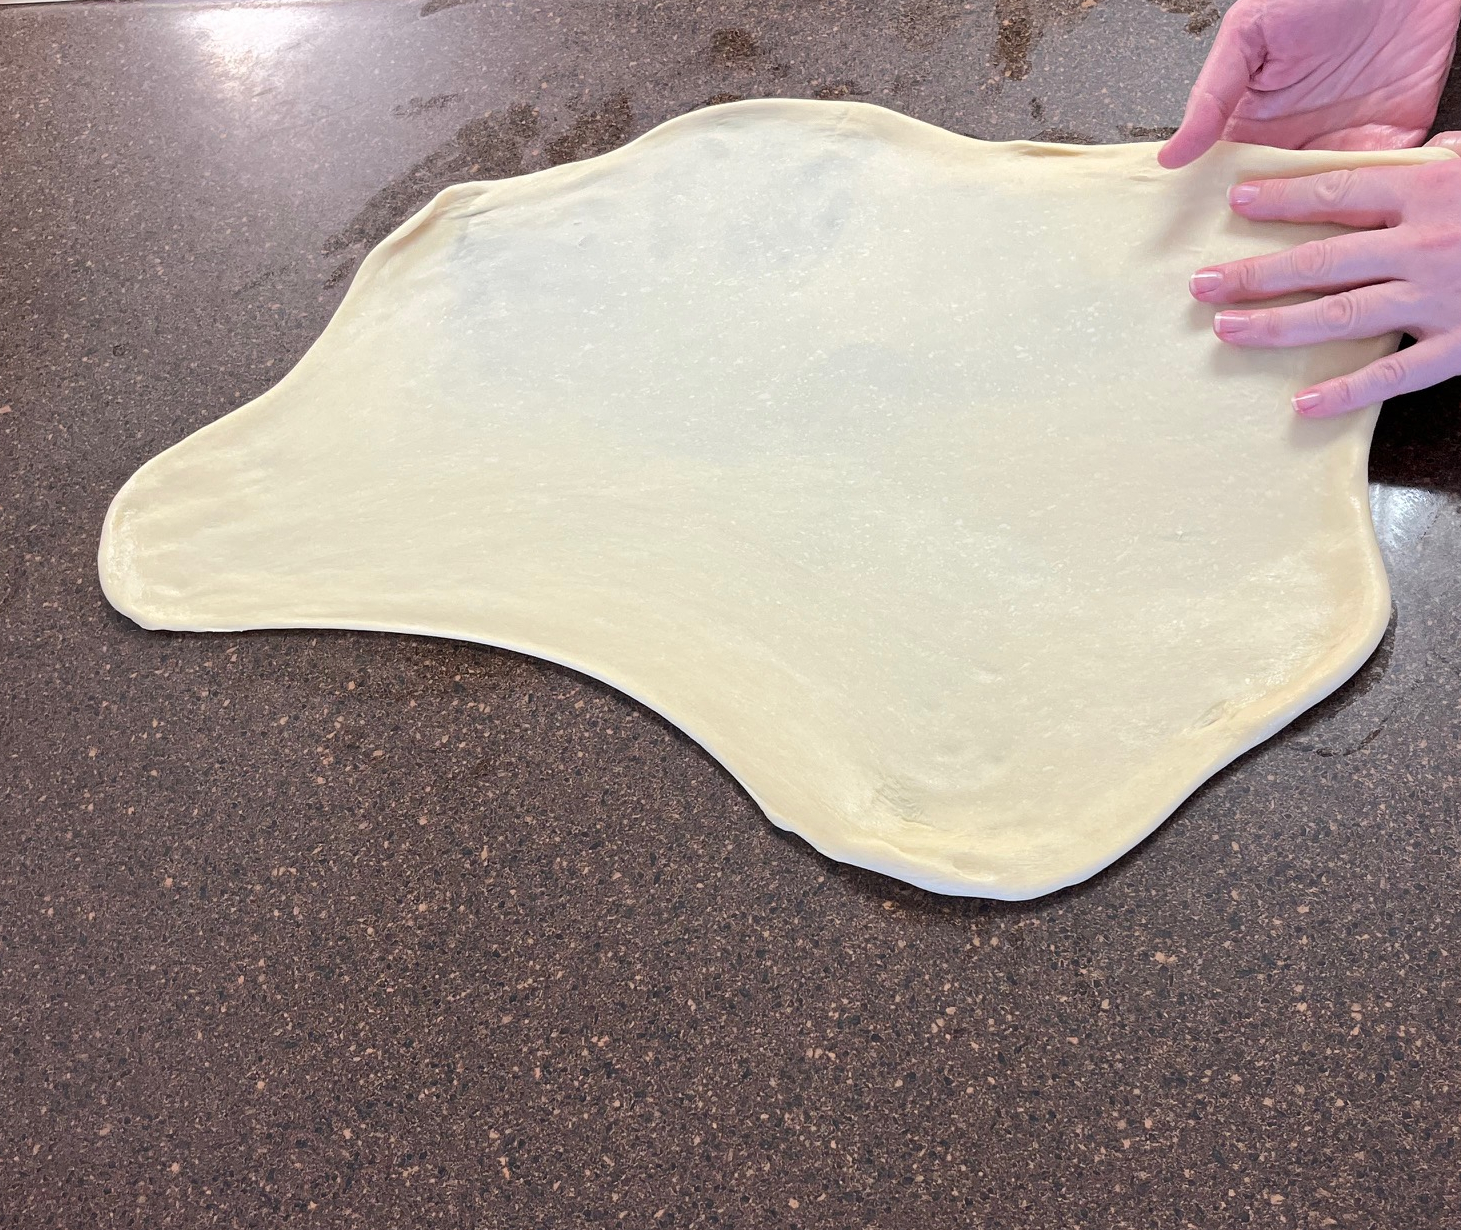
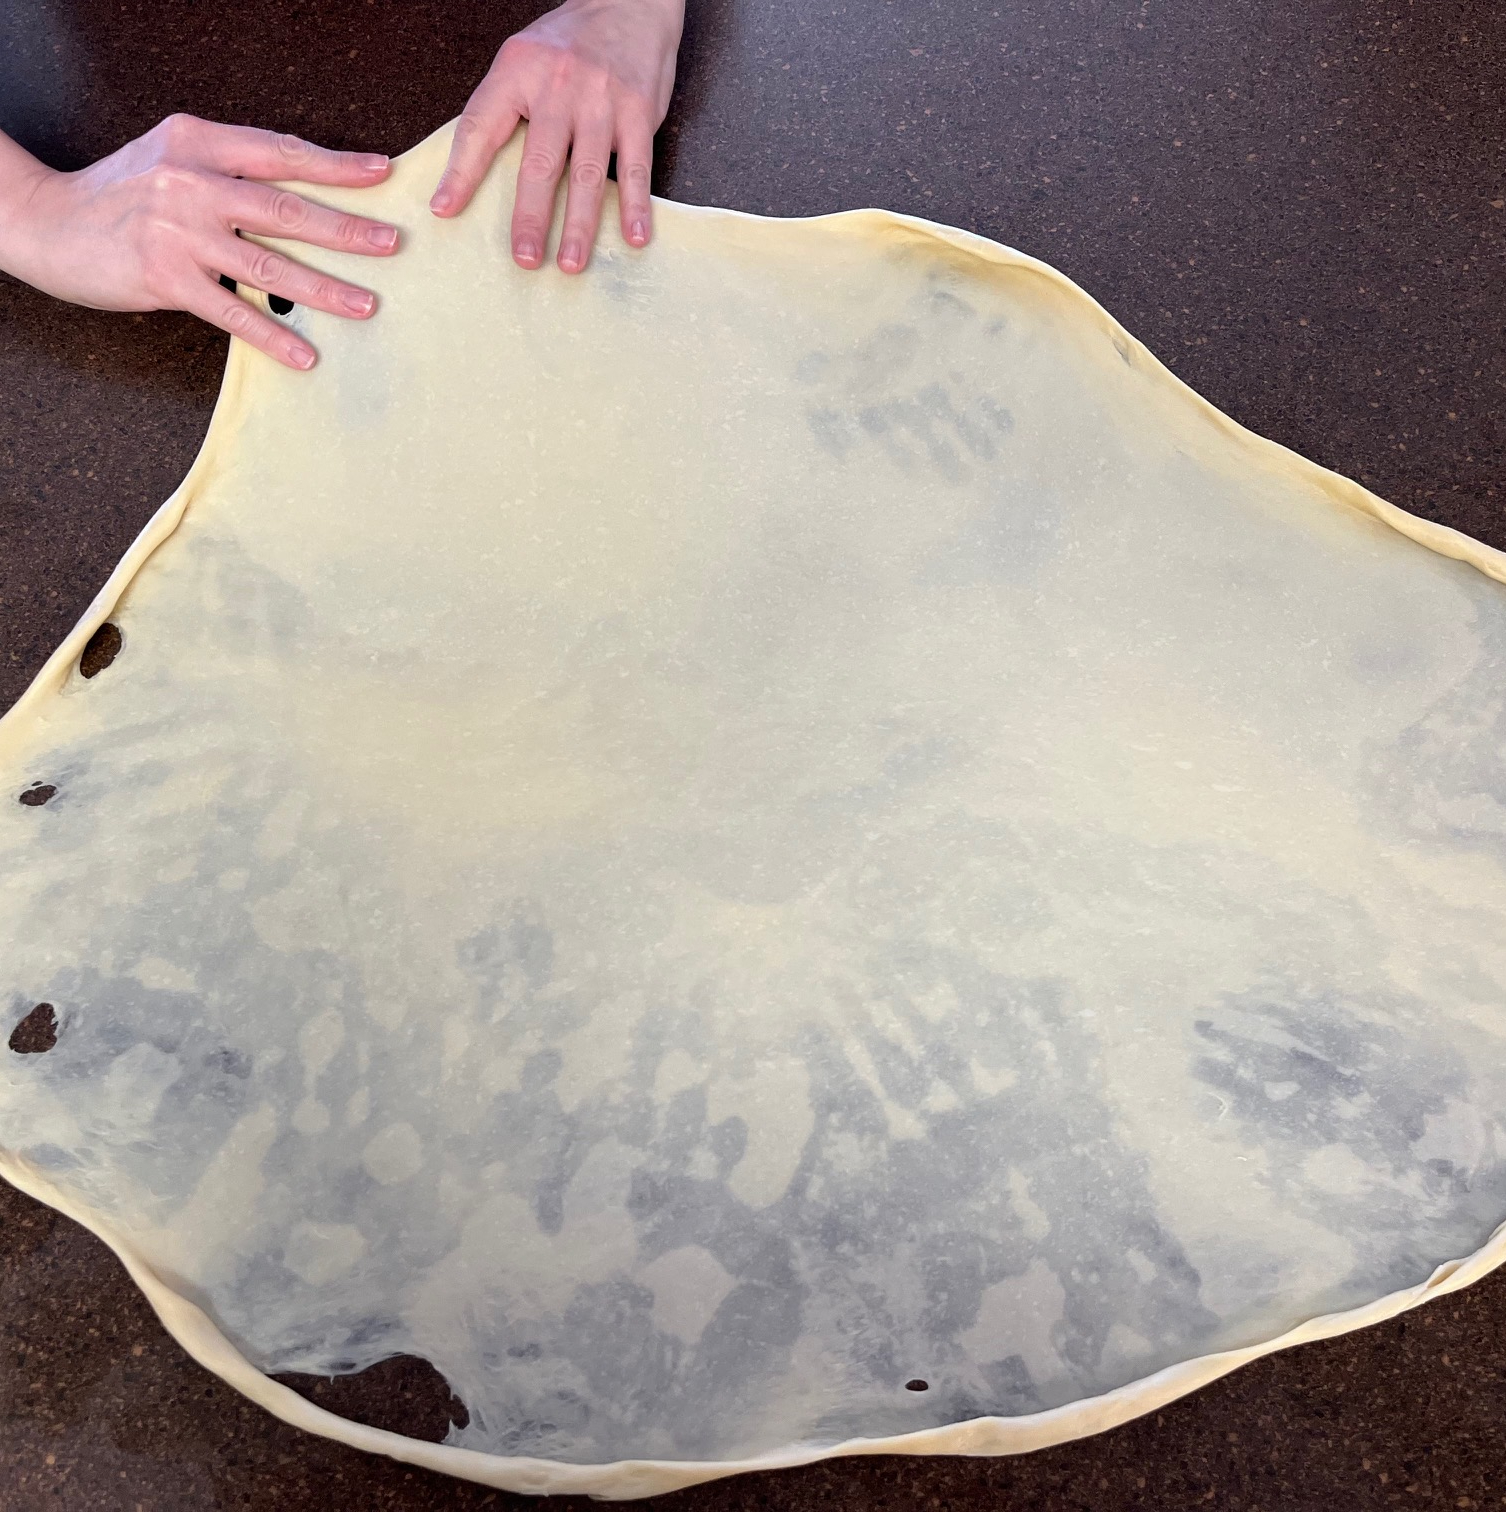
- Start to gently stretch the dough. Place your hand under the edge of the dough and gently pull towards you. Work your way around the table, pulling in every direction. The dough will probably tear in places – that’s ok. Just try to avoid any really large holes. I like to gently hit the dough on the table with an open palm as I stretch, to stick the dough to the table and keep it from rolling back over itself.
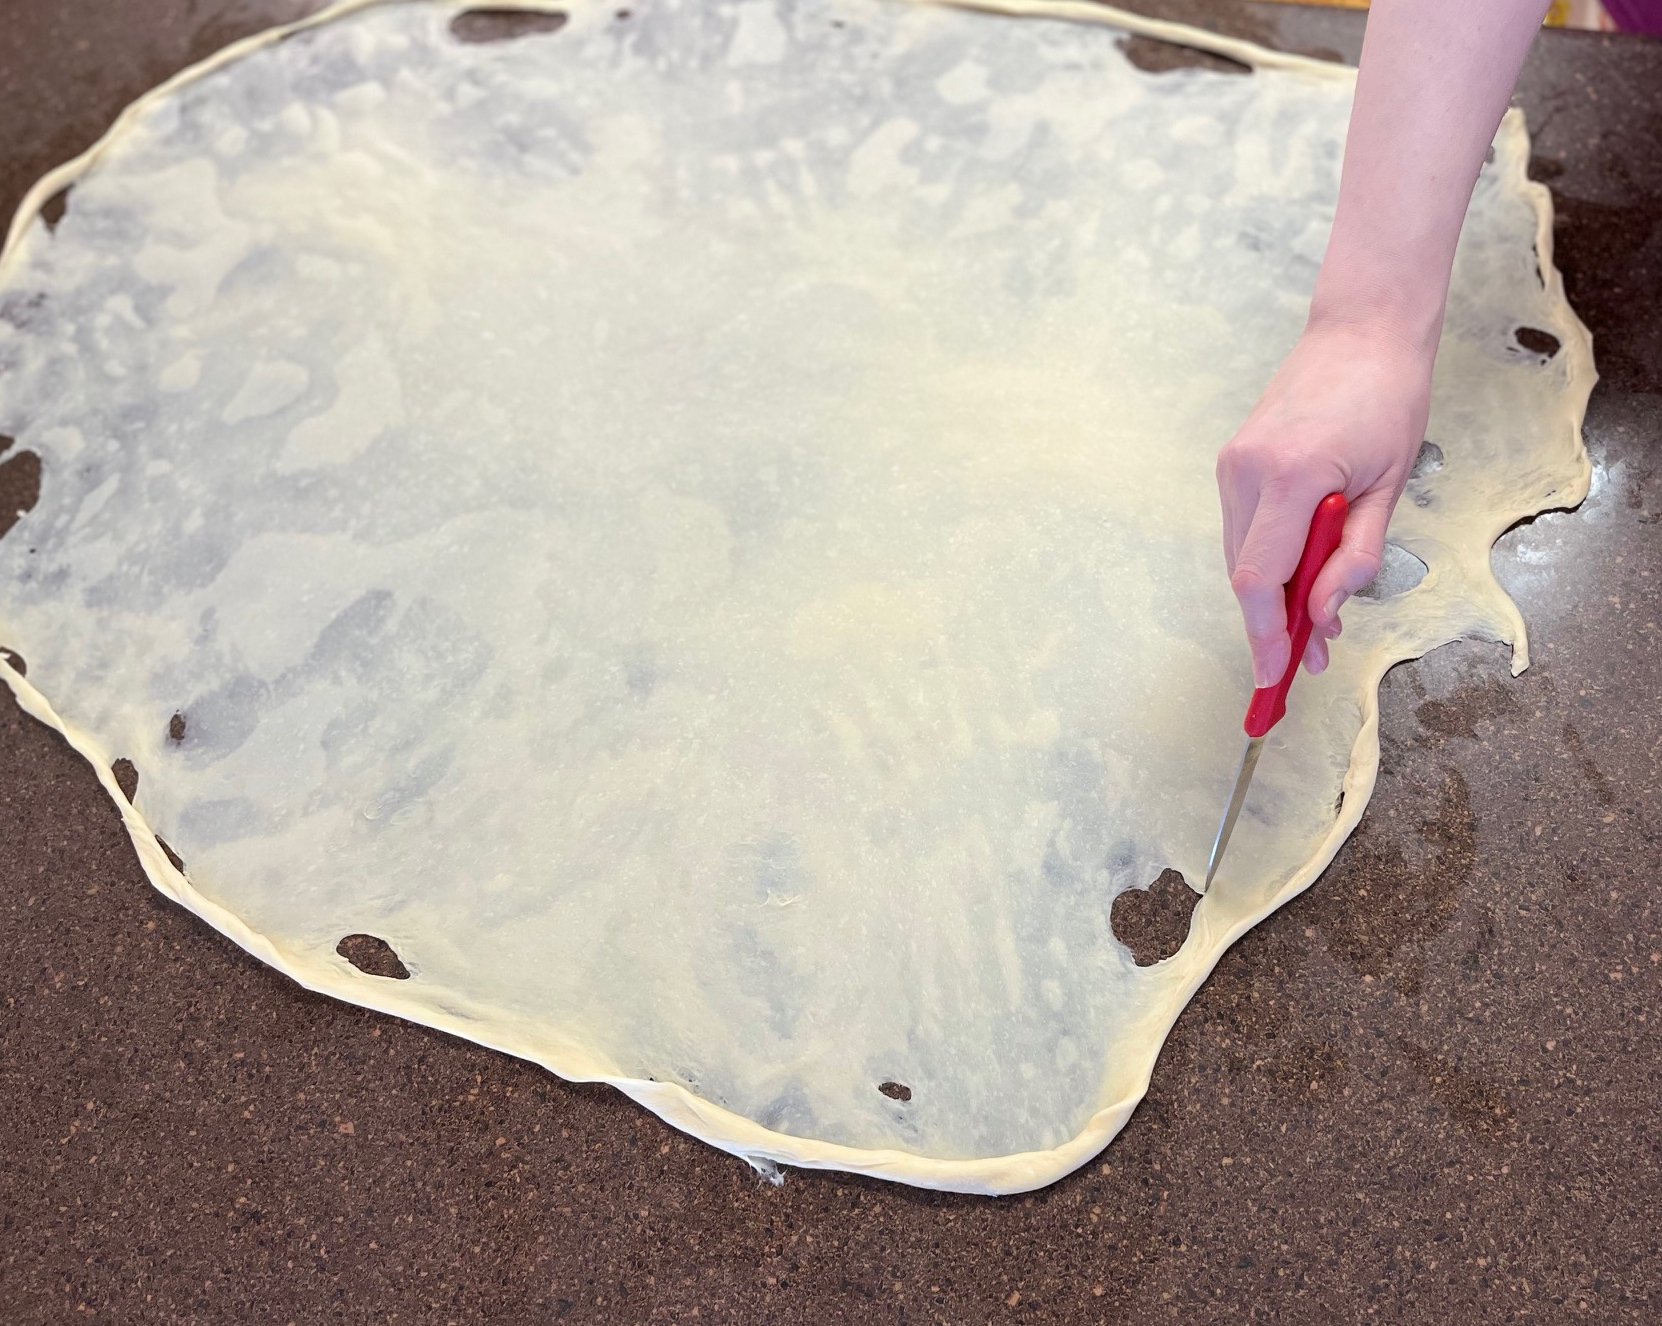
- Use a paring knife to trim the thick dough on the outer edges.
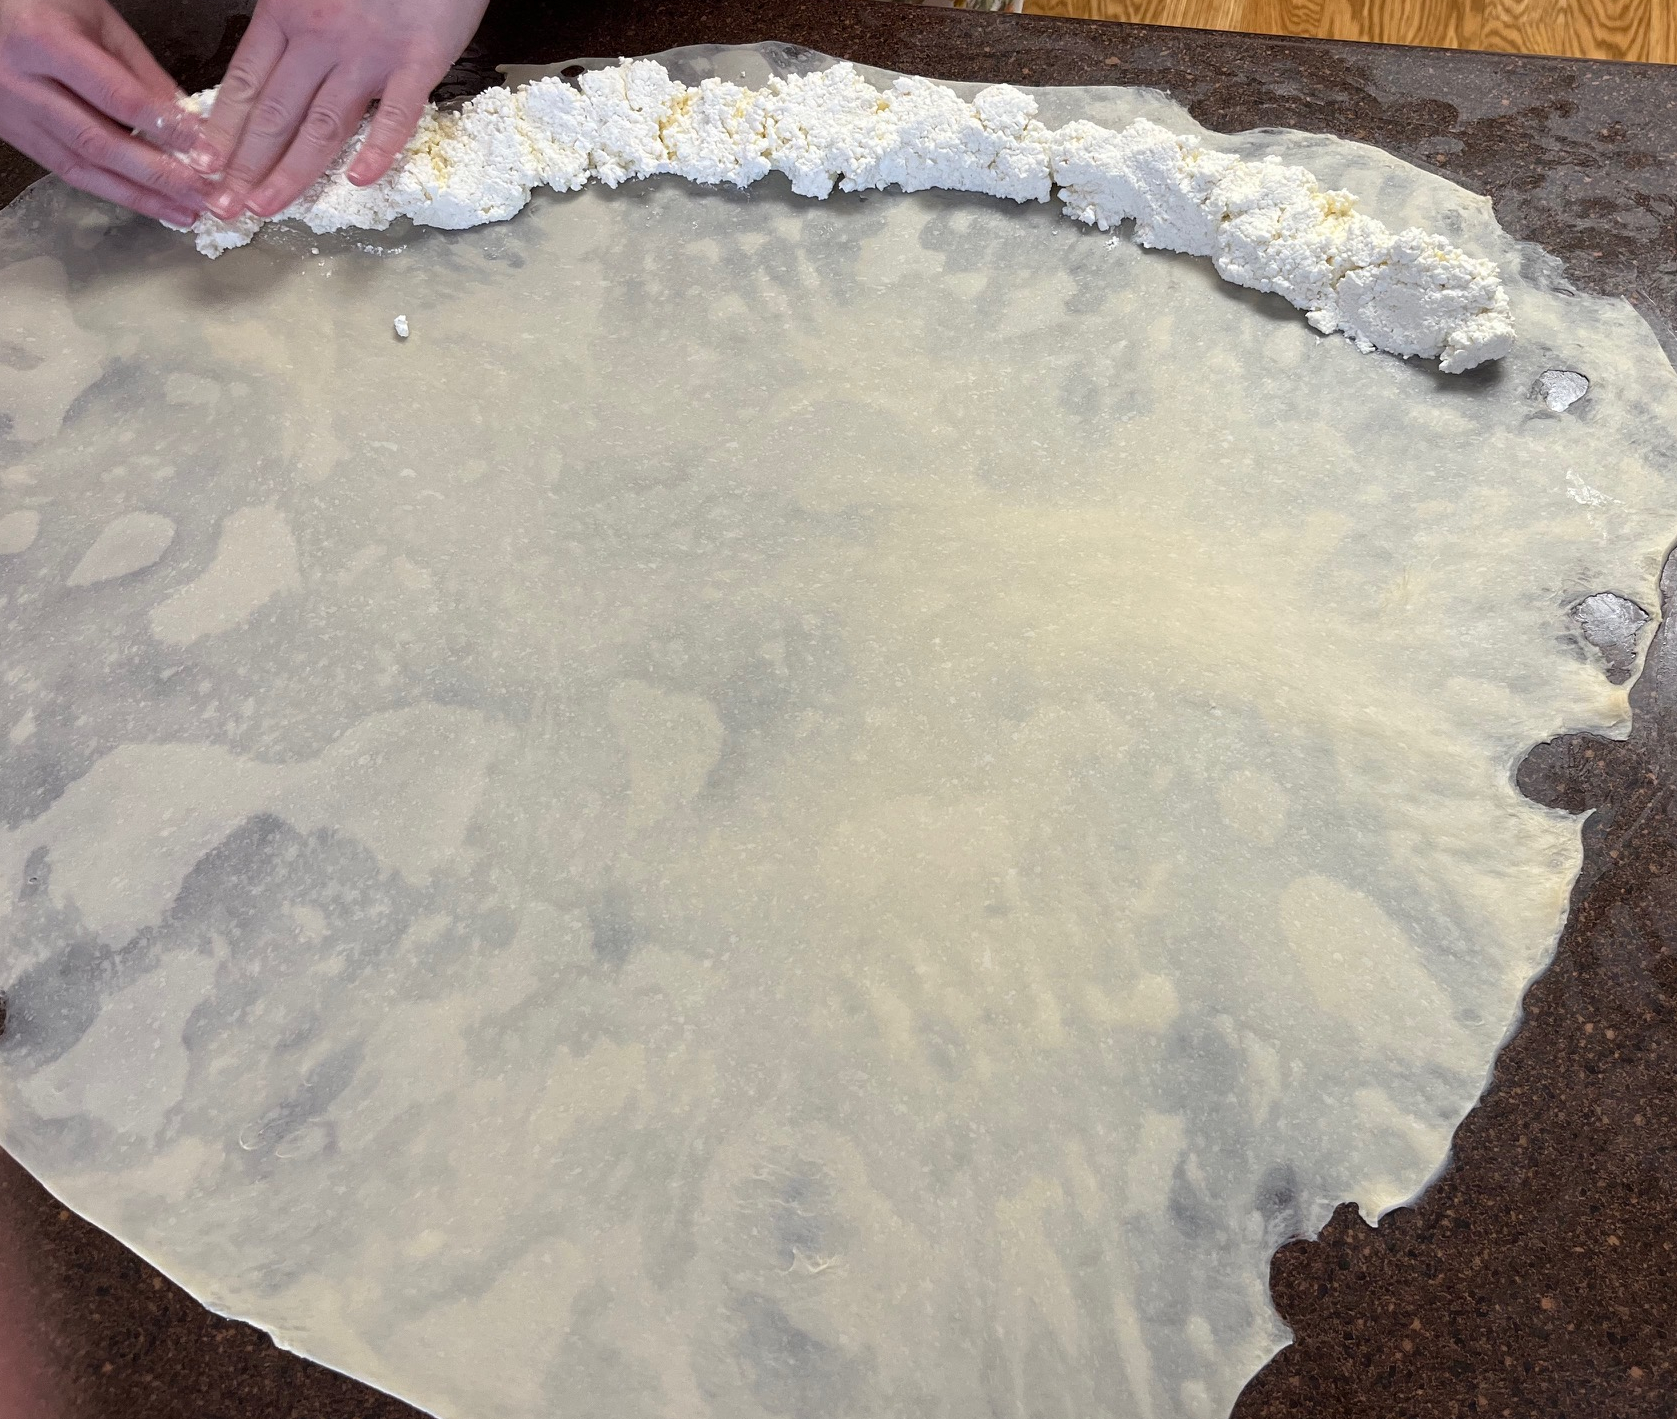
- Place half of the filling in a row about 1-inch from the edge of a long side of the dough. (For a small, hors d’ouevres size knish, cut the dough in half lengthwise – then place a much smaller row of filling along the edge and proceed.)
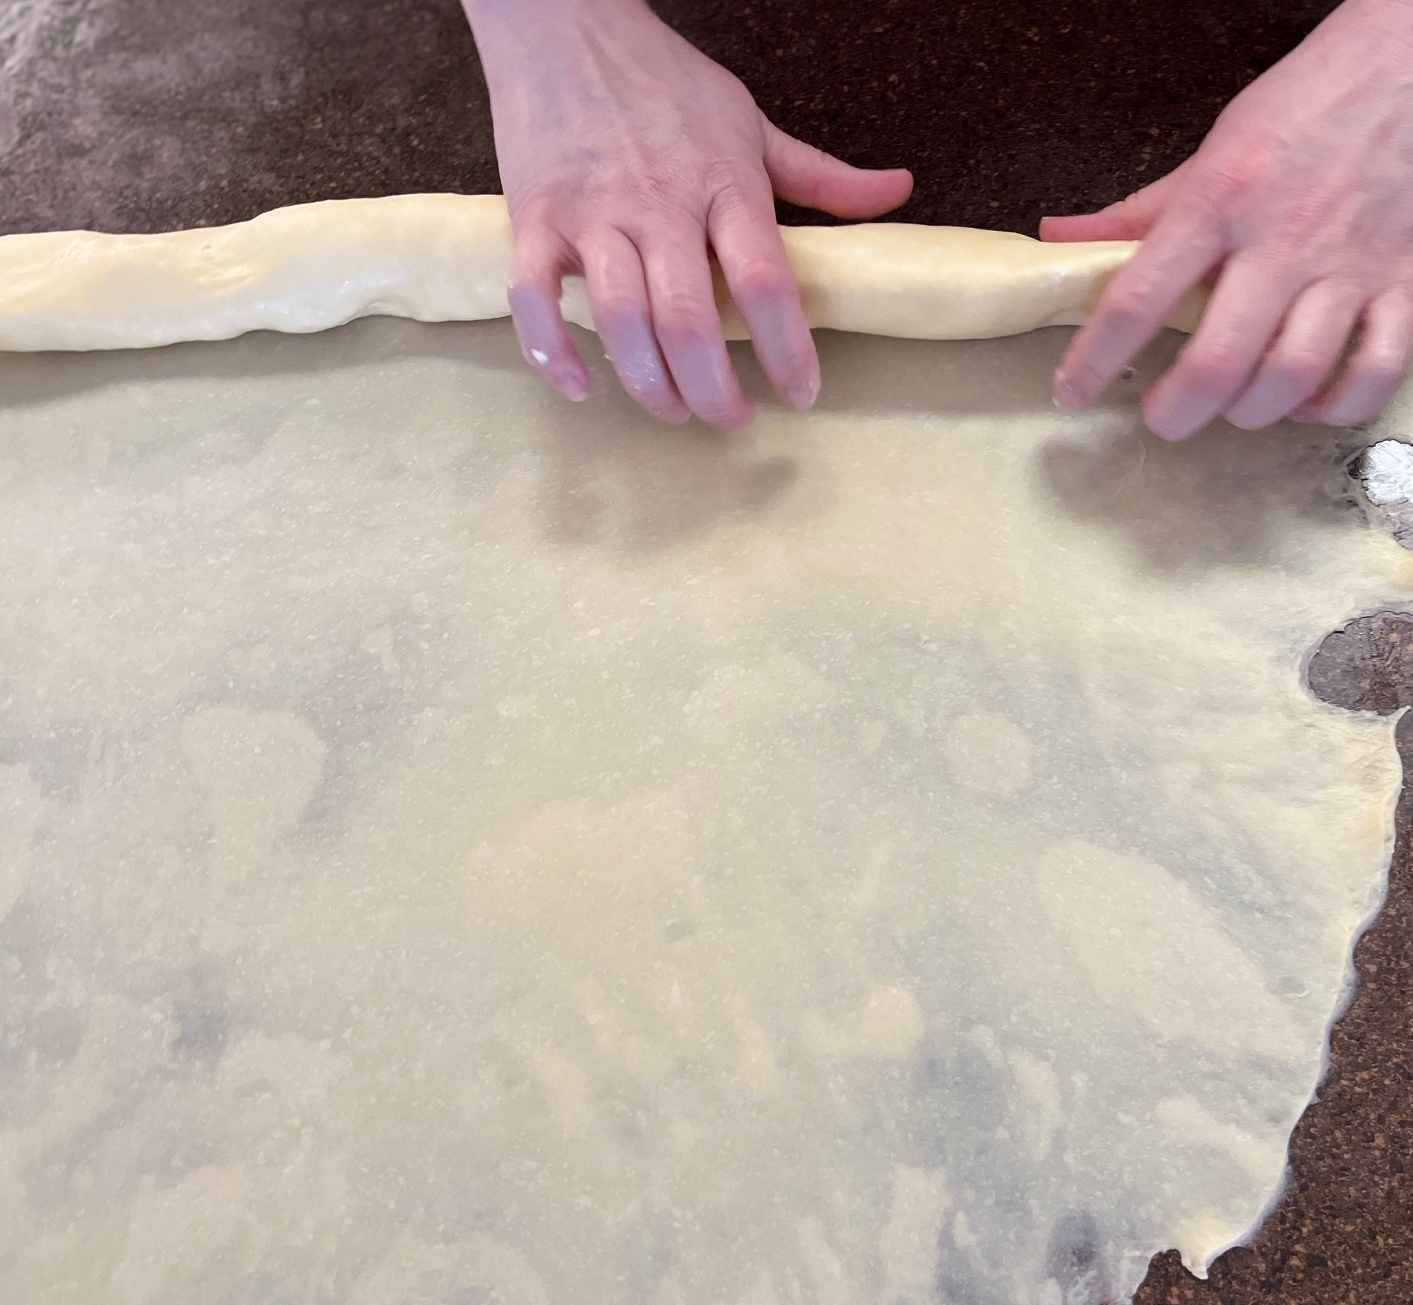
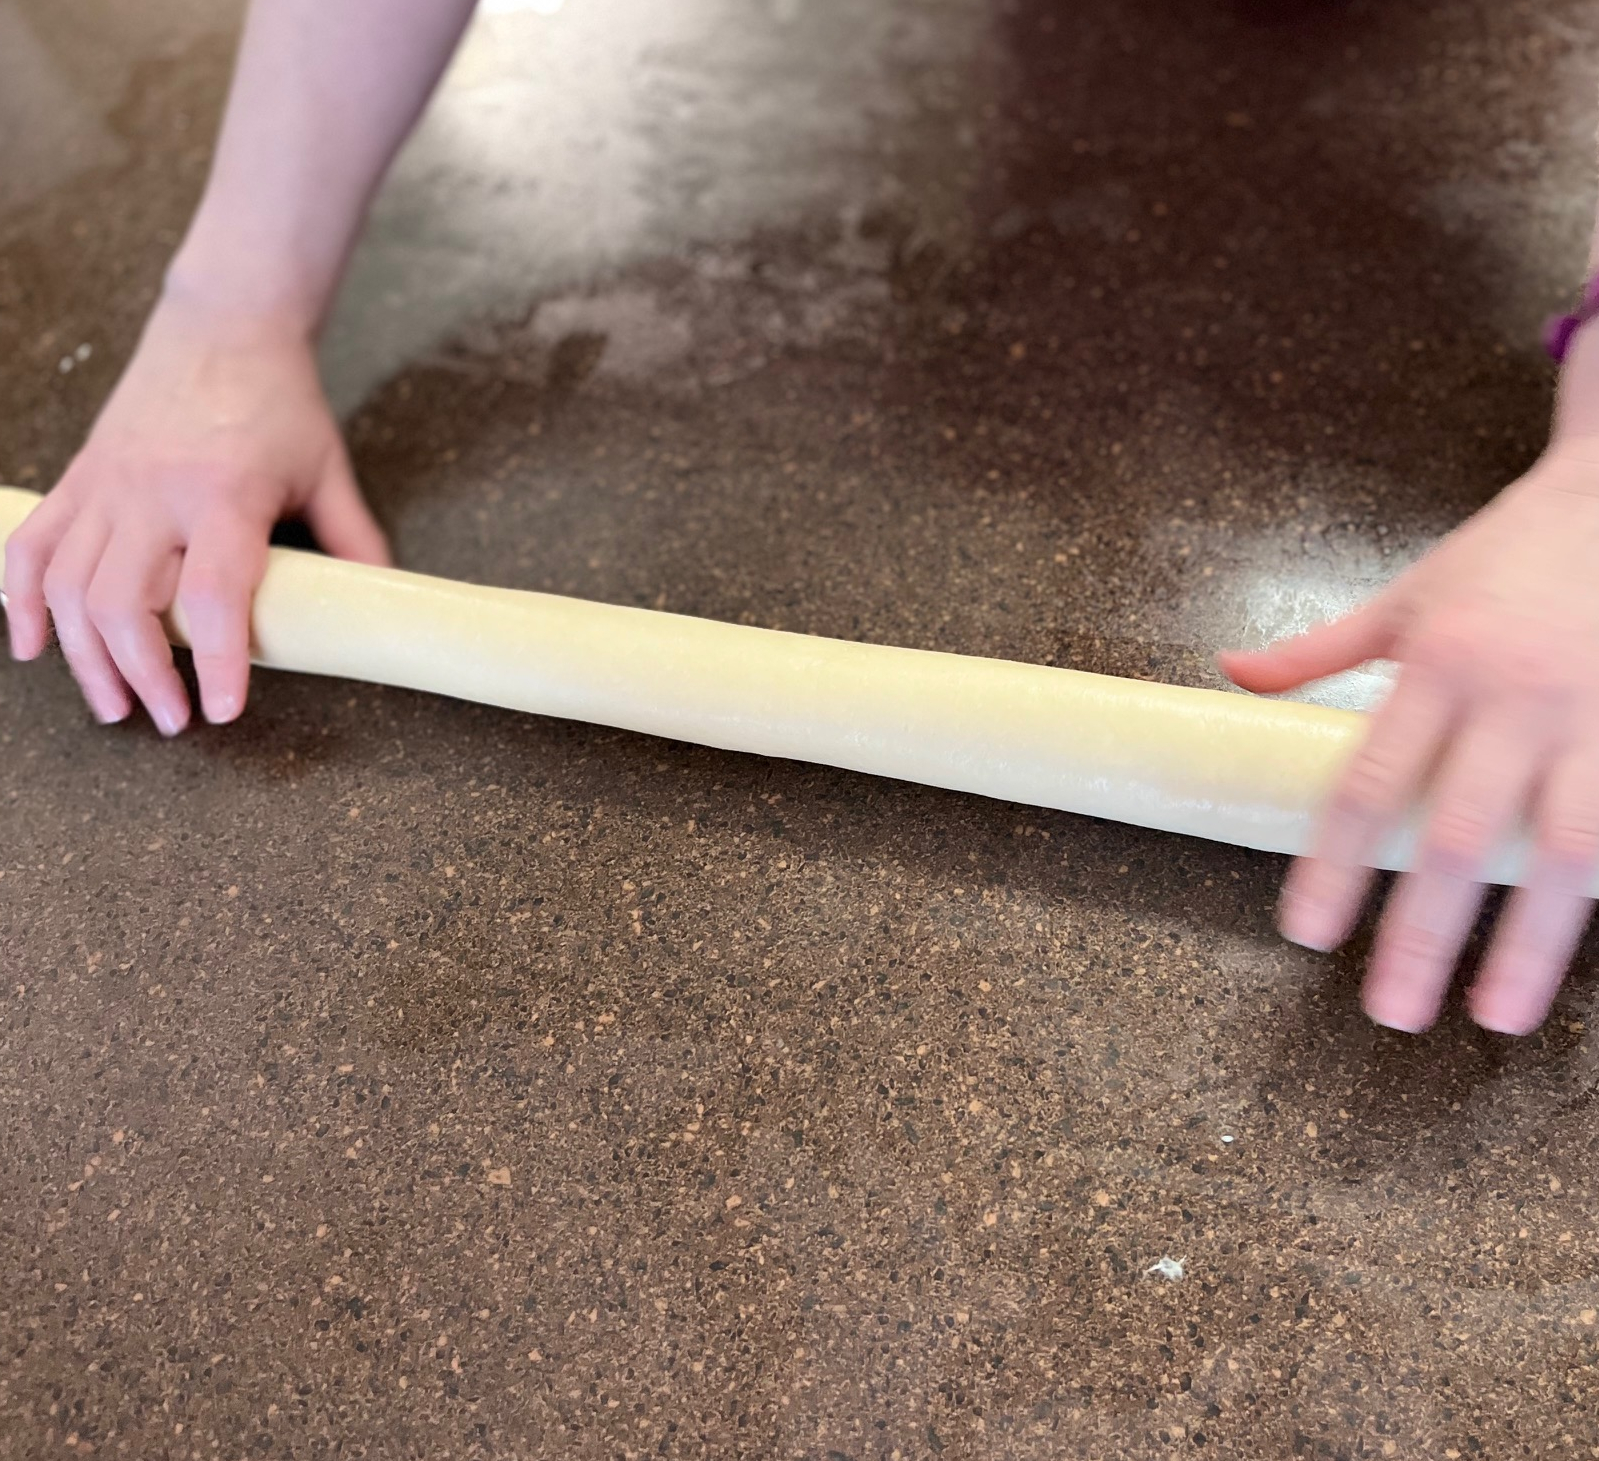
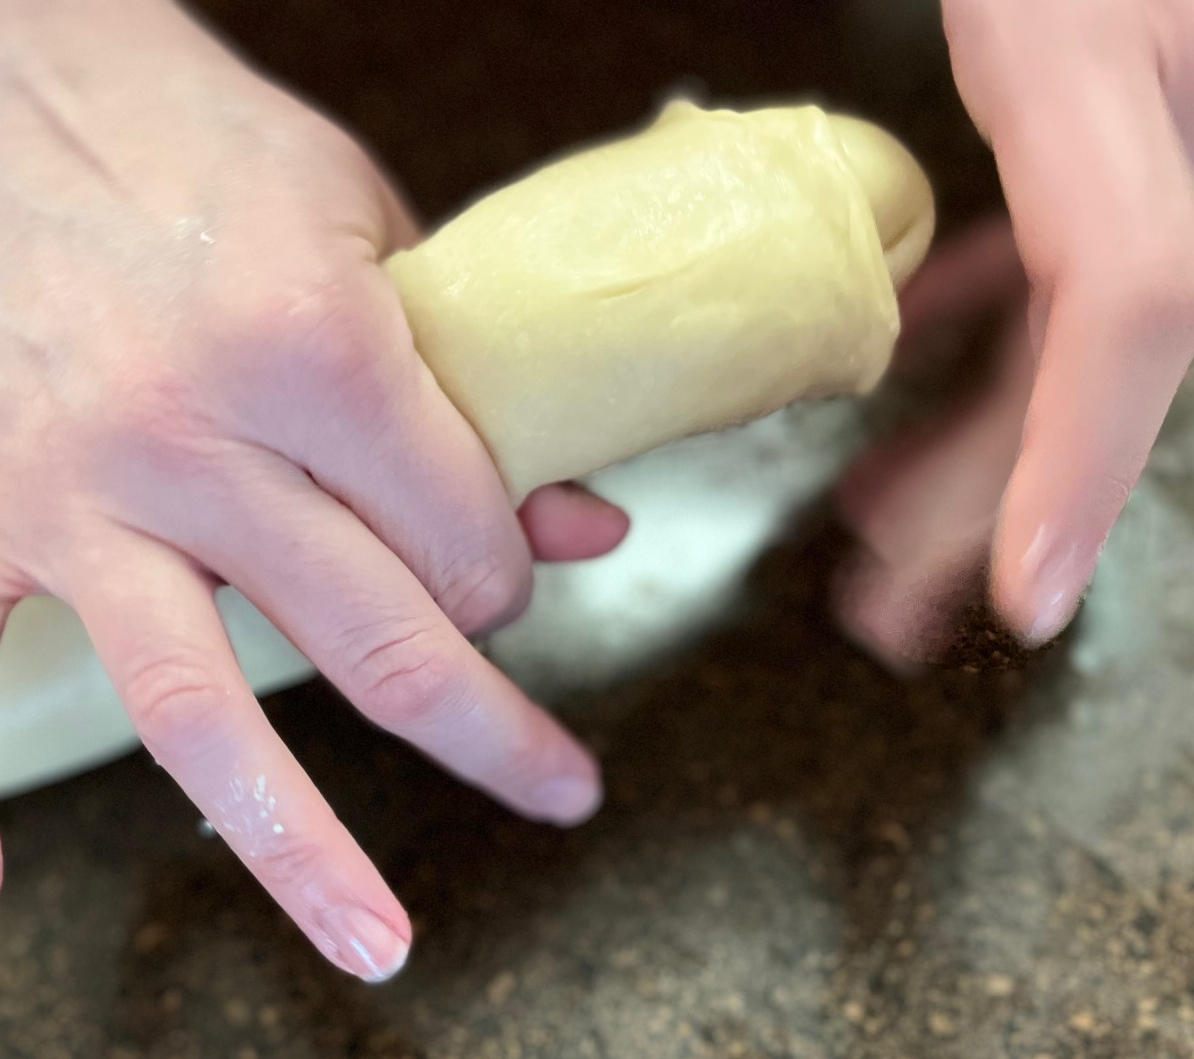
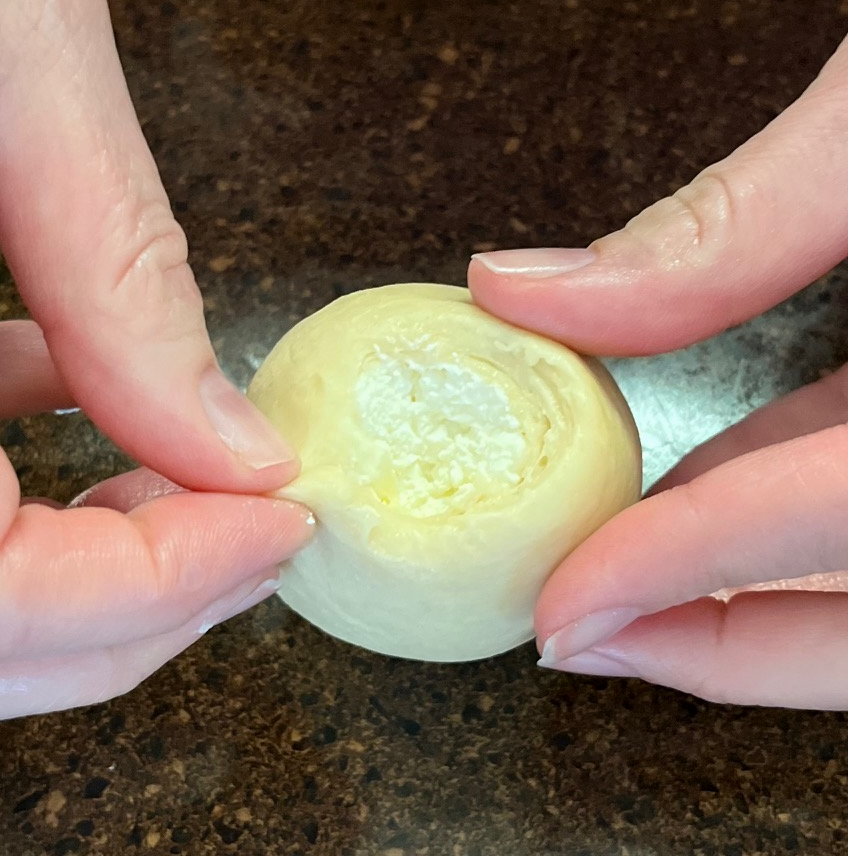
- Start pulling the edge of the dough up and over the filling. Continue to roll the filling in the dough, gently pulling the rope towards you stretching the dough a little more, until you have one long rope.
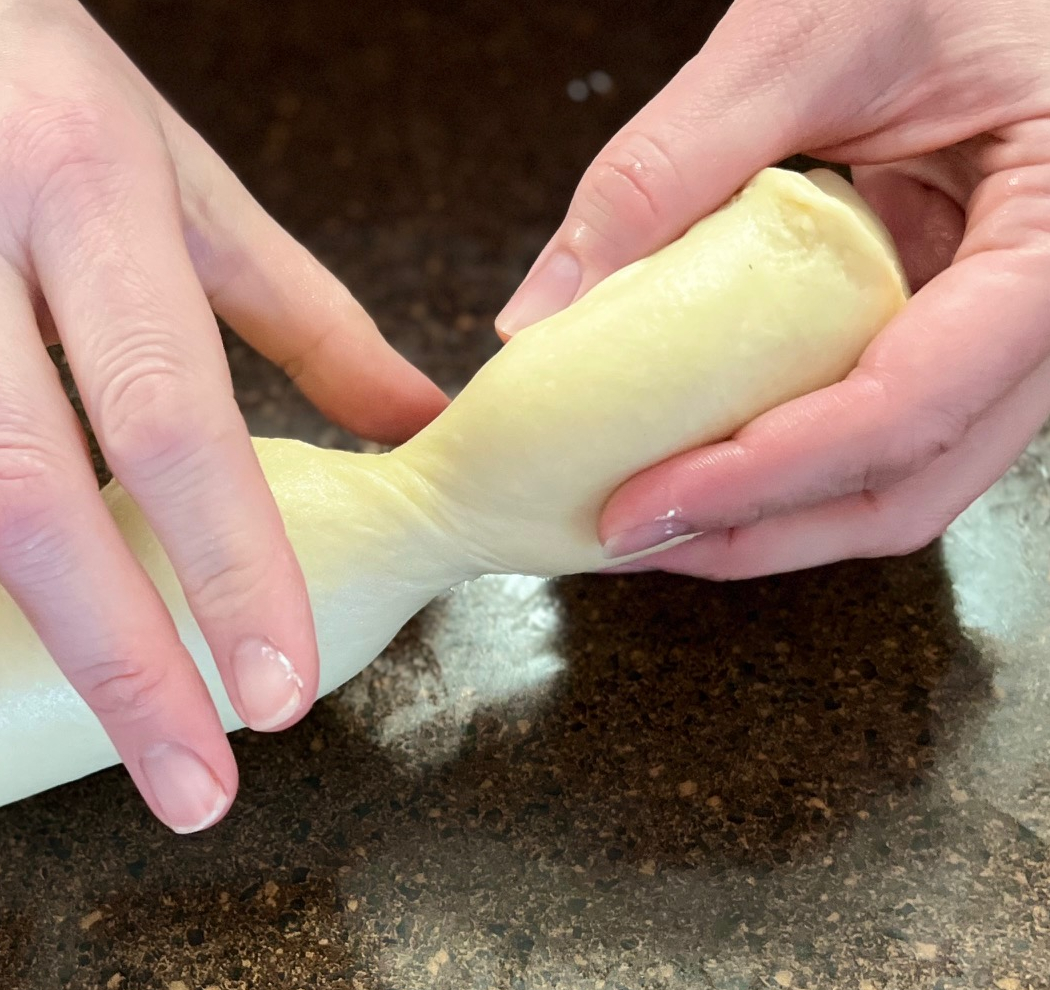
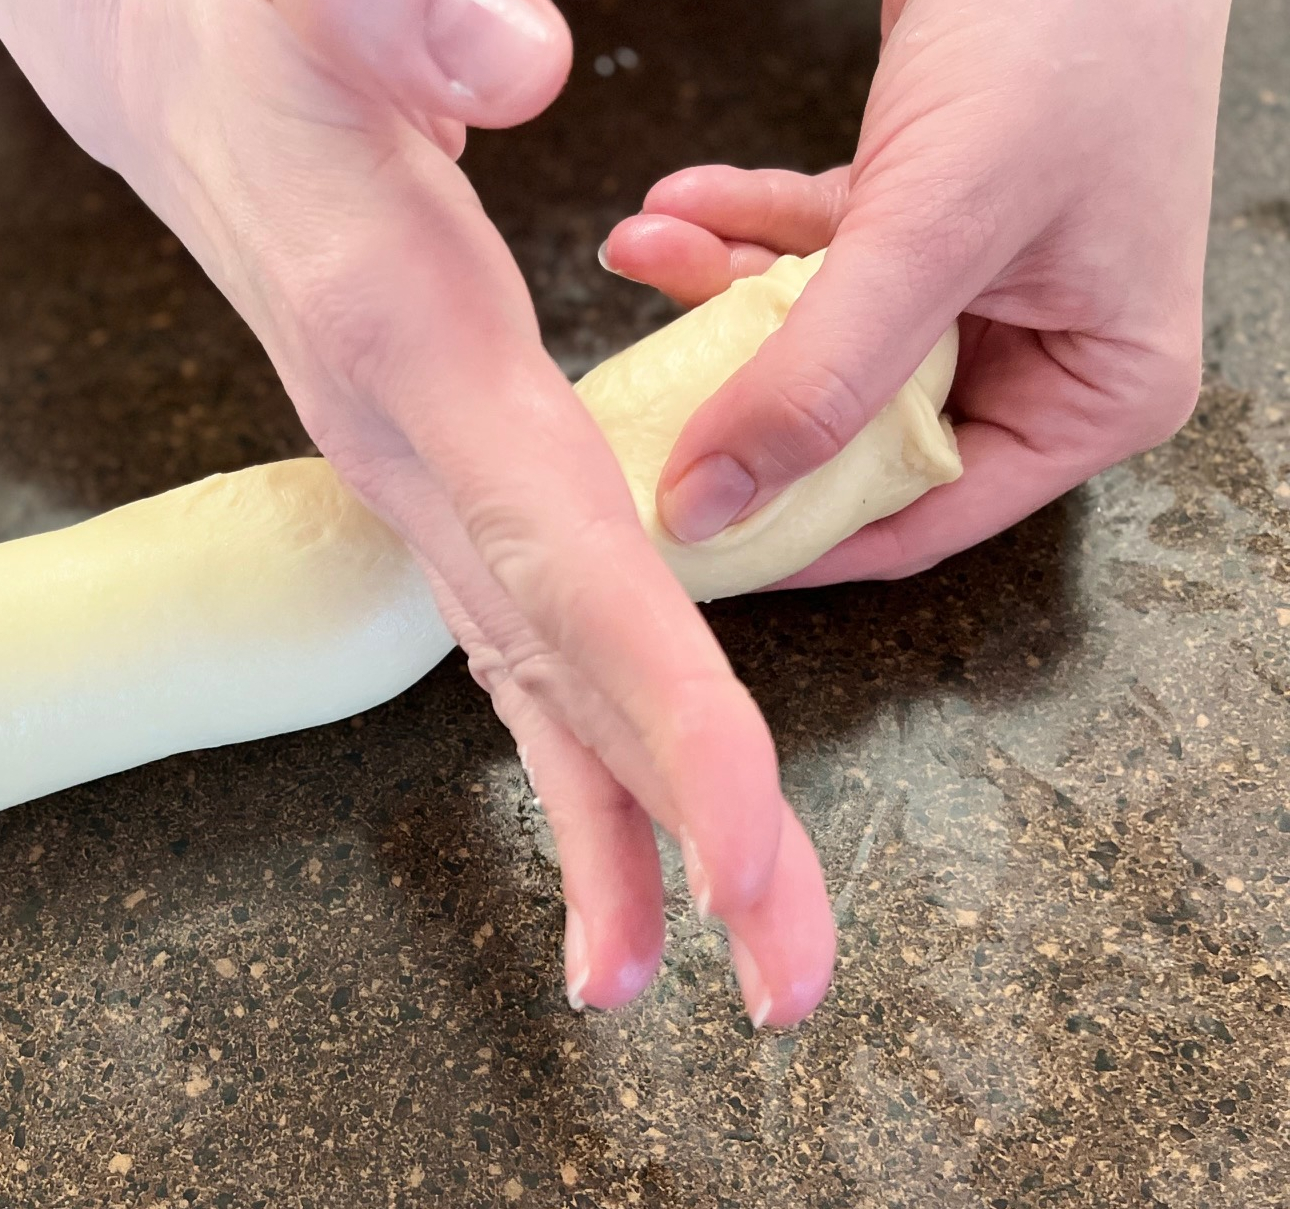
- Pinch the rope where you would like to cut it. This is where you decide how large you’d like the knish to be. I aim for about 2 inches. Then twist the dough where you want to cut it. Then use the side of your hand to saw the knish off of the rope. Continue to do this until the entire rope has been cut up.
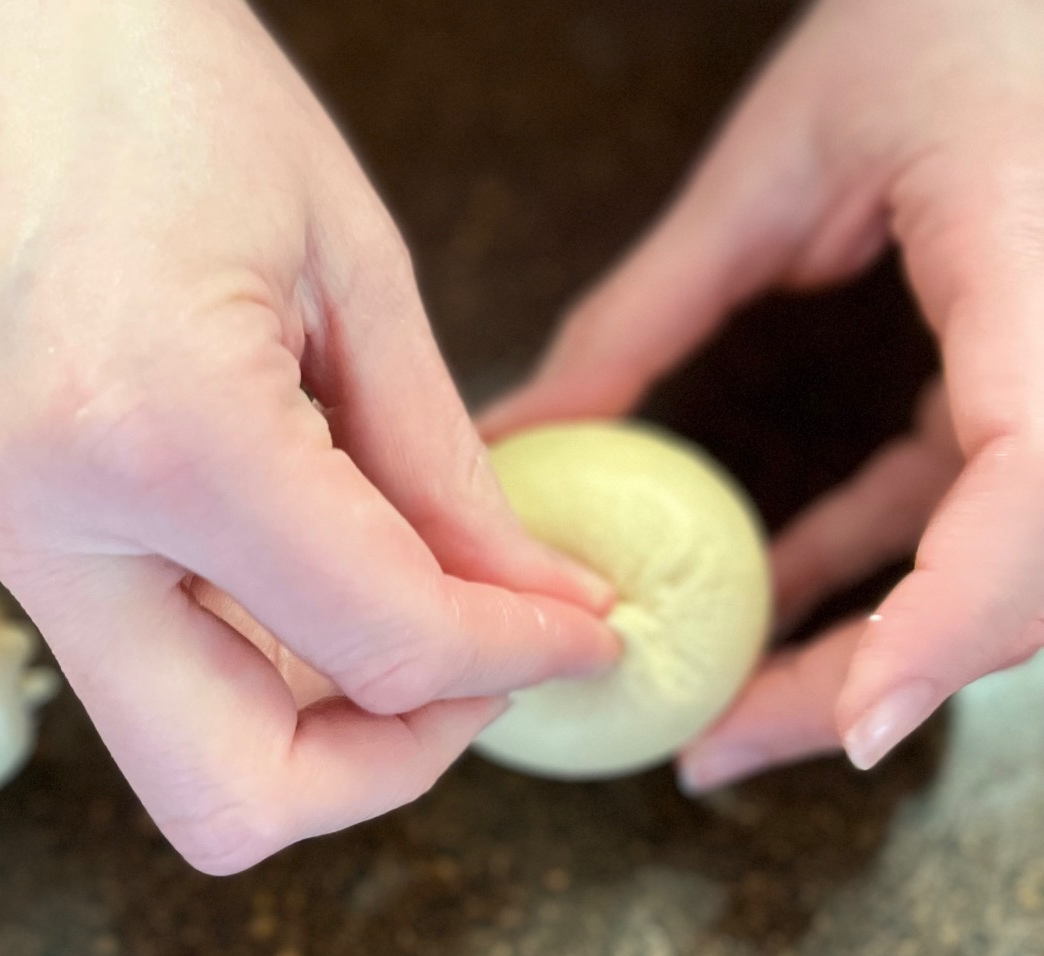
- If you don’t twist the rope enough before sawing off a piece, you’ll end up with an open end. You need to stretch the dough over the ends and pinch them together. You must pinch the dough on both the top and bottom of every knish to help them stay closed while baking.
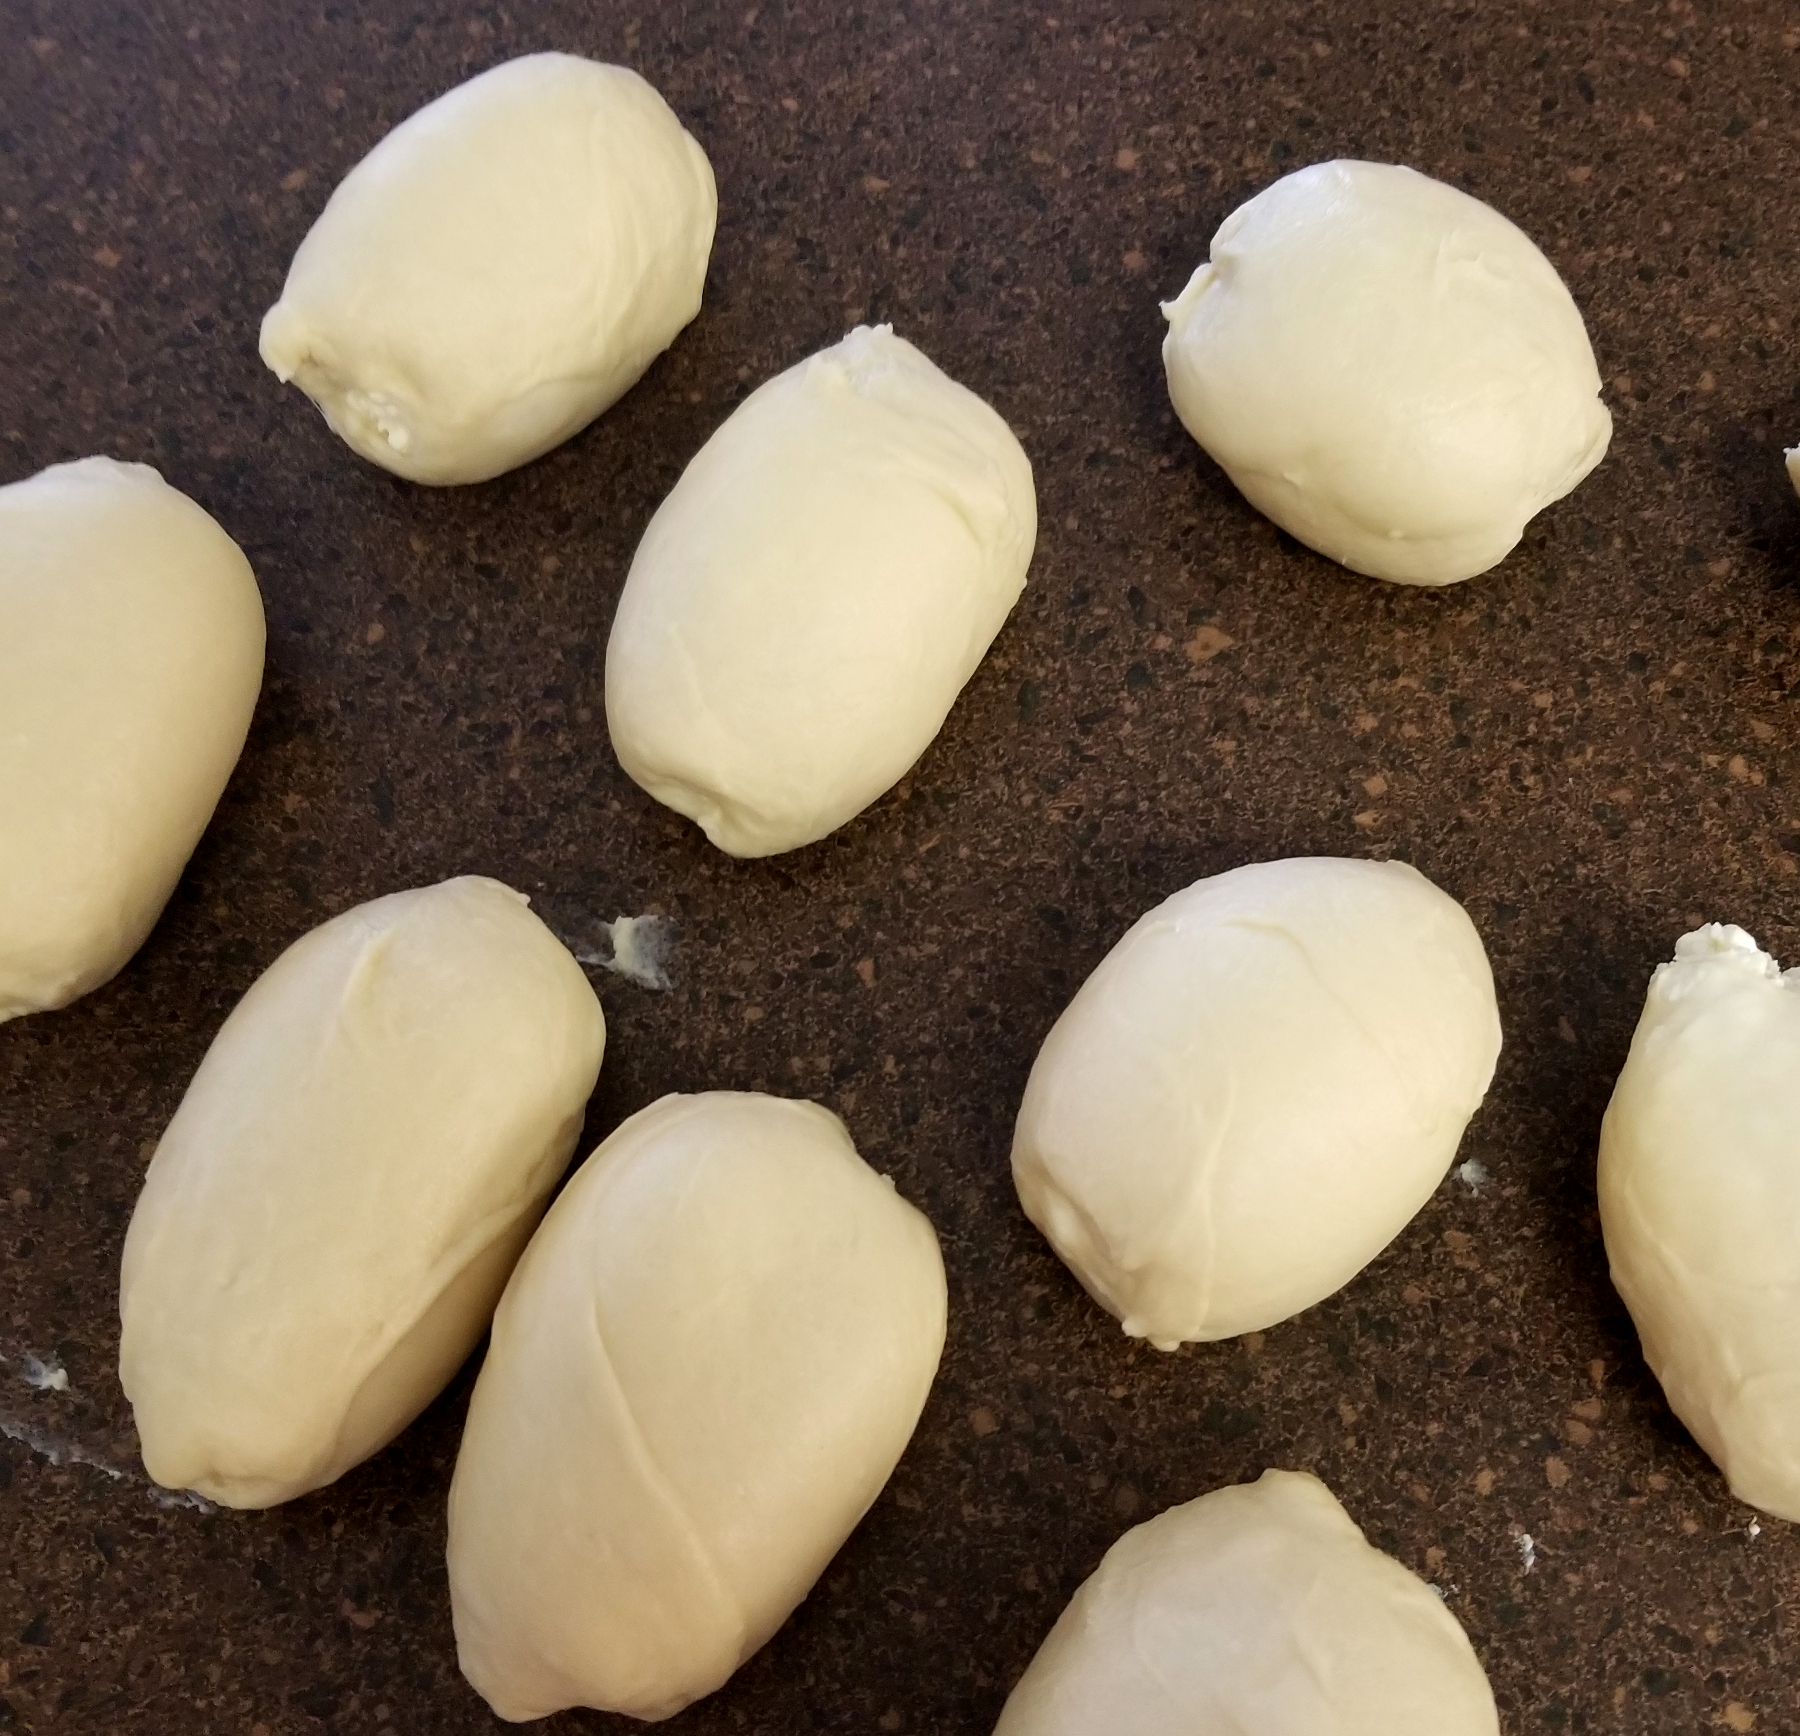
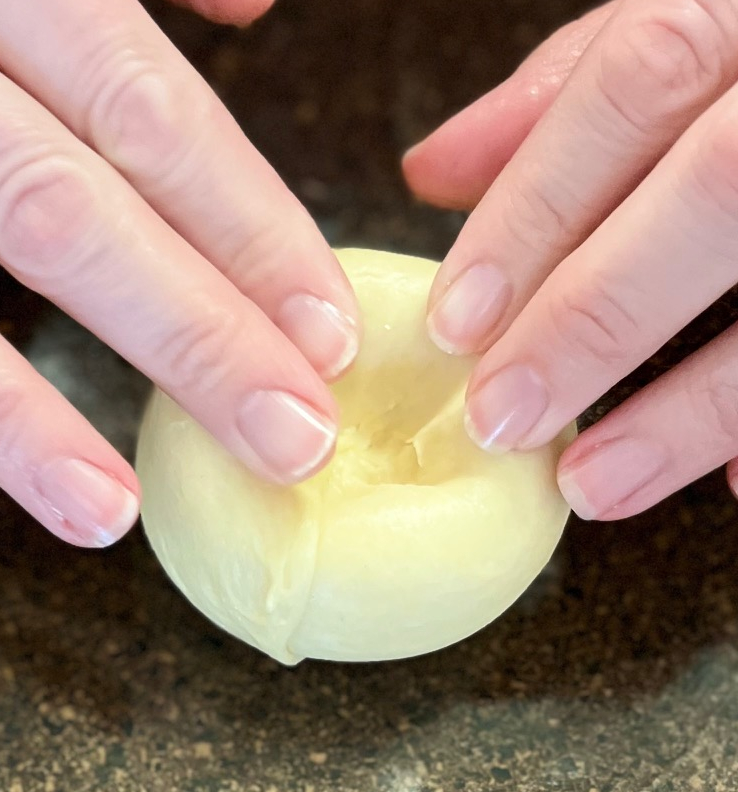
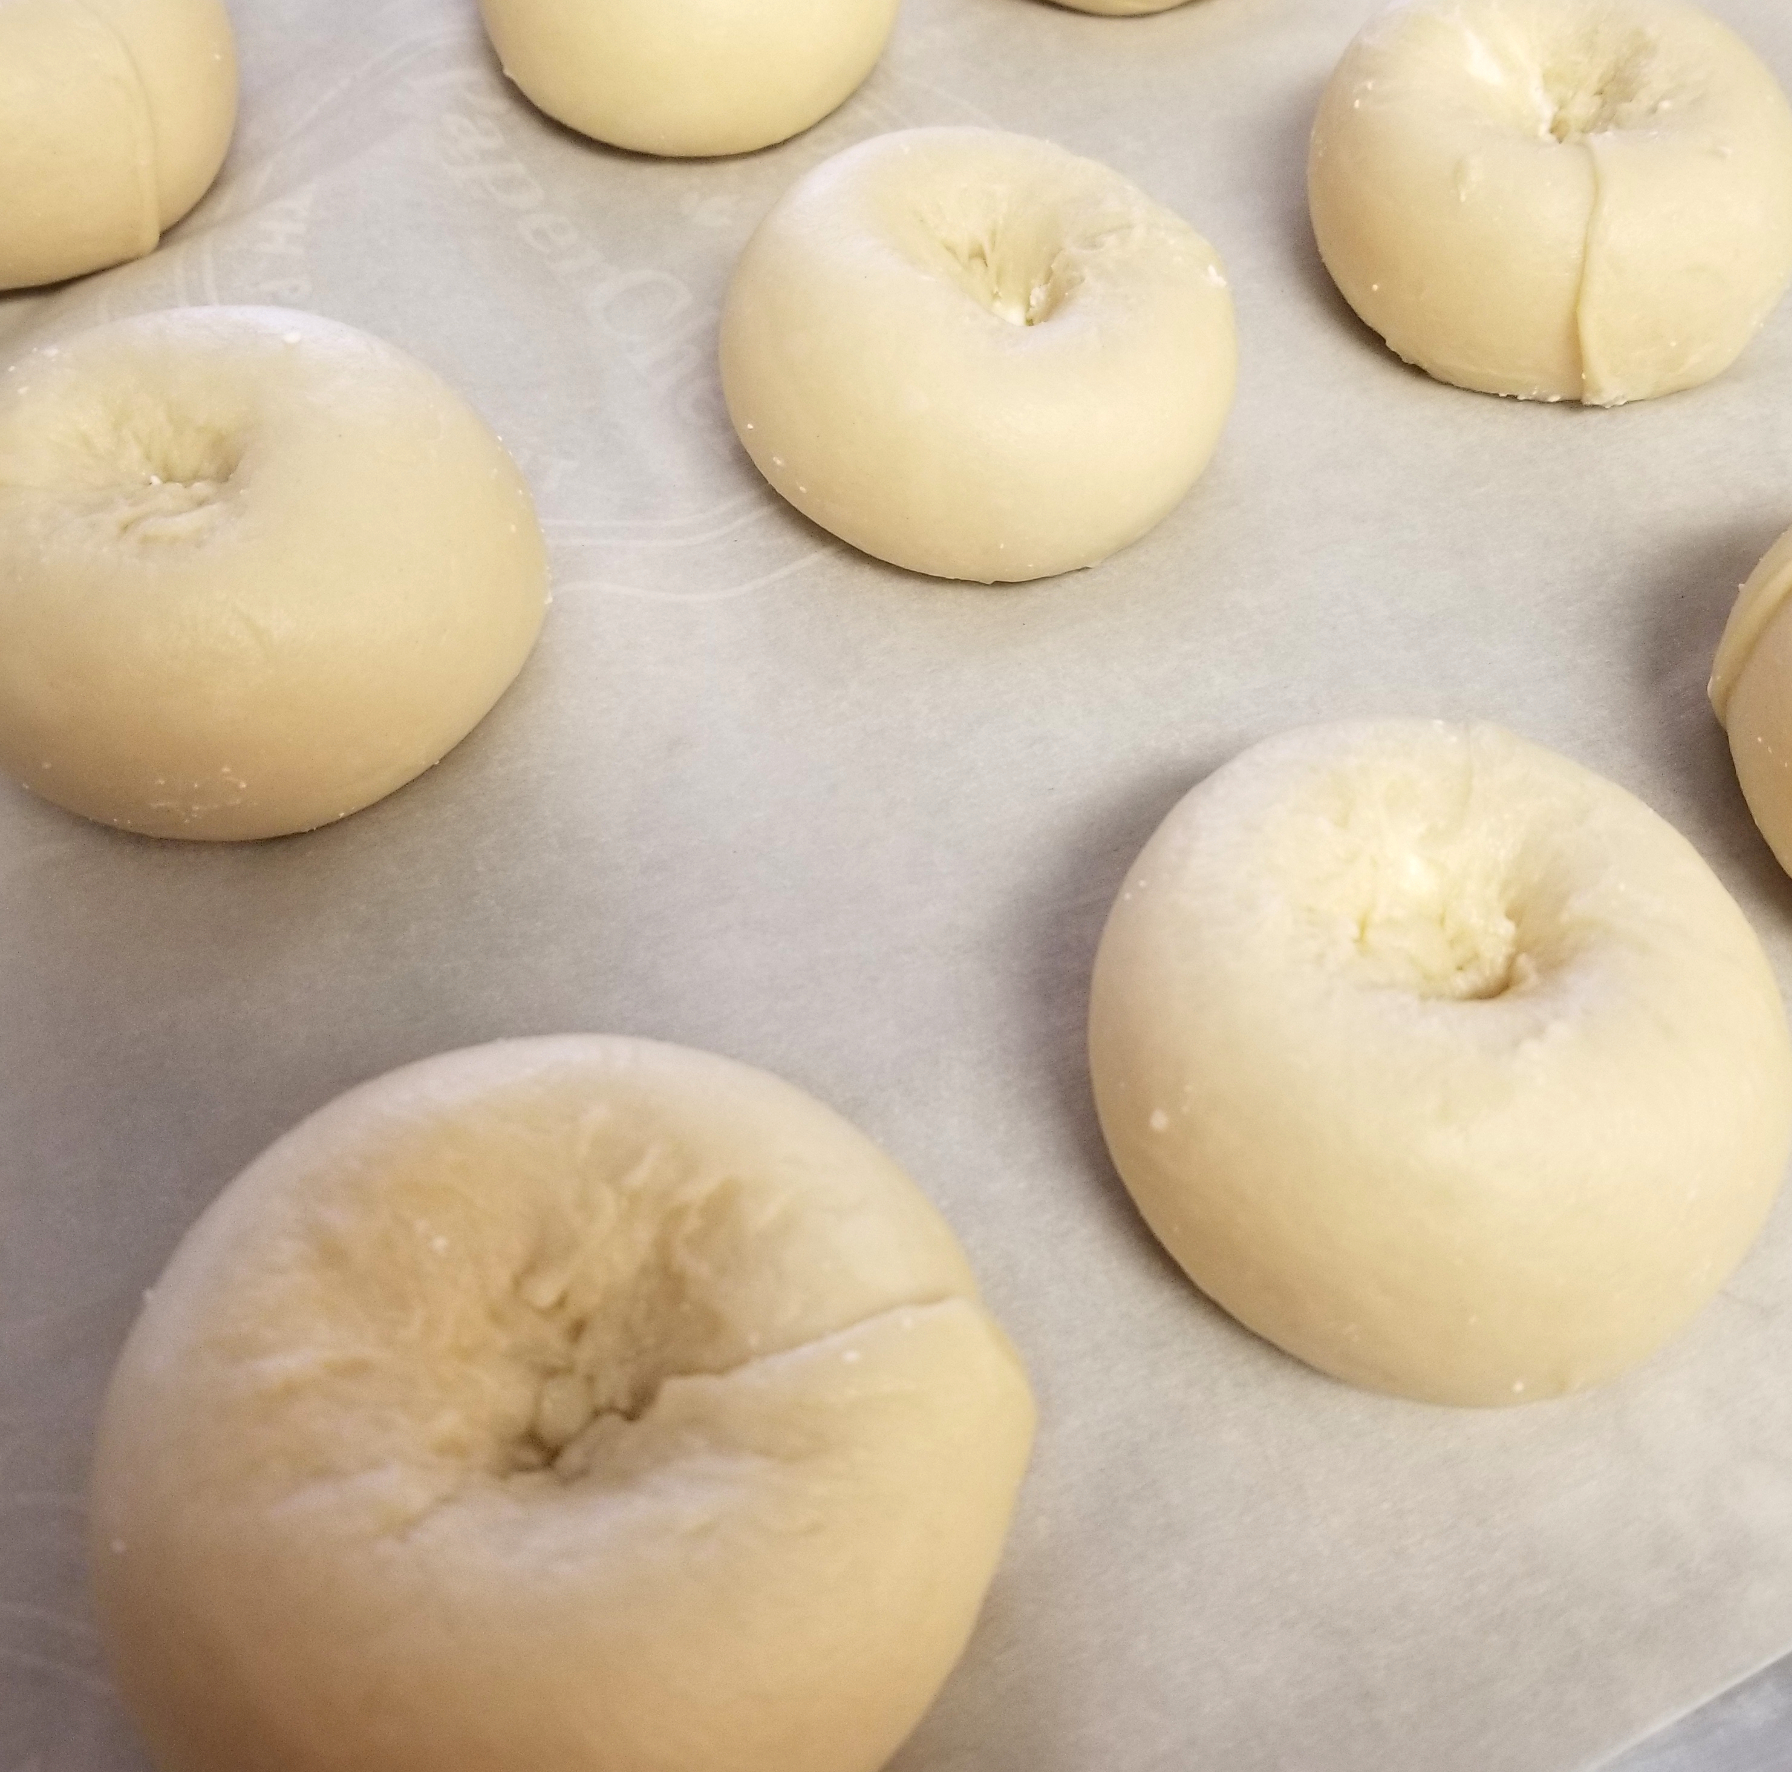
- Press down to create an indentation in the middle of the knish. Place on a parchment-lined baking sheet.
- Bake in a preheated 375º (190°C) convection oven. Bake for 20 minutes, turn and bake another 10-15 minutes or until golden brown.
- Some of them will probably split a little as they bake. If they do, gently push the filling back in while still warm.
- Enjoy!


more as you go.
pinched it.

the knish . . .
tray to bake.
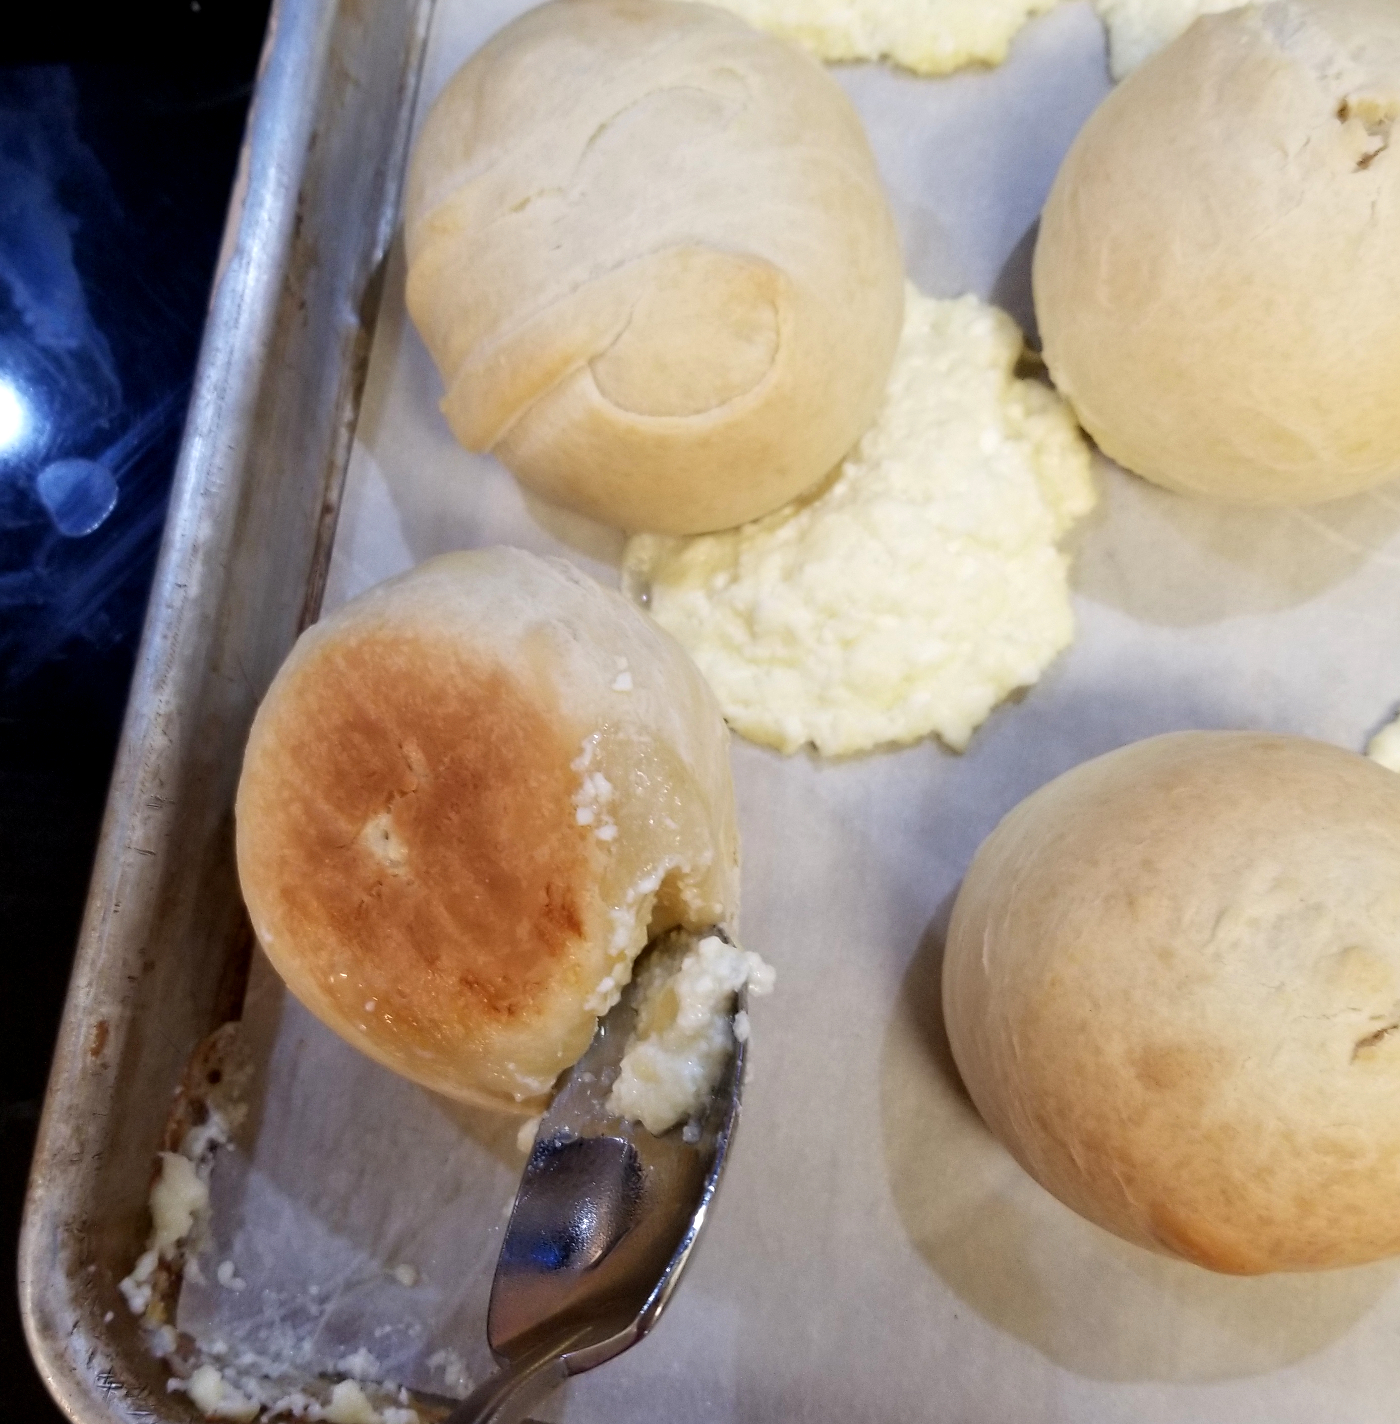
back in while still warm.


Just what I was looking to break fast with.
Todah Rabah
Shana tova!
I fortunately came across your website.
So many new recipes to try.
Shana Tova u Metuka
Is it safe to leave the dough made with eggs out for an hour? Should it sit in a he fridge?
Hi Leslie! Sorry, I didn’t see your comment. I realize this is very late, but yes, it’s fine to leave the dough with eggs out for an hour. (Think about bread with that’s made with eggs – it’s often out proving and rising for much longer!)
[…] They met at the mail box. They swapped food. On a given Friday, Bubbe would bring over a tray of Cheese Knishes. She would tell my mother, “I know you fast on Friday.” This is pre-1962, when the […]